Real Techniques Limited Edition Duo-Fiber Brush Collection

Posted by Lipglossiping On June - 20 - 2013

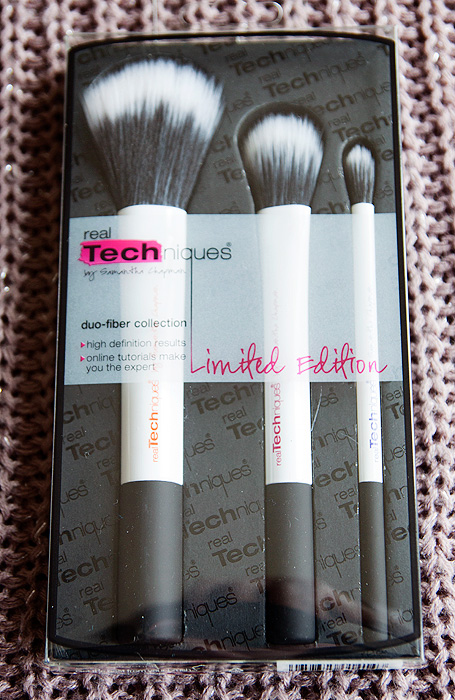
Building upon her inexpensively-priced-but-well-crafted brush empire, Samantha Chapman of Pixiwoo fame has released another set of brushes to sit alongside her core collections, albeit for a limited time only.  The Real Techniques Duo-Fiber Brush Collection* was launched last month and began to hit our shores a few weeks ago.

Reviews have been almost overwhelmingly positive for this trio of brushes and I was keen to cast my eye over the set to appease my own curiosity of whether they were worth the hype.

Real Techniques Limited Edition Duo-Fibre Brushes Fiber Review 1

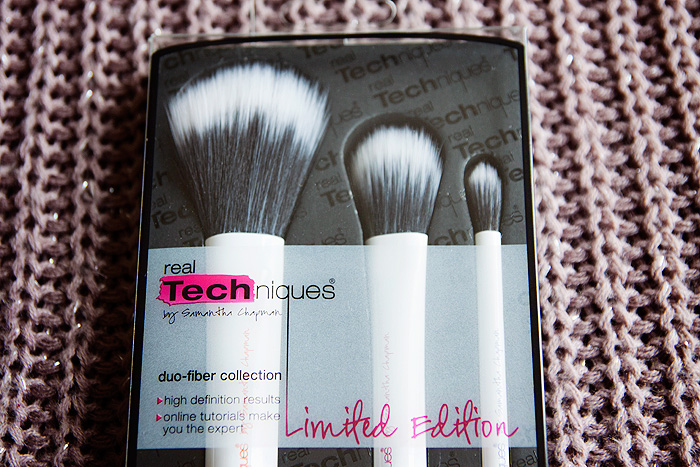
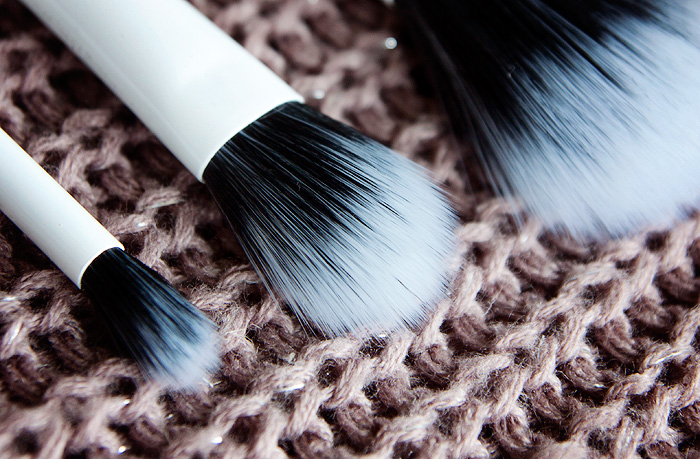
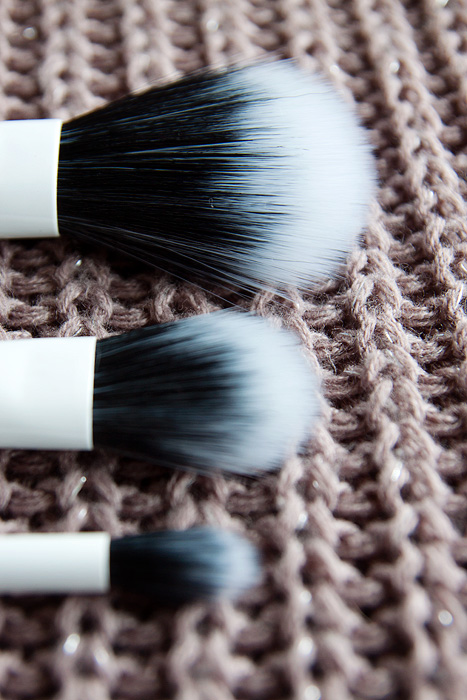
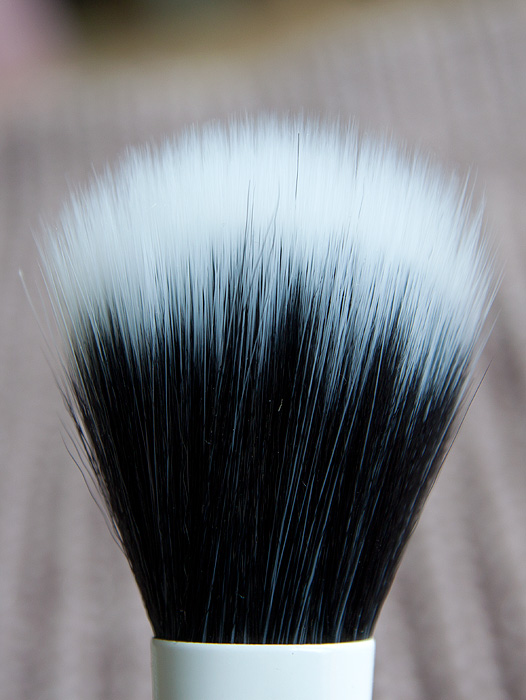
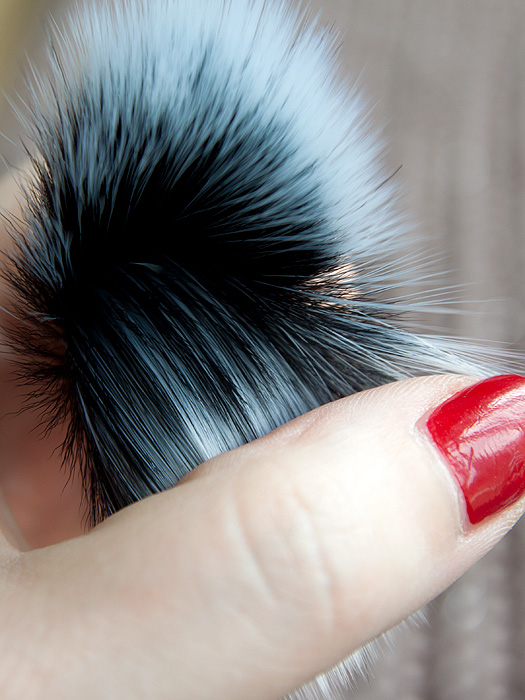
The brushes, as the name might suggest, are dual-fibred.  Both fibres used in the construction are taklon, therefore synthetic and 100% cruelty-free.  There are three brushes in the collection and each is labelled along the handle, clearly describing its purpose.

Real Techniques Limited Edition Duo-Fibre Brushes Fiber Review 2

Real Techniques Limited Edition Duo-Fibre Brushes Fiber Review 3

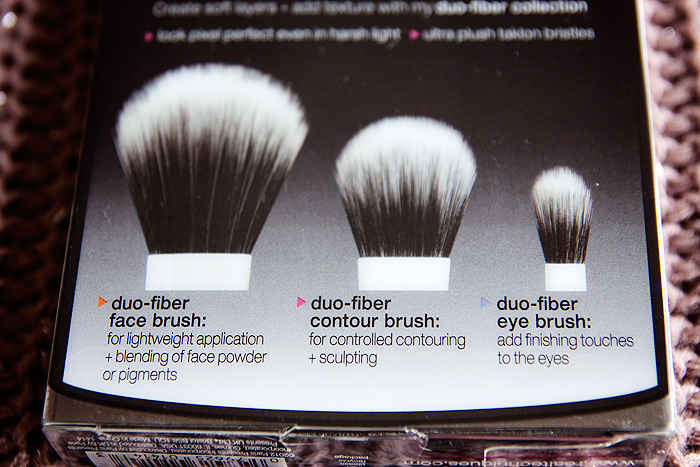
The largest of the three brushes is the Duo-Fiber Face Brush.  Of the three, this is the most flexible and feels the least densely-packed (relative to size).  The layering of fibres in such a loose manner means that this brush is ideal for a light-coating of powder to set your makeup.  You’d be hard-pushed to pack on the product with this tool in your hand and for this purpose, it’s pretty much perfect.

Although the website states that all brushes can be used with cream and liquid products… I don’t think there would be much point in using this brush for anything other than powder products.  It would be like buying a pair of nail scissors and using them to cut your fringe.  Technically, you could do it… but why would you want to waste the engineering?

Real Techniques Limited Edition Duo-Fibre Brushes Fiber Review 4

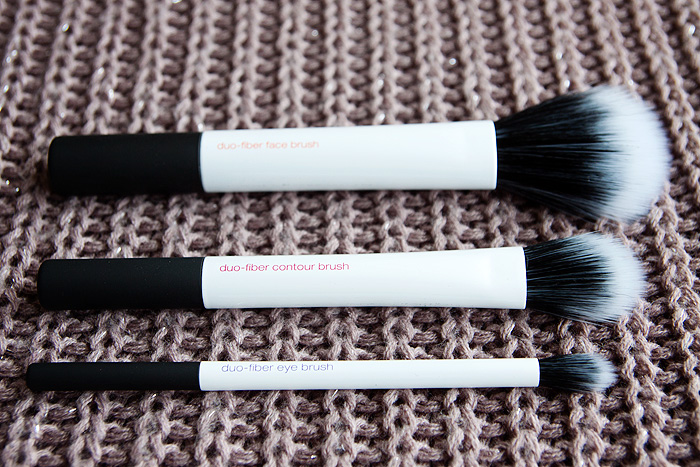
The second brush in the set, the Duo-Fiber Contour Brush is slightly more rigid than the face brush.  The fibres feel a little springier, with more resistance under pressure.  This gives the brush a little more strength to direct the product being applied and additional control when it comes to blending for a seamless finish.  Ultimately, this is the brush you’ll want to be using this Summer for applying your bronzer and contour shades.  A little more precision but applied with an equally light hand.

Despite being somewhat stiffer than the face brush, I’m still not sold on using it for cream products… I just have other brushes (even from this line) that I prefer to use with liquids and creams.

Real Techniques Limited Edition Duo-Fibre Brushes Fiber Review 5

The smallest brush in the set is the Duo-Fiber Eye Brush, and for me, this one is an outright disappointment.  I simply do not find the brush comfortable to use in the delicate eye-area.  The fibres are sharp, scratchy and even with the lightest of touches, too harsh for blending out colour across my eye socket.  At a push, it works ok for under-eye concealer but ultimately, I will pass over this brush daily in favour of a softer brush.

Real Techniques Limited Edition Duo-Fibre Brushes Fiber Review 6

If you use a lot of powder products, I’d say that you would benefit greatly from purchasing this collection… the Face brush is unlike any other I own for creating a ultra-light finish.  I prefer to use cream products on my cheeks when it comes to blush and bronzer so I’m a little torn on the contour brush… at the bargainous price that this set retails for, I’d lean toward saying that it wouldn’t hurt to own it.

The eye brush isn’t worth the space in my brush holder (imo).  Not that there is any space.

Real Techniques Limited Edition Duo-Fibre Brushes Fiber Review 7

Real Techniques Limited Edition Duo-Fibre Brushes Fiber Review 8

The set hasn’t blown me away.  Not in the same way that the Core Collection did back in 2011 (I still use the Buffing Brush daily) and please don’t assume that just because they’re dual-fibre brushes, you’ll get something comparable to MAC’s legendary 187 at a cheaper price point… these aren’t a set of stippling brushes, they’re far more specific in their use helping you to create softly layered-looks and hone your application skills with a lighter-touch.

For a more multi-purpose duo-fibre brush you’d need something like the Real Techniques highly-regarded Stippling Brush instead.

As far as craftsmanship goes, other than my issue with the scratchiness of the eye brush… overall, the quality is great.  There’s no horrible chemical stink to the fibres, the ferrules are solidly formed and the taklon appears to be well-clamped into the handles.  Although the bottoms of the brushes are flat, they don’t offer the greatest stability on their ends… something to remember if you have a white carpet.

The Real Techniques Limited Edition Duo-Fiber Brush Collection is available to buy online from Cloud10Beauty.com or instore at Boots, priced at £23.99

* press sample


Are you still not curling your lashes?

Posted by Lipglossiping On June - 19 - 2013

Lash curling. I think it’s probably one of the most under-talked about subjects in the blog world. And you know why? Because it’s a hugely neglected step in the quest for makeup perfection.

Before you think I’m preaching, I’m guilty of this too. The number of times that I pass over my eyelash curlers and reach straight for the mascara is pretty shameful for someone blogging about the virtues of this crucial step in the process!

Why you should curl your eyelashes_3

First things first, many women give up on the idea of lash-curling simply because they haven’t found a pair of curlers to suit their eye shape.  Some pinch, some force you to contort your wrist awkwardly, and some… well, some just don’t give any kind of curl at all.  If your lashes are stubbornly straight, you may be better off investing in a pair of heated lash curlers which promise to give super-strength and hold to your curl.

My lashes are fairly average, they curl nicely at the end but benefit from a bit of lift at the roots for a more wide-eyed look.  I’ve tried a few lash curlers in the past and my needs aren’t so demanding that I’ve struggled to find a tool that works (although I find the Shu Uemura ones a little too flat for me).  Having said that, I’m enjoying the effortless results that I’m getting from these Japonesque Power Curl Eyelash Curlers* (£20) from Cult Beauty.

Why you should curl your eyelashes_4

I say “effortless” because these ones seem to catch each lash in one attempt.  I don’t have to faff around with placement and even though I’m using them extremely close to the root, I can squeeze them together safe in the knowledge that I’m not going to feel a pinch at the outer corners.  Something that I have experienced in the past when I curl close to the root.  I suppose you just know when you find a pair that suits your eye-shape and curling requirements, and these are pretty much spot-on for me.  There’s also the added bonus of the brand offering free replacement curler pads throughout the lifetime of the product!

Why you should curl your eyelashes_5

So… lash-curling… for the uninitiated, let me give you a few quick tips that work for me:

1. Rest the curlers against your cheek, they should feel comfortable to work with

2. Look down as you get the curlers in position, this will help trap as many lashes as possible.

3. Hold still whilst curling and count to ten before releasing your grip, you don’t want to pull out any lashes!

4. If your lashes are super-straight, don’t be afraid to create another curl halfway along the lash… and even another at the very tip if needed!

5. Set your curl with mascara.  If your lashes are very curl-resistant, you may fare better with a waterproof mascara for extra-strength hold.

Why you should curl your eyelashes_6

place and…

Why you should curl your eyelashes_7

…squeeze!

Why you should curl your eyelashes_8

worth the effort?

I did the above demonstration without a mirror (I was holding my camera!) and you can see that I had the curler a little too close to my nose, missing a couple of lashes at the outer corner.  This is actually quite useful because it means that you can see the “droop” my lashes would have had minus the curling step.

Do you curl your lashes every day?  Think it makes enough of a difference to warrant the additional step in your routine?

* press sample

Guest Post: Sonia Kashuk Complexion Perfector Brush review

Posted by Lipglossiping On March - 27 - 2013

A big welcome to Anna from It’s A Bloggers World who is guest-posting on Lipglossiping today.  Anna is an Italian, living in Manchester.  Today, she is talking about a rather unusual-looking makeup brush and I’m sure I can feel the stirrings of a new desire already!

I am sure that every one of you, as makeup-addicts have faced, at least once, THAT question: “Are you a foundation brush or a sponge person?”

Dilemma.

I have been through all the different stages: fingers, flat brush, stippling brush, latex sponges (in every shape created), wet or dry, everything!

Then I realized it was more a matter of what effect I wanted to achieve from my foundation than finding the perfect tool; most of the time, I’ll use a stippling brush if I want to go for medium, natural coverage or I’ll choose a flat brush with the addition of a sponge if I need a full coverage “hide-those-spots-please” finish!

This is why I couldn’t help myself from buying this little jewel.  Enter the Sonia Kashuk Complexion Perfector Brush.

Sonia Kashuk Complexion Perfector Brush review

I had the opportunity to purchase this last summer while in Chicago as I casually found myself walking near a Target (don’t look at me like that, of course it was planned and of course I knew where the shop was before even landing in the USA!)

As you can see, it’s a dual-ended brush with an oval sponge on one side and a brush on the other.

The brush is synthetic and has a domed shape. It’s quite firm but no worries, it doesn’t scratch your skin at all, it just does the job of keeping a well-defined shape.  The sponge is oval-shaped and quite similar to the iconic sponge that Sonia Kashuk is famous for.  It can be removed to for washing, clever isn’t it?

I basically use both parts: I first apply foundation with the sponge and work it out all over my face.  Then, I use the brush for the sides of my nose, the under-eye area and any small details (see “detail” as that spot that decided to rise like a volcano on your chin without being invited).

Sonia Kashuk Complexion Perfector Brush review

As you can see on the instructions, it can be used the opposite way as well, using the brush first before blending all over with the sponge, but I find it easier for me to use the first way.

Sometimes, if I am lazy, I use the brush to apply my concealer as well and it works pretty good.

I didn’t have any problem when I washed it, no loose hairs or changes to the shape (doesn’t it get on your nerves when this happen? I go mad!)

It’s part of the “Kashuk tools” and costs about £15.50. Unfortunately my dear Sonia is not sold in the UK, so you have to count on ebay, an old friend that just moved to USA or that holiday that you really need…

Are you ready for a trip to the USA then?

Dangerous nail files, for when things get heated in the office…

Posted by Lipglossiping On October - 15 - 2012

The sky outside is slowly darkening, the tea lady was last seen leaving with the Kit Kats well over an hour ago and is showing no signs of returning. You can’t remember whether you left enough food for the cat and you know that you forgot to set the Sky+ for Eastenders.  For the love of all things way-past-5pm, when is this meeting going to end?

There’s only one thing for it.

Heads slowly turn toward you as you sit there, nonchalantly filing your nails with a chainsaw… or a hunting knife… or maybe a machete…

“We’ll pick this up again on Monday shall we?” says the boss, darting from the room, pushing back her chair with such force that you’re genuinely surprised it didn’t make a cartoon hole in the wall.

Now, to find that tea lady…

‘Dangerous nail files’ are a range of high quality nail files made in the USA in the shape of weapons and tools, designed by Shelly Getzendanner from the School of the Art Institute of Chicago.  They come individually packaged at £7.95 each and will be available at The Conran Shop this month.

Sigma F84 Angled Top Kabuki Brush

Posted by Lipglossiping On September - 7 - 2012

I missed the Sigma brush hype a couple of years ago, because I was fixated instead on building a collection of Trish McEvoy brushes.  Nowadays, I’m skinter than a skint thing and I’ve come to the realistic conclusion that I’d be a moron not to reign my makeup budget in a little a lot.  I don’t drink, I don’t smoke and I don’t have any major hobbies that consume my monies so whilst I’m still totally commited to being buried with my makeup collection, I’m more open to the idea of not making myself destitute at the same time.

The Sigma range (some of them) have been renowned for offering great quality at a slightly lower price point and in particular, I was looking for a multi-tasking brush.  Step in the Sigma F84 Angled Top Kabuki Brush with its densely-packed head and stubby handle, I’ve found what I was looking for.

Creams, liquids and powders all work flawlessly with this brush which buffs the product firmly but gently onto the face.  The synthetic fibres withstand daily usage and wash like a dream, even if they do take a little longer than I’d like to dry.

The angled brush head makes light work of facial contours and allows me to work the product into every nook and cranny.  Not that my face has nooks and crannies just yet, but you know what I mean.  I also love the chunky handle which gives me maximum control over direction and pressure.

I’ve recently begun using it to apply my cream blushes, and it works great for that too – allowing me to really blend out the edges to give a polished finish.

The only problem I’ve encountered with the brush is that it basically has too many uses and I’m gonna need more than one.  Which kinda defeats my money-saving attitude somewhat no?

The Sigma f84 is available to buy online in the UK from Cocktail Cosmetics, priced at £14.95

Remember how I told you that I’m supposed to be on a no-buy?  As in… no-buying anymore beauty crap until I’ve redeemed my spendy ways and bought enough substandard, veneered beech/birch/what’s the difference flat-pack from IKEA to furnish our new flat?  Well, I’m getting devious in my old age.

We went to IKEA last night and I totally came back with beauty stuff in the guise of it being for the new bathroom.  1-0 to me!

Ok, so it’s not the most exciting beauty purchase since the time I got all excited about finding a jumbo sharpener to fit my NARS Glitter Pencils but c’mon, a girl’s gotta get her beauty fix somewhere?  The blog-worthy thing about these IKEA NÄCKTEN flannels (guest towels/whatever) is that a). they’re 20p each and b). they’re BIG – about twice the size of normal flannels – which means that they soak up twice as much water as normal flannels and really give your pores a good steam.

They’re perfect for encouraging us grubby lot to change our flannels more regularly.  At 20p eahc, you can afford to keep a stash that you can just throw at the laundry basket (bonus points if you get it in) when you’re done.  Judging by the washing instructions, these should even survive my refusal to acknowledge anything that can’t be tumble dried – the lazy girls iron.

So next time you’re trudging around IKEA all sad-faced ‘cos they’d run out of Daim Cake and only had that trio of ugly mini-cakes that NO ONE EVER EATS, EVER – don’t be glum, go and buy some flannels or something.

And a hot-dog on the way out.

What are your favourite ‘cheap’ bathroom essentials?

The Brush Guard vs. the eBay budget equivalent

Posted by Lipglossiping On June - 14 - 2012

You may remember this post about the brush guards that I use whenever I clean my brushes, it allows them to dry and retain their shape perfectly.  In the comments, Ellie told us about the el-cheapo version you could pick up on eBay for just ninety-nine pennies!  A couple of my original brush guards were showing some wear on the edges so I picked up a couple of rolls and waited patiently for them to arrive from the far East.

I thought I’d do a quick comparison… this isn’t particularly in-depth but I thought it might be useful to demonstrate the major differences between the available tools.

The most obvious difference is in the rigidity of the material used to construct the brush guards.  The eBay equivalent is much softer, more pliable and to be honest, less substantial.  The ‘official’ brush guards are firmer and more rigid with a stronger construction.  If you imagine a rope… the stronger rope will be weaved of more strands – this is pretty much what’s happening here.  Think of it as the ‘official’ version of The Brush Guard being triple-ply loo roll as opposed to the single-ply eBay alternative!

However, this doesn’t make the eBay Brush Guards any less useful when it comes to keeping the brush hairs in shape.  Look, same brush…

You can see that both guards encourage the brush to keep its naturally domed taper, thus allowing it to dry retaining a good shape.  The biggest drawback to the eBay version is that I simply haven’t been able to use them on any eye brushes with as much success and that includes brushes like the MAC 217 – there’s too much stretch in the mesh to conform to a smaller brush tip and hold the bristles as tightly as I’d like.

As for travel?  Well, the official version would be my recommendation.  The eBay guards are simply too pliable and don’t afford the rigidity needed to protect the brushes when they’re bumping up against one another.  To try and demonstrate what I mean, I pressed my fingertip against the brush tip on a MAC 217… I tried to apply the same amount of pressure to the brush head and you can see the difference between the amount of movement exercised on the delicate hairs.

Ultimately, if you’re looking for something to simply cover, lightly protect and shape your larger brushes after washing and aren’t looking for something to protect your brushes whilst travelling – go for the eBay brush guards.  At 99p for a roll of mesh you’ll be sitting pretty with neatly domed powder brushes at the ready!  If you need something more substantial or struggle to keep your eye brushes in good shape, you should stump up the extra pennies and go for the official versions of The Brush Guard.

It may look like a super low-tech solution to protecting your brushes, but not all brush guards are built equally!

I purchased my eBay brush guards, rather unsurprisingly, on eBay (99p) and my official ones from Cocktail Cosmetics (£5 per pack).

ADesign Skincare Brush Set (and my new favourite brush)

Posted by Lipglossiping On April - 19 - 2012

I’ve been trying out the ADesign Skincare Brush Set for just over a month now, and I wanted to see if this one set could ever possibly replace the various skin brushes that I’ve grown to love over the years.  I have to say, the set did fare better than I thought it would… but the ultimate answer is that nothing can replace many years of replacing rubbish brushes with marginally better ones until you reach brush nirvana!

But let me talk you through the brushes contained in the ADesign Skincare Brush Set*, with particular reference to my. new. favourite. brush.

I’ll begin by giving you a quick overview of the set, which is available to buy online from Cocktail Cosmetics, priced at £44.95.  Broken down, that works out at around £8.99 per brush – which for face brushes, makes it a very good value set.  You’d easily pay that on the high street for brushes that don’t come close to even 10% of the quality that these represent.

For your money, you get five brushes housed in a patent mock-croc bag that is fully-lined to prevent damage from spills.  The brushes (from left to right) are: Pointed Foundation Kabuki Brush, Flat Top Foundation Brush, Foundation Brush, Medium Concealer Brush, and Pointed Concealer Brush.

You may be asking yourself, why on Earth would you need three different foundation brushes?  If you are, get off my blog.

Moving on…

Yes.  It’s magnificent isn’t it?  Like a silver bullet sent to banish bad makeup application werewolves (or something *shrugs*).  I haven’t quite got the hang of how best to use the Adesign Pointed Foundation Kabuki Brush and I’m not keen on the stubby kabuki-handle – the pointed tip is obviously engineered to provide precision and having a longer-handle would complement this more effectively.  Of course, if you love the design, you could always opt for something like the Bdellium Tools Bambu Pointed Foundation Brush as an alternative.

The heavily tapered bristles on this brush allows for dual-motion blending… you can swipe both back and forward like a traditional painting motion or apply circular buffing strokes.  For me, I’ve found its forte when it comes to applying concealer over a larger area, particularly around the nose as the point gets right into the creases whilst the taper blends the edges seamlessly.  I’m not completely sold on it, but I do think I’ve not quite mastered the best technique for it yet.  If you have any suggestions, I’m all ears!

The Adesign Flat Top Foundation Brush, a.k.a. my new favourite brush.  It’s a masterpiece, so beautifully dense with tickle-me soft fibres.  It is not very pliable which allows for a really good buffing motion (rather than flopping about ineffectively on the face) and comes with a small head which I much prefer when compared to a larger size flat-top such as the ELF Powder Brush.  I’m going to photograph comparable brushes shortly and reiterate why I prefer this brush to the others.  For quick reference, comparable brushes would be: MAC 130 and Shiseido Perfect Foundation Brush (though this one isn’t cut at an angle).

I’ve been using this for applying foundation (all textures), applying cream blush and blending out any edges.  When my skin has been particularly dry and all my products have been cream or liquid-based, I haven’t even bothered to use a different brush.  This is the stand-out offering from the set.  The smaller head also means that it complements my stick products really well (things like NARS Multiples and my Shu Uemura Stick Foundation).  Perhaps the ultimate compliment I can pay it though is that it has enabled me to wear my MUFE HD Cream Blushes… those things played me up something chronic, I just couldn’t find the right tool to get the just-flushed blush from them.  Until now.

I wish that I could point to a single technical aspect of this brush that suits my needs so well, but all I can tell you is that I’m in brush love.  For reals.

After the gushing over the previous brush, the Adesign Foundation Brush doesn’t get me nearly as excited.  Again, this is small-headed… comparable in size to the Giorgio Armani Designer Foundation Expert Shaping Brush but mega-bucks cheaper.  While the GA brush tapers away quickly, the ADesign brush provides greater density from the base up, which allows this brush to both paint and buff.  The fibres have a good amount of spring to them and are densely packed from root to tip.

The Adesign Medium Concealer Brush is another that didn’t give me an awful lot to flap about.  Again, it’s a good-looking brush without any flaws and applies under-eye concealer very gently but one the whole, I prefer my No7 Concealer brush when it comes to painting on the product with a flat edge like this offers.  But talking of flat edges…

…the Adesign Pointed Concealer Brush is without them!  This is a really good brush for concealing over blemishes.  It delivers the product with pin-point precision and blends without dislodging or removing any of the product you’ve just placed!  How many times have you applied concealer to a spot, blended and then realised that you’ve blended at least 50% of the product off?!  This has worked wonders for my concealer application skillz… now I has some!  Again, this is so densely packed, you would think you’d need something with a ‘lighter’ touch, but no… despite my initial scepticism, this really does the job magnificently well.  It’s a little too stiff-feeling to use in the delicate eye area, where something like a MAC 224 works well to both apply and blend concealer.


Without exception, each of these synthetic-fibre brushes are high-quality.  The ferrules are solid, the fibres are well-cut and dense.  Each is perfectly soft, washes well and keeps its shape as it dries.  Talking of drying, these do dry more slowly than natural hair fibres…. such is the downside to synthetic brushes but I haven’t experienced any shedding during washing or application at all.  Which is more than can be said for most brushes.  Whilst I haven’t fallen head-over-heels for every brush in the set, the two that have made an impression on me (Flat Top Foundation & Pointed Concealer) … have made an impression that I want to shout about.

As an aside, you may be wondering why this is called the ‘skincare’ set… well, if you watch the video below, you’ll see that this set was designed for both makeup application AND skincare application.  Call me old-school but I’m all about the fingers when it comes to skincare!

The ADesign Skincare Brush Set is available to buy online from Cocktail Cosmetics, priced at £44.95

* press sample

These trio of eyeshadows from Illamasqua’s latest Human Fundamentalism* collection landed on my desk this week and I thought I’d post up some swatches.  The three matte shades are: Vernau (yellow ochre), CanCan (bright lilac purple), and Pivot (yellow green).  Get ready for some piccies… (I dunno why I always say that like it’s 2001 and you’re all hitting X so as not to max out your 56k dial up *shrugs*)

The shades have fair to good pigmentation (for mattes) and blend nicely.  The pick up is powdery but again, this is something you often have to contend with when you’re using a matte formula.  On with the swatches…

Applied on dry skin with no primer (please excuse the cycling scratches).  The pales don’t look too chalky considering.

Each shade applied with Illamasqua’s Sealing Gel* (as you would for an eyeliner application).

My attempts at a FOTD sadly ended with me looking at myself in the mirror and declaring “you look like a twat in those colours”.

But…. and this is where it gets interesting…

I went to the bathroom to remove my clown face and upon scrubbing with face wash and warm water….

The swatches done with the Sealing Gel would. not. budge.  I mean, they really wouldn’t budge.  I’m sat here 5 hours later and they’re still looking at me.

So my review is being thoroughly hijacked because I can’t coo over a trio of eyeshadows in shades that I wouldn’t be seen dead in (did I mention Illamasqua will makeover your dead body?).  However… I can get excited over the Illamasqua Sealing Gel which would be a phenomenal addition to your makeup routine if, like me, you have hooded eyelids and can’t stop eyeliner from transfering up to your hairline when you blink a bit too hard.

The shadows are ok, if you’re gonna get all hot and sweaty over them… you probably don’t read my blog anyway to be honest.  But check out the inconspicuous looking bottle of sealing gel next time you’re near a counter.  I already own/use a mineral-makeup branded sealing gel… this is 100x better.

Illamasqua’s sealing gel is priced at £10.50 and can be purchased on counter or online.  Also, if you haven’t seen them already – check out Illa’s pretty glorious moving swatches on their new-fangled website.  The Human Fundamentalism Collection can be seen here.

* press sample

Do you protect your brushes?

Posted by Lipglossiping On March - 16 - 2012

For some of us, makeup brushes can amount to a big investment and it pays to look after them.  It’s only fairly recently that I’ve bothered – to be honest, I’m a little bit easy-come-easy-go as my Mum used to tut at me whenever I was being less than careful with my possessions.

(foundation size – good for foundation and small powder brushes)

I use Brush Guards to protect my favourite brushes.  The mesh slips over the handle and cradles the bristles tightly, it’s not the perfect solution for travelling but I love them after washing my brushes as I can simply stand them on end (brush guard down) and this protects the ferrule whilst ensuring that the bristles dry to a perfect shape.  Infact, they’ve even recovered some of my domed brushes that I thought had lost their shape for good.  A worthwhile investment!

(blush size – great for large(r) eyeshadow brushes)

Brush Guards are priced at around £5.95 a packet and come in various sizes from eyeliner-brush sized right up to kabuki.  I bought mine a long time ago from Cocktail Cosmetics.

Do you do anything to protect your brushes? (or have you got better things to do with your life? haha)

NEW! Tweezerman Safari Print “Cheetah” Slant Tweezers!

Posted by Lipglossiping On March - 14 - 2012

Listen up, ‘cos you’re about to learn something really important.  If you ever find yourself stranded in the wilds of Africa, you’ll thank your lucky stars that you read this post.

If you see a cheetah lurking in the bushes and he’s giving you the eye, run for the nearest tree.  If it’s a leopard, don’t.  Cheetah’s can’t climb… leopards actually like to drag their prey up the nearest tree, so you’d be doing half the hard work for him.

But how can you tell the difference between a leopard and a cheetah?  They’re both cat-like and spotty right?

Study.  Those are cheetah spots.  Or at least, they’re supposed to be.

BUT THEY’RE NOT!!!

As cute as those new Tweezerman tweezers undoubtedly are (you know how I love my wild prints!)… those are, in fact leopard spots.  For shame Tweezerman, you could’ve got a beauty blogger eaten in the wild!

Behold.

The cheetah (on the left) has oval, regular shaped spots whilst a leopard (on the right) has rosette shaped, irregular spots.  Now, you tell me… are those new tweezers leopard-print or cheetah-print?

Yeah, no need to thank me.  It’s all part of the service.  You wouldn’t get this in Cosmo.

.

Tweezerman Safari Print Cheetah *cough* Slant Tweezers are available from next month, priced at £22.00

p.s. I really love my Tweezerman wide grips, I’d even take them on safari with me to catch mosquitos a la Mr. Miyagi – sort of.

My Jobis makeup bag a.k.a My new favourite thing!

Posted by Lipglossiping On March - 7 - 2012

Having my weekly mooch around T.K. Maxx (I can never remember how many bloody x’s to use) today proved to me two things.  One… I really don’t need any more nail polish and two… I should replace my polish obsession with a makeup bag fetish.  And so I did.

Check out this beauty from Jobis (no, I haven’t heard of them either) that I picked up for the princely sum of £9.99

I’m a massive sucker for a flash of leopard print and heard my name being screamed loudly by this not-so-little accessory from across the store.  At first, the inner print stole my heart… but then, when I opened the second zip to reveal a brush holder compartment?!  Well, I couldn’t get my purse out of my handbag quick enough.

I insisted that Mr. L and Leila immediately stop what they were doing and come back home with me so that I could spend the next 40 minutes lovingly fluffing my brushes (not a euphemism) and fill my lovely new Jobis with the perfect configuration of makeup stuffs.

Look!  It holds my long-handled brushes beautifully, you can fit a whole face-worth’s in there!

I know that stock varies from store to store but my local had a few of these with all the purses and I didn’t see them in there last time – so if you’re in the market for a new makeup bag, may I suggest that you run to your nearest T.K. Maxx and nab one of these beauties before some other makeup-loving cowbag beats you to it.

Do you like it or is leopard print your style nemesis?

RANDOM

Butter London Trout Pout NOTD

Having my weekly mooch around T.K. Maxx (I can never remember how many bloody x’s to use) today proved to me two things.  One… I …

Deal Alert: 25% off at Illamasqua in conjunction with Stylist.co.uk

Having my weekly mooch around T.K. Maxx (I can never remember how many bloody x’s to use) today proved to me two things.  One… I …

Eyeko Petite Polish - NOTD

Having my weekly mooch around T.K. Maxx (I can never remember how many bloody x’s to use) today proved to me two things.  One… I …

New No7 Spring Collection launching next week!

Having my weekly mooch around T.K. Maxx (I can never remember how many bloody x’s to use) today proved to me two things.  One… I …

Review: The Basingstoke Country Hotel (and spa)

Having my weekly mooch around T.K. Maxx (I can never remember how many bloody x’s to use) today proved to me two things.  One… I …

Cold & Flu: Survive it and stay beautiful (well, kinda)

Having my weekly mooch around T.K. Maxx (I can never remember how many bloody x’s to use) today proved to me two things.  One… I …

MUJI Skincare

Having my weekly mooch around T.K. Maxx (I can never remember how many bloody x’s to use) today proved to me two things.  One… I …

A somewhat personal journey...

Having my weekly mooch around T.K. Maxx (I can never remember how many bloody x’s to use) today proved to me two things.  One… I …

The Lipstick League - week of 7.30.12

Having my weekly mooch around T.K. Maxx (I can never remember how many bloody x’s to use) today proved to me two things.  One… I …

A year on Lipglossiping – Lookback (September 2009)

Having my weekly mooch around T.K. Maxx (I can never remember how many bloody x’s to use) today proved to me two things.  One… I …

POPULAR

CLOSED: Competition Time: Givenchy Very Irresistible L'eau en Rose Perfume!

Having my weekly mooch around T.K. Maxx (I can never remember how many bloody x’s to use) today proved to me two things.  One… I …

CLOSED - Win it! The Body Shop Expert Brush Collection

Having my weekly mooch around T.K. Maxx (I can never remember how many bloody x’s to use) today proved to me two things.  One… I …

Win a gorgeous "glow" trio with prizes from Urban Decay, New CID, & Arbonne!

Having my weekly mooch around T.K. Maxx (I can never remember how many bloody x’s to use) today proved to me two things.  One… I …

Hello? Is this thing on?

Having my weekly mooch around T.K. Maxx (I can never remember how many bloody x’s to use) today proved to me two things.  One… I …

Avoid the brush off with Oral-B Pro-Expert

Having my weekly mooch around T.K. Maxx (I can never remember how many bloody x’s to use) today proved to me two things.  One… I …

Big savings on French Pharmacy brands, win my Escentual.com top picks!

Having my weekly mooch around T.K. Maxx (I can never remember how many bloody x’s to use) today proved to me two things.  One… I …

Win it! 3 EcoTools Bamboo Bronzer Brushes to win!

Having my weekly mooch around T.K. Maxx (I can never remember how many bloody x’s to use) today proved to me two things.  One… I …

FOTD Busting out of the comfort zone!

Having my weekly mooch around T.K. Maxx (I can never remember how many bloody x’s to use) today proved to me two things.  One… I …

Dear Obesity...

Having my weekly mooch around T.K. Maxx (I can never remember how many bloody x’s to use) today proved to me two things.  One… I …

Urban Decay The Black Palette - Photos & Swatches

Having my weekly mooch around T.K. Maxx (I can never remember how many bloody x’s to use) today proved to me two things.  One… I …

COMMENTS

  • Categories

  • Archives

  • Admin

  • Ads