Food Friday: Brioche Vendéenne

Posted by Lipglossiping On September - 16 - 2014

When I think about French food, I think fuss… showiness… style over substance…

In case you’re wondering, I pretty much think about British food as the complete opposite.  I mean, how could you not equate fuss and frippery with a country famous for producing cute little boxes of multi-coloured macarons for heaven’s sake?  Suffice to say, I usually steer clear of attempting to recreate French cuisine.  I am not a patient cook and I am, in no way at all, a perfectionist.

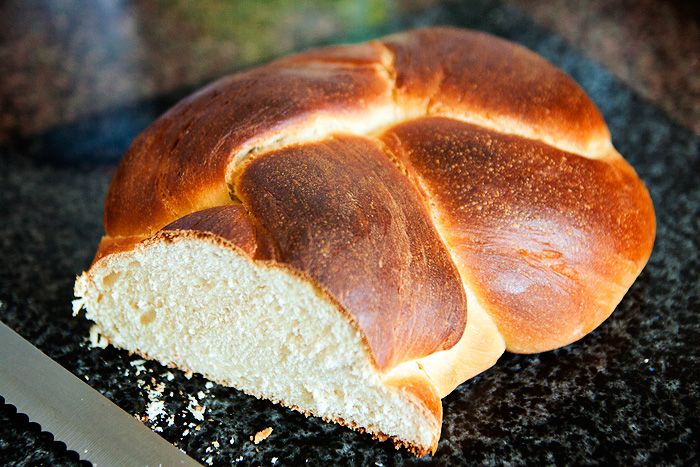
Which is why I wasn’t at all sure about my strange hankering to rustle up a loaf of brioche.  And not just any old brioche, but the kind of brioche that I grew up with when I spent my summers in the Vendée.

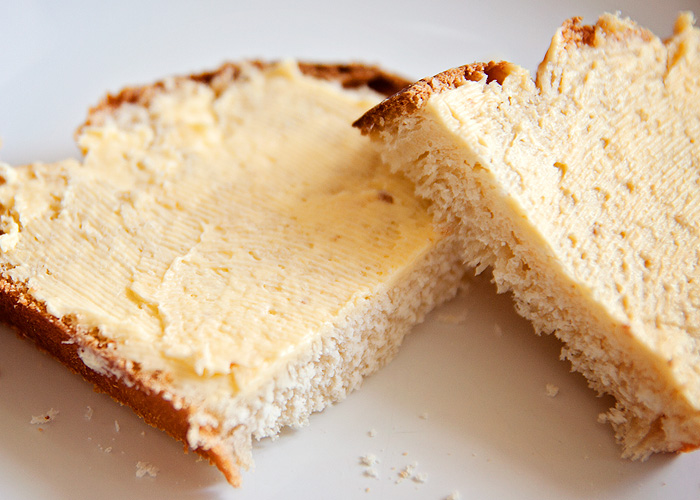
The Vendéenne Brioche is all about a light, cakey texture with just the right amount of sweetness.  Many in France will spread their morning slice with jam but I’m an all-butter purist, just make sure that it’s *proper* butter though, ok?

brioche-vendeenne

My brioche recipe is fairly basic as most go… I didn’t attempt to add Orange Blossom Water as some do and the same goes for rum!  I wasn’t going to spend £££ (or should I say ) on ingredients that I might never use again.  However, now that I’ve got the basic recipe under my belt, I may be a little more adventurous next time.

You will need:

220ml milk (regular or semi-skimmed, no fully skimmed please!)
1 large egg, beaten
85g caster sugar
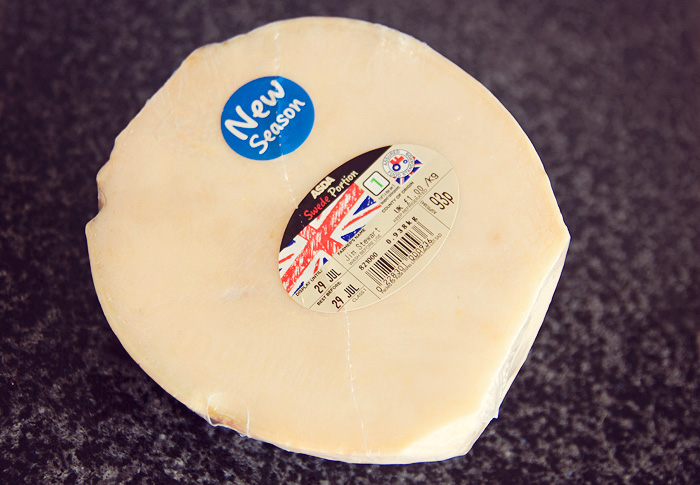
80g butter, room temperature
10g fast-action yeast
500g plain flour
1tsp salt
1tsp vanilla extract (good quality)

If you’ve got a stand mixer with a dough hook, I ain’t gonna lie… all the better.  But of course, this can easily be done with some good old-fashioned elbow grease.

Warm the milk to around 35 degrees celsius (tepid) before adding the sugar, vanilla extract, and beaten egg.  Then in this order: add the salt, the butter, the flour, and finally the yeast.

Bring the ingredients together until a smooth dough forms, making sure that you’ve combined all the ingredients well.

Place the dough into a bowl, covering it with a tea-towel and leave it to rise for 1 hour in a warm place.  I usually turn the oven onto 50 degrees c for around 2-minutes before switching it off, letting out a little of the heat (you want it warm, not hot!) and then shutting the oven door on my dough after another minute has passed.

After an hour, your dough should have (roughly) doubled in size.

Tip your dough onto a lightly-floured surface and punch it to release the gas from the yeast.  Split it into two equal halves and get ready to braid.

I use this video for braiding inspiration… it’s a lot easier than a 3-stranded braid and looks super-authentic once baked!

Once braided, place your brioche onto its cooking surface.  I prefer to cook my brioche (and other breads) on a silpat or parchment-lined baking sheet but you can pop it in an oiled tin if you prefer.  Put it back in the oven (or other warm place) for a second rise, another hour will do.

Brush the surface of your brioche with egg (add a few drops of white vinegar for a super-shiny crust) and bake it in the centre of a preheated oven at 180 degrees celsius for anything between 20-30 minutes.  Check the colour of the top regularly to get an idea of how quickly your loaf is cooking.

Once removed from the oven, let it cool and enjoy the fruits of your labour with a generous slathering of butter, or jam… or both if you’re feeling particularly decadent!

brioche

Bon Appetit!

if you liked this post, please don’t forget to check out my subscriber options, here


Chips for tea? Yep. Swede ones!

Posted by Lipglossiping On July - 29 - 2014

swede chips lipglossiping

We all know what normal chips taste like (bloody amazing, that’s what), and while many of us are familiar with the delights of sweet potato and butternut squash chips… perhaps you’re not so aufait with the thought of swede ones?  This much maligned veg, stuff of every school-dinner taker’s nightmares… surprisingly, makes one mean chip!

Starting with your swede.  If you’re choosing at the supermarket, go for one that is small but feels dense… that’ll result in the nicest, sweetest tasting chips of all.  Avoid any that feel a bit light for their size and don’t worry about how ugly and nobbly they are, swedes run celeriac a close second for “ugliest vegetable in the aisle” trophy!

IMG_6070

mine was already half-peeled ‘cos I’m lazy like that

Chip your swede using a sharp knife, if you’re a regular with butternut squash, a little swede will pose you no problems!  Tip: Around 400/500g uncooked weight allows for a decent cooked portion for one person.

Try to keep the “chips” as uniform in size as possible, I went for fairly skinny fries but you can also wedge them if you prefer a chunkier chip.

IMG_6076

Put them in a pan of slightly-salted water and par-boil them for 10-12 minutes, this step is essential if you don’t want to bite into a rock-hard “chip” when they come out of the oven later.

IMG_6089

Once drained, allow them to sit for a couple of minutes to let some of the steam evaporate… alternatively, pat them dry with some kitchen towel.

Season your par-boiled chips, I like to use cumin and chilli powder on mine, generally aiming for around 1/2tsp of cumin and a 1/4tsp of chilli.  I also spray them lightly with frylight.

I use my Tefal Actifry to cook swede chips but you can easily do them on a baking sheet in the oven too, just crank the temperature up to 220 degrees celsius (425 fahrenheit) and be more generous with the oil if you’re cooking the conventional way!

IMG_6095

After around 30-minutes, they’re ready to go!  Don’t forget a sprinkle of salt, what is any chip without it?

And there you have it.  The swede chip.  Extremely tasty, healthy, and a great low-carb alternative to the potato variety.  Personally, I prefer these to butternut squash ones… the texture is a little firmer and more chip-like.

Now, go make ’em!

IMG_6111

if you liked this post, please don’t forget to check out my subscriber options, here

Food Friday: Summer grilling with the Tefal Optigrill

Posted by Lipglossiping On May - 2 - 2014

After spotting the Actifry cauliflower “rice” recipe that I blogged about a few weeks ago, Tefal got in touch to ask if I’d be interesting in trying their latest kitchen innovation, the Tefal Optigrill.  I’m sure you’ve seen the TV ads for the grilling machine recently, it’s somewhat similar in appearance to the iconic George Foreman-style grills in as much as it allows you to move the grill out of the oven and onto your kitchen counter.

The major differences are found in the machine’s objectives.  While the George Foreman has traditionally focused on being a “health” machine, the Tefal Optigrill concentrates its motives on “perfecting” the art of home-grilling with clever technology that allows the user to customise their grilling preferences and make light work of family cooking.

At home, I do try to grill a lot of food… it’s healthier and less messy than frying but there’s definitely an art-form to the technique and one that I don’t always get right.  I’m forever setting the smoke alarm off, not necessarily because I’ve burnt the food but because excess fat spits onto the heating elements!  And then there’s the skills needed to grill food well.  I don’t mind admitting that pork often emerges from my grill a little dry and I don’t even bother attempting some fussier foods such as chicken and fish, I just use the oven instead.

I suppose what I’m saying is that I find working with a conventional grill a bit hit-and-miss.  When you get it right, the results are amazing… belly pork crisped to perfection under a hot grill cannot be beaten.  But when I get it wrong, I’m either left with a kitchen full of smoke or a disappointingly uneven result.  Because of this, I only ever fry steak.  If I’m going to spend £8 or £9 on a couple of pieces of high-quality meat, I’m loathe to roll the dice on my cooking abilities to get it right.

And this is where the Tefal Optigrill promises to excel.  Great results, first time… all of the time.

But does it?  Let me throw some photos of recent meals into the mix and let you be the judge!

IMG_5192

garlic & herb stuffed boneless chicken thighs (still juicy!)

IMG_5283

lamb & mint quarter pounders cooked from frozen

IMG_5080

lamb leg steaks, tender and not overcooked

Over the past few weeks, I’ve tried many different things with my new countertop grilling machine.  From lamb to pork, steak to chicken and even a bit of cheese.  The results have been mostly brilliant.  My only disappointment has arisen when cooking something that requires the technique to really crisp the fat.  In this case, the Optigrill produced a massively underwhelming and somewhat flacid pork belly.  I was gutted!  I guess belly pork really does need the kind of heat that requires me to flap a tea-towel around infront of the smoke alarm as the fat spits and crackles under a conventional grill.

Everything else that I’ve thrown at the machine has been cooked marvellously.  And not only that but with minimum fuss, mess, and indeed thought because the clever device will actually tell you – through a series of flashing lights and beeps – when your food is ready.  Not only when it is cooked, but also at what stage of “readiness” it currently sits at.

If you like your lamb a little pink… turn off the Optigrill and remove your meat at the “orange for medium” stage.  If you like your steak to be well-cooked, you’d want to remove your food from the grill when greeted with the “red for well-done” light.  There’s definitely a learning curve to the machine, especially if you’re simultaneously preparing a timing-is-critical side-dish and you’re not quite sure how long the Optigrill will actually take to cook your food!  But this is something that is easily surmountable with a little practice, once you’ve cooked a favourite dish… you’ll know for next time.

Unlike the George Foreman’s seemingly default setting of “squeeze all fat out of food until it no longer has any taste or texture”, the Tefal Optigrill does a great job of getting super-hot in the pre-heating stage, allowing the machine to effectively seal in a lot of the flavour before it actually starts cooking your meal.  You will still see excess fat and/or water drip into the tray underneath but it certainly doesn’t make a habit of drying out your food.

IMG_5336

halloumi slices on a beef tomato and pesto open sandwich

I’ve stopped using any oil at all on the plates prior to cooking, I seem to get an equally good result whether I use oil or not… so why add the extra calories?  I was also pleased to discover that both the upper and lower grill plates can be removed completely for easy cleaning and I recommend giving them a quick wipe with a piece of kitchen towel prior to washing up/putting in the dishwasher.

I’ve found that I’ve been able to work the Optigrill quickly into my routine, which is always the key as to whether or not it will end up stuffed in the back of my cupboard once the novelty has worn off.  Ultimately, a kitchen “gadget” has to be usable in multiple and varied situations… it needs to be versatile.  Whether I’m cooking lamb leg steaks to go with a full roast dinner (sticking the roasties and yorkshire puds in the Actifry means that I don’t even have to turn my oven on!), grilling halloumi to go with a posh Summer salad, or chucking frozen burgers onto the machine for a quick weekday evening meal, the machine hasn’t left me disappointed.

So far, the Tefal Optigrill has more than earned its keep on my kitchen counter.

The Tefal Optigrill is available to buy online from lakeland.co.uk, johnlewis.com, and debenhams.com (where it is currently 10% off) priced from £135.00

* press sample

if you liked this post, please don’t forget to check out my subscriber options, here

Cauliflower “Rice” in the Tefal Actifry

Posted by Lipglossiping On April - 8 - 2014

In a horrible twist of fate, I ending up buying my much-longed-for Tefal Actifry approximately one week before the price on Amazon finally dropped back down to its current reasonable level.  I’d been waiting since the start of January for the prices to return to some semblance of reality and three months later, they were still higher than they had been since last August.  Considering I’d spent just £90 on the damn thing when I’d bought one for my Mum and Dad pre-Christmas, I just couldn’t bring myself to spend over £130 on the exact same machine just a couple of months later.

And so, fate transpired that I ended up buying a second-hand model from Gumtree, £70.  It wasn’t the 1.2kg model that I’d been hankering after but the smaller 1kg.  I now hate my unfortunate timing and throw the damn thing dirty looks whenever I pass by the kitchen.  Having said that, I made some delicious cauliflower “rice” in it last weekend, a very useful low-carb alternative to the real thing!

Cauliflower Rice in the Tefal Actifry

Why the low-carb alternative?

Well, I’ve only got 4-weeks of pregnancy left and this time around, it’s been trying at times.  The initial sickness was something I’d managed to escape when I was carrying Leila but this time, it hit me like a ton of bricks.  Throw in another run-in with the dreaded PCOS-induced gestational diabetes and I can’t say that I’ve enjoyed this pregnancy as much as my first.

Having said that, nothing will replace the feeling of those little bumps and knocks from the inside out… and enjoying the knowledge that there’s no bond in the world quite like that between an unborn baby and its Mum.  I will dearly miss that intimacy (my baby, all mine!) when he’s out.

So, back to the low carb thing…

As pregnancy progresses, the effects of borderline gestational diabetes tend to become more severe.  Back when I was 22-weeks my insulin deposits could easily cope with a handful of chips and a couple of spoonfuls of rice but now, as I enter my 35th week, I’m not so lucky.  Even the most unrefined of carbs can cause my blood sugars to spike to unhealthy levels.  Time to call on the cauliflower!

Cauliflower Rice in the Tefal Actifry (2)

The first thing you need to do is grate your cauliflower to produce a grain-like texture or alternatively blitz the florets (a handful at a time) in a food processor.

Once the cauliflower has been blitzed, dump it in the bowl of the Tefal Actifry and add a generous tablespoonful of oil.  If you want to add some extra flavour, feel free to experiment with a little spice.  For my Bratwurst & Cauliflower Rice mash-up, I concocted a moroccan-inspired combination that comprised:

1 tsp ground cumin
1/2 tsp ground coriander
1/2 tsp ground ginger
1 tsp ground cinnamon
1/2 tsp black pepper
1/8 tsp ground cloves

Turn on the Tefal Actifry and set the timer for around 25-minutes.  Do keep an eye on it though as you’ll need to re-incorporate any “rice” grains that rise up the side of the bowl as it cooks.  I just use a silicone spatula to push them back down.

Cauliflower Rice in the Tefal Actifry (3)

After 25-minutes, feel free to add some extras.  I threw in a handful of frozen peas, some pre-cooked Bratwurst, and a broken-up plain omelette that I’d cooked on the hob after frying the Bratwurst.  The last 10-minutes in the Actifry ensured that the flavours combined beautifully as the paddle turned and incorporated the spices and oils.

Cauliflower Rice in the Tefal Actifry (4)

Using the Tefal Actifry meant that the cauliflower took on a fried-rice texture and the spices delivered some real flavour to an otherwise bland, low-carb alternative.

The Tefal Actifry (1.2kg model) is currently available on Amazon.co.uk for £109.99 which is the lowest it’s been since early December.  It’s even cheaper than the smaller 1kg model!  If you follow me on Twitter, you’ll know I’ve been on Actifry “price-watch” all year.  I’m fuming!

Do you own a Tefal Actifry?  What’s your favourite thing to cook in it?

if you liked this post, please don’t forget to check out my subscriber options, here

Food Friday: Sheenie’s Spicy Steamed Chicken

Posted by Lipglossiping On March - 7 - 2014

Now, whilst I’m almost certain that the real name of this recipe isn’t actually “Sheenie’s Spicy Steamed Chicken“, it shall henceforth be known by this name in this household… because without her, I’d have never discovered this ridiculously-easy-to-make taste sensation.

You can read a little bit more about how Sheenie herself finally got to the bottom of this recipe on a recent trip to Karachi by checking out her food blog.  I’m very grateful to her Aunt for divulging the family secrets!

Aside from the resulting dish, the best thing about this recipe is just how damn simple it is.  Infact, it’s so simple and uses so few ingredients that I was genuinely surprised to discover it packed such a robust flavour.

The only thing I want to change about it (in my typical philistinic way) is to “bulk” it up a bit.  As much as I love chicken and sauce over rice, I need moar… a little more substance, some added veg… spinach and chickpeas perhaps?  I’m planning on making it again over the weekend and will edit the post at the bottom to report back on whether I manage to mangle a thoroughly decent recipe with my fiddling.

Anyway, on with the food!

Sheenie's Steamed Chicken

All you need to create a deliciously authentic savoury dish are a handful of ingredients.  I won’t tell you the quantities because Sheenie has the details blogged, but all you need is some: chicken, vinegar, soy sauce, water, chili powder, and chaat masala.  The Chaat Masala will be the only thing you may have difficulty finding, I couldn’t spot any in my local Asda so I ordered a small box online from eBay.  If you have an Asian supermarket nearby, I’m sure you’ll discover it with no problem.

Chop your chicken into fairly generously-sized pieces.  I used skinless/boneless chicken thigh but you can really use any kind of chicken, on the bone or otherwise.  Using a lidded saucepan, add all the ingredients minus the soy sauce and allow to simmer for 15-20 minutes until the chicken is cooked through.  As a final step, remove the lid of the saucepan and add the soy sauce.  Give the sauce another 3-5 minutes and it should thicken ever-so-slightly.

As Sheenie says on her blog, there’s a little guesswork to be done with this dish when it comes to estimating quantities, I’d say that my resulting sauce was just a little thin but my rice absolutely welcomed the added jus!  It just meant that I used a slotted spoon to serve Mr. L’s portion alongside a naan bread.

Sheenie's Steamed Chicken 2

Sheenie's Steamed Chicken 3

Sheenie’s Spicy Steamed Chicken makes for an ideal weekday evening meal, the whole thing takes less than half an hour to rustle up from start to finish and once you’ve got the Chaat Masala in your hot little hands, uses only store-cupboard ingredients.  I’ll hold my hands up and say that this isn’t the best-looking dish in the world but please, please give it a try… it will surprise and delight you!

if you liked this post, please don’t forget to check out my subscriber options, here

Food: Impress with a lazy girl’s Tarte aux Pommes

Posted by Lipglossiping On March - 3 - 2014

If you ever find yourself in the position of having only 30-minutes to knock up an impressive-looking dessert, then you’ll want to bookmark this recipe.  You might know by now that I love cooking, baking, and food in general but positively hate the faff that goes with it.  This means that most of my “creations” end up tasting good but looking pretty mediocre.

I watch programmes like The Great British Bake Off with a certain amount of jealousy at the participants’ willingness to spend hours decorating their masterpieces with the patience of a Saint.  I will never be that type of cook.  I have been blessed with very little in the way of a “planning” or “patience” gene.

So it is with a great amount of pride that I present to you my lazy version of a Tarte Aux Pommes.  I’ve got a bit of a cheek calling it that to be honest as it contains very few of the original features of a classic Normandy Apple Tart.  There’s no frangipane in there, and there’s no Calvados.  I deal with what I have in my cupboards, which is generally only the kind of stuf that I’m actually using week in, week out.

The thing is though, it tastes lush and it looks the business and I am far from ashamed of it!  Check it out!

tarte-aux-pommes

tarte-aux-pommes2

I’ll begin by saying that I used a 23cm tart pan… one of those ones with a removable base, this is important because depending on the size of your tart… you’ll need more or less apples (and obviously pastry) than I am including in the recipe below.  The safest thing would be to buy a little more than my suggestions, I mean… apples aren’t going to go to waste and if you overmake or overbuy the pastry, make some mini-tarts to go with!

You’ll need:

A packet of ready-rolled shortcrust pastry (I told you this was the lazy version, you wanna make your own? Knock yourself out!)
1 Pink Lady Apple (more if you don’t trust yourself to slice it thinly enough or you want to make a larger tart!)
1 Tbsp Melted Butter (blitz it for a couple of seconds in the microwave in the bottom of a mug)
3 tsp Caster Sugar
1/2 tsp Ground Cinnamon
1 Tbsp Apricot Jam
1 tsp Water

1. Lay your pastry flat with the base of your tart tin on top, trace around the edge with a knife.  Alternatively, you can trace around a dinner plate and bake the tart on a flat baking tray for a custom-size.  Pre-heat your oven to 190 degrees celsius.  You may need to line your baking tray or tart tin with parchment paper, the non-stick on mine is still in pretty good condition thankfully.

2. Quarter your apple(s) – don’t peel them, the pink skin looks lovely when baked!  Remove the core and slice thinly.

3. Arrange your apple slices over your pastry disc in the traditional Tarte Aux Pommes design.  I love some of the “rose” styles but didn’t have the patience!

4. Brush your apples with the melted butter and sprinkle the Caster Sugar and Cinnamon over the top.

5. Bake your tart in the middle of the pre-heated oven for 15-minutes, before moving it to the top shelf for the remaining 15-minutes if your apples are looking a little pale.

6. Combine the Apricot Jam and water in a small dish before brushing the glaze over the top of the cooked tart to give it a lovely shiny finish.

7. Serve warm with some whipped cream!

Tell me if you try this, I’d love to know how you get on!

if you liked this post, please don’t forget to check out my subscriber options, here

Food Friday: Chicken & Aubergine Bake

Posted by Lipglossiping On January - 24 - 2014

I’ve never had aubergine before.  Not once.  I think that’s pretty impressive vegetable-dodging for a 32yr old even if I do say so myself!  You see, I grew up in a family where the person in charge of the cooking hated auberginewith a (not entirely normal) passion about it.  As a marvellous curry cook, I think my Mum had tried to incorporate things like Aubergine and Okra many-a-time, always with a disappointing result.

Aubergine does have a bit of a reputation too, doesn’t it?  Slimy… bittersome not-very-tantalising adjectives that make it quite easy to leave the poor vegetable sitting, unloved, on the supermarket shelf.

Well, I got brave and finally had a go with this much-maligned veg.  And you know what?  It turned out pretty good!

Food Friday: Chicken & Aubergine Bake

You’ll need:

chicken breast steaks (or sliced fillets)
1 aubergine
1 tin of chopped tomatoes
1 tin of chickpeas, drained
1 medium onion, diced
1 slice of bread, breadcrumbed
Garlic (4 cloves or dried granules)
1tsp oregano
2Tbsp tomato puree
a few slices of pepperoni or salami
2Tbsp grated parmesan (for topping)
75g grated mature cheddar (for topping)

Food Friday: Chicken & Aubergine Bake

Fry off your chicken with the tomato puree and a few squirts of Frylight or a little oil.  Don’t overcook as you’ll be putting the breast in the oven, just seal the pieces to release some of the juices and take off the heat.

Food Friday: Chicken & Aubergine Bake

Start peeling your aubergine.  You don’t have to but mine were about a week old… the older the aubergine, the tougher the skin!

Food Friday: Chicken & Aubergine Bake

Slice the aubergine thinly, about 1/2cm thick slices, lengthways.  Don’t worry about the flesh discolouring

Food Friday: Chicken & Aubergine Bake

Spray a little Frylight into your baking dish and layer the aubergine slices across the bottom of the dish.  Sprinkle some garlic granules, salt (if you wish), and oregano over the top of the cut pieces.

Food Friday: Chicken & Aubergine Bake

Lay the pepperoni across the aubergine – the fat that releases from the meat will soak into the vegetable and amp up the flavour in a big way!  Scatter the chopped onions on top of this.

Food Friday: Chicken & Aubergine Bake

One of the nicest things about this meal is that (apart from frying off the chicken) it’s a one-pot dish.  Very quick to assemble when you get home from work.  Add the drained chickpeas (I use about half the can here) and rest the chicken pieces over the top.  Don’t skimp on the tomatoey/oily juices from the pan… the aubergine will thank you for all that flavour!  Layer the remaining aubergine slices ontop of the chicken.

Food Friday: Chicken & Aubergine Bake

Finally, add your tinned tomatoes, the remaining chickpeas, Parmesan, and grated cheddar.  If you like, you can add a splash of balsamic vinegar… whenever I use tinned tomatoes, I can’t help myself!

Food Friday: Chicken & Aubergine Bake

Preheat the oven to 200 degrees celsius.

Food Friday: Chicken & Aubergine Bake

If you haven’t already, now is the time to pulverize your slice of bread into crumbs.  Sprinkle the bread crumbs over the cheese and bake in the center of the oven for 1hr, checking occasionally to make sure that the top doesn’t get too brown.

Food Friday: Chicken & Aubergine Bake

You can serve this with some chunky, fresh bread or be good and have a side salad.  This Chicken & Aubergine Bake really makes for a quite a substantial and very filling meal!

Food Friday: Chicken & Aubergine Bake

I probably used around 1Tbsp of oil in total.  You could lose the pepperoni and of course, cut down on the cheese if you’re really watching your fat intake (although I don’t think there’s too much in this meal).  For my blood sugars, I’ve found that a little bit of fat combined with some slow-release carbs actually helps prevent a post-meal spike, so I’m not overly concerned.

Do you like aubergine?  How do you eat it?

if you liked this post, don’t forget to check out my subscriber options, here

Food Friday: Spicy Sweet Potato & Butternut Squash Soup

Posted by Lipglossiping On January - 17 - 2014

Last time I was pregnant, I was sent for a GTT (glucose tolerance test) at 28wks to see if I was at risk of GD (gestational diabetes).  This is a pretty common issue for PCOSers who fall pregnant and after a couple of hours waiting to find out the results, I discovered that I was borderline and would need to change my diet for the remainder of the pregnancy if I wanted to avoid full blown GD later on.  Thankfully, I was already pretty aware of my ongoing issues with insulin resistance and to be honest, it wasn’t as much of a horror as it could have been.

I was sent away with a blood sugar monitor and tested myself daily, once upon waking and once again two-hours after my evening meal.  My morning results were always well within the limits of GD but it was those pesky post-prandial (post-meal) blood sugars which meant that most refined carbs had to leave my diet.  It was a case of trial and error, coming up with meal plans that were low GI isn’t the hardest thing in the world to do… and thankfully I don’t have (too much of) a sweet tooth.

I’m now 23 weeks pregnant and I asked my consultant if I could have one again before 28-weeks this time.  She thought it was a good idea and I’m back to my post-prandial testing.  In the five-years since having Leila, guidelines have changed and I now have to test only one-hour after eating.  The results so far are borderline, but well within limits once I replace those refined carbs for more wholesome sources.  I think we’ve been here before!

Today’s recipe is one that saw me through many a carb-restricted lunchtime five years ago, and one that I’m relying upon again today after that bittersweet reunion with my blood sugar monitor.

Food Friday: Spicy Sweet Potato & Butternut Squash Soup

As far as veggies go, you can’t get more of a taste/glycaemic load (good) compromise than sweet potatoes and butternut squash… of course, my soup could be made from those wonderful green, leafy vegetables (that would be even more virtuous) but there’s something about orange veg in the winter months that warms my belly like no other.  Cabbage-based soup next time, I promise!

You’ll need (to make a BIG, freezable batch):

1 butternut squash, peeled and diced
4 sweet potatoes, peeled and diced
1 large onion, peeled and diced
3 vegetable stock cubes (or fresh vegetable stock)
1 small tub of soured cream
1/2 tsp coriander
1 level tsp ground cumin
1 level tsp hot chilli powder (adjust to personal taste)
salt and pepper
1 Tbsp oil for frying

Optional – red lentils

Food Friday: Spicy Sweet Potato & Butternut Squash Soup

Fry off the onions and cumin on a medium heat until softened.

Food Friday: Spicy Sweet Potato & Butternut Squash Soup

Add the chopped sweet potato and butternut squash before sprinkling over the remaining spices and stock cubes (fresh stock).

Food Friday: Spicy Sweet Potato & Butternut Squash Soup

Add around 2L of feshly-boiled water, less for a more intense flavour and more if you want to eke out the soup for freezing portions.  I added a little more with the intent to thicken up the soup with some red lentils if it needed it.  Let the vegetables blip away in the simmering water (with a lid on) until soft, around 30/45 minutes should do it.

Food Friday: Spicy Sweet Potato & Butternut Squash Soup

Once softened, take your stick-blender and blitz away until the soup is smooth.  At this point, it’s up to you to judge whether or not your soup needs thickening, it’s mostly down to personal taste.

Food Friday: Spicy Sweet Potato & Butternut Squash Soup

After tasting mine, I decided that the flavour was intense enough to take a little more water, so I added a handful of red lentils and topped up with another 700ml of boiling water.  Let this cook away until the lentils are soft, about 30 minutes before giving the soup another whizz with the stick-blender.

Just before serving, take the soup off the heat and stir in the soured cream.

Food Friday: Spicy Sweet Potato & Butternut Squash Soup

I serve mine with a sprinkling of parmesan cheese.  What?  There’s no carbs in cheese right?

Freeze the rest in individual portions and you can reheat them as and when needed in the microwave.

What’s your favourite home-made soup recipe?

if you liked this post, don’t forget to check out my subscriber options, here

Food Friday: Chickpea Burgers courtesy of Patz’s Pantry

Posted by Lipglossiping On September - 13 - 2013

I don’t know man, I mean chickpeas are awesome.  They’re kinda nutty, somewhat meaty, pretty substantial and above all else, packed with fibre.  But burgers? Burgers are on a whole different level…

How could you ever, ever substitute a burger, a proper meaty burger… with one made out of chickpeas?

Let me show you how, courtesy of this recipe from new foodie blogger (and occasional beauty PR ;)) Patrizia a.k.a Patz’s Pantry.

Patz Chickpea Burgers_1

I didn’t have any shallots, so I substituted regular red onions.  I also used breadcrumbs from a pitta rather than regular bread. The rest is as Patrizia has written it.

I won’t list the full ingredient quantities because you should check out her blog for the recipe.  Anyway, it’s such a simple recipe and really quick to knock up in about 25 minutes tops.  Perfect for when you’ve had a long day at work and don’t want to get into anything too taxing.

Patz Chickpea Burgers_2

Once you’ve mashed up the chickpeas (I used a mini food processor and did it in a couple of batches), all you need to do is mix the ingredients together… starting with the spices…

Patz Chickpea Burgers_3

…and then the vegetables (they also went through the food processor)…

Patz Chickpea Burgers_4

…finally, crack your egg into the mixture and add the breadcrumbs.  You might be able to see from the above photo that I also added a cheeky teaspoonful of wholegrain mustard.  Combine everything well.

Patz Chickpea Burgers_5

If you have one of these nifty burger presses, they’re fantastic!  If you don’t, you can still shape the patties by hand… I do recommend a burger press though if you regularly make your own, they’re really cheap and help you eke out those ingredients as well as helping to control portion sizes!

Patz Chickpea Burgers_6

Once you’ve made your burgers, whack them back in the fridge to firm up for 15-minutes before frying over a low heat for around 3-4 minutes on each side.

Patz Chickpea Burgers_7

I pretty much ruined the effect of mine by melting a leftover slice of plastic cheese on top.  I promise it looked far better before I butchered its appearance with the blob of sweet chilli sauce too haha!

Patz Chickpea Burgers_8

I served mine on a pitta bread with some sweet potato fries and a side salad.  It was delicious, truly.

Are you burger fiend?  What’s on the menu tonight?

Food Friday: Chicken Laksa

Posted by Lipglossiping On September - 6 - 2013

I first discovered the joy of Laksa courtesy of an inner-city food court almost 15 years ago.  I was living in Sydney at the time and alternating my lunches between New York Style pastrami sandwiches, Lebanese Fattoush, and Singaporean Chicken Laksa.  Such was the multi-cultural diversity of the city, coming from the British countryside, it was a revelation to taste my way around the continents in such an informal setting.  When I returned, I really missed some of my favourite dishes, and the first one that I had to learn for myself was the Chicken Laksa.

Now, back then… it was practically impossible to find a ready-made Chicken Laksa paste.  There are billions of recipes online describing how to make your own but nowadays, I just buy a jar of paste from my local Asian supermarket – tastes great and much less hassle.  I believe that some mainstream supermarkets stock it now, I’m pretty sure Sainsburys do anyway.

Chicken Laksa is a great dish to serve up when you’re looking to impress.  It’s a warming taste sensation, constructed around a base of chilli and coconut milk, you can customise it to suit your taste for spice just by adding more or less paste.  Not only that but it takes a mere half an hour to put together.

And this is what you need to do it…

Chicken Laksa

Not too many ingredients at all huh?  Just the way I like my cooking!  The above serves 2/3 people.

1 large fresh chicken breast/frozen chicken pieces – I used the meat that I’d pulled from a whole roasted bird after cutting off the breasts.
1 bag of bean sprouts (I use about half a bag for 2 people)
1 bag of noodles (traditionally vermicelli noodles but I’ve used rice, egg, whatever!)
1 can of coconut milk
Roughly 500ml water or chicken stock.  If you’re using water, add some chicken oxo-type cubes to the pan during cooking.
1 jar of Laksa paste (My favourite brand is Yeos – I use a whole jar but this will make it hot, for a milder version, use half a jar)

Apologies that my list is a little vague in terms of quantities, this is one of those recipes that is best judged by the eye as you go along… honest!

Chicken Laksa2

Grab a large saucepan or stockpot and add the paste, coconut milk, water+oxo cubes/stock and the chicken.  Bring to a simmer, put the lid on and stir occasionally until your chicken is cooked through.  How long this takes will depend on whether you’re using raw, pre-cooked, or frozen (pre-cooked) chicken… err on the side of caution and make sure the chicken is fully-cooked/heated to safe temperature.

I usually give it a good 15-minutes bubbling away for pre-cooked, frozen chicken.

Chicken Laksa3

Take note of the water levels and at this point decide if your “soup” is thin enough… if it feels a little too thick, add some more water.

Chicken Laksa4

Throw in your noodles and bean-sprouts and cook for a further 5-minutes before serving.

Chicken Laksa5

Chicken Laksa6

Done!  How easy is that?  And even though I do say so myself, it looks pretty impressive!

I usually serve it with some crusty bread… completely not traditional.  Not bothered either.

One of the best things about Laksa though is just how versatile it is.  If you’re vegetarian, use tofu instead of chicken (although remember to check the paste ingredients, they vary).  If you don’t like chicken, use king prawns instead!

Have you ever made a Laksa?  What’s your favourite way to cook it?

Food Friday: Stuffed Marrow (just like Deirdre used to make)

Posted by Lipglossiping On August - 30 - 2013

If you’re British and don’t get the popular cultural reference in the title, shame on you.  If you’re not British, and do… you’re amazing!

When I was at my local farm food shop last week I spotted a barrowfull of marrows, they were selling them off at 60p-a-piece.  I’ve never had marrow before, stuffed or otherwise… at 60p, I felt that I couldn’t go wrong.

I googled for some recipes but decided that I’d go for the old tried, tested, and somewhat derided route of stuffing it.  Instead of cutting the marrow into two long “boats”, I decided to slice them into 1.5″ thick rings and stuff the middle of those instead.  To my eye, it just looks a little more modern.

The great thing about marrow is that… it doesn’t really taste of anything.  You might think that this isn’t such a selling point, but it absorbs the flavours of whatever you combine it with beautifully.  I felt that combined with the stuffing mix I prepared in the recipe below, the marrow tasted a little like fluffily boiled potatoes (but without the uber-carbs!).  A truly delicious meal.

The recipe below makes enough stuffing mix for the amount of marrow you see in the photos (6 slices, not whole) with enough leftovers to stuff a further two large peppers.  It’s great for cooking up on a weekend and refrigerating a portion for later on in the week.

Stuffed Marrow_1

You’ll need:

500g turkey mince (or any mince you prefer to use)
85g sage & onion stuffing mix
1 marrow
2 onions
1 carrot (shredded
1 tin chopped tomatoes
a glug of worcestershire sauce
1 tsp chilli paste (or chilli powder)
1 heaped tsp of garlic paste (or a couple of cloves)
1 lvl tsp ground coriander
1/2 tsp cayenne pepper (not pictured)
100g green lentils
Water

1 pitta bread broken into breadcrumbs (I prefer the crunch pitta bread gives)
60g grated cheese

Stuffed Marrow_2

Rapidly boiling the lentils for 10 minutes before turning the heat down and continue to simmer for around 30-minutes.

Stuffed Marrow_3

Fry off the turkey mince (I used a couple of sprays of frylight to coat the pan first) and add your spices (coriander & cayenne pepper).

Stuffed Marrow_4

Add the onions, carrots, garlic paste, and a good glug of the worcestershire sauce and allow to simmer for a couple of minutes.

Stuffed Marrow_5

Pour the chopped tomatoes and stuffing mix on top and stir to combine the stuffing mix.  Have a jug of water ready, you’ll need to topup the pan as the stuffing mix absorbs the liquid. You can use a stock cube in the water but I didn’t have one to hand and it was fine.

Stuffed Marrow_6

As your mince is cooking away in the background (keep checking it for water levels, you want it dry-ish but not enough to stick or burn!), it’s time to prepare your marrow.  Marrow might seem like an awkward vegetable to prepare but it’s incredibly easy.  Simply slice of 1″-1.5″ thick pieces, as many as you need.  Using the tip of the knife, cut out the middles and discard.

Stuffed Marrow_7

They should look like the above photo once you’ve finished.

Stuffed Marrow_8

Drain your green lentils once they’ve finished cooking and add them to your stuffing mix, combine well.

Stuffed Marrow_9

Take a baking tray, a sheet of greaseproof paper, and your Frylight spray.  Place the empty marrow rings evenly onto the greaseproof paper and fill with your stuffing mixture.  The mixture will shrink down a little as it bakes so make sure that you fill them generously!  Top with the pitta crumbs and grated cheese.  Lightly spray the rings with some Frylight and pop into a pre-heated oven (200°C/400°F/Gas 6).

Loosely cover the baking tray with foil, try not to let the foil touch the top of the rings (or your cheese will transfer!).  Bake for around 30-minutes, remove the foil and pop back in the oven for another 10-minutes until the top is browned.

Stuffed Marrow_10

They should come out looking something like this!

Stuffed Marrow_11

For me, these are a whole meal in themselves… they don’t need anything to accompany and three slices of stuffed marrow was incredibly filling.  Some people are happy to eat the skins, I didn’t like the texture so sliced mine off just before eating.  Either way, don’t peel your marrow before you cook it, the skins hold everything together!

I do hope you try this one while marrows are still in season.  It makes for an incredibly cheap and filling meal, healthy too!

* Weight Watchers – I pointed this recipe at 9PP per portion for the minced stuffing mix (the whole recipe makes 4 portions of stuffing mix)

Food Friday: Caramelised Onion & Blue Cheese Filo Quiche

Posted by Lipglossiping On August - 23 - 2013

My Nan was a pastry queen, all she had to do was look at a packet of flour for it to turn it into the richest, most buttery pastry known to man. I’m genuinely awful with pastry, I can’t leave it alone… I play and mess about with the dough too much until it’s as tough as boot leather. Probably for the best if I’m honest, were I a bonafide pastry queen like my Nan, I’d be at least 4st heavier than I am today. Every cloud and all that…

It’s to this end that I often ditch the pastry cutter and buy ready-made and the one I reach for most frequently is filo. It’s kinder to the waistline than shortcrust and puff… a little can go a surprisingly long way, satisfying that pastry craving without undoing a week’s worth of hard work.

I wanted to make a lighter quiche that would see us through a weekend of can’t be bothered to cook days.  Something that I could slice up and eat cold, enjoying it just as much as I had when it had been warm.  Quiche was the thing!

Caramelised Onion & Blue Cheese Filo Quiche_1

The cast of characters:

1 packet of Jus-Rol Filo Sheets
A handful of walnuts
2 whole eggs
3 egg whites (I keep a tetrapak of Two Chicks egg whites from Waitrose in my fridge)
2 large onions, sliced
50g blue cheese, crumbled
1 Tbsp butter, melted (I used Clover because I’m a phoney)
1 Tbsp brown sugar
2 Tbsp natural yoghurt
1 tsp Dijon mustard

Grab a heavy-bottomed pan and add a Tbsp oil, sliced onions, and the brown sugar.  On a medium heat, cook the onions for around 45-minutes until soft, aromatic, and caramelised.  Keep your eye on them and stir frequently, if the heat is too high… they will burn.

Caramelised Onion & Blue Cheese Filo Quiche_2

Lightly spray your flan dish with oil and lay your filo sheets into the dish, brush each sheet with a little melted butter before layering additional sheets until the entire dish is covered with a generous overhang at the edges.  You may need to cut your ready-prepared sheets into smaller squares before layering.

Caramelised Onion & Blue Cheese Filo Quiche_3

After 45-minutes, your caramelised onions should look something like this…

Caramelised Onion & Blue Cheese Filo Quiche_4

Grab a bowl and prepare your filling.  Preheat the oven 190° (180° fan).

Combine the eggs (both whole and whites), yoghurt, walnuts, blue cheese, mustard, and any seasoning you want (I only added black pepper) and mix until well-combined.  Add the caramelised onions into the egg-mixture and continue combining.

Caramelised Onion & Blue Cheese Filo Quiche_5

Caramelised Onion & Blue Cheese Filo Quiche_6

Pour the egg-mixture into the flan dish and gently fold the loose edges over the filling.

Caramelised Onion & Blue Cheese Filo Quiche_7

Bake in the centre of the oven for around 25-30 minutes.  The centre of the quiche should be firm, the pastry should be crispy.

Caramelised Onion & Blue Cheese Filo Quiche_8

Serve with a side salad… YUM!

Caramelised Onion & Blue Cheese Filo Quiche_9

If you have any leftover pastry… no one would blame you for making some little filo tarts!  I just filled mine with some sliced apple, raisins and a tiny squeeze of honey over each filling before pinching together the “tops”.  I used a standard muffin pan to bake them in.  So good!

leftover-filo-pastry-parcels

leftover-filo-pastry-parcels2

Do you have fun with filo?  Have you ever made a filo quiche?  It was much easier than I expected!

RANDOM

Beauty Blender Giveaway Winners….

My Nan was a pastry queen, all she had to do was look at a packet of flour for it to turn it into the …

Beauty UK Smokey Lilac with a bit of OPI magic NOTD

My Nan was a pastry queen, all she had to do was look at a packet of flour for it to turn it into the …

China Glaze Summer Neons collection: Splish Splash NOTD

My Nan was a pastry queen, all she had to do was look at a packet of flour for it to turn it into the …

I'm in Elle Magazine!

My Nan was a pastry queen, all she had to do was look at a packet of flour for it to turn it into the …

N.Y.C Nail Glossies #241 Review

My Nan was a pastry queen, all she had to do was look at a packet of flour for it to turn it into the …

ADesign Skincare Brush Set (and my new favourite brush)

My Nan was a pastry queen, all she had to do was look at a packet of flour for it to turn it into the …

La Bougie Candles: Rockrose & Oudh, divine!

My Nan was a pastry queen, all she had to do was look at a packet of flour for it to turn it into the …

The Art of Christmas Gifting 003: Soap & Glory - Yum at Heart

My Nan was a pastry queen, all she had to do was look at a packet of flour for it to turn it into the …

Bargain of the Week...

My Nan was a pastry queen, all she had to do was look at a packet of flour for it to turn it into the …

Butter London Knackered NOTD

My Nan was a pastry queen, all she had to do was look at a packet of flour for it to turn it into the …

POPULAR

CLOSED: Competition Time: Givenchy Very Irresistible L'eau en Rose Perfume!

My Nan was a pastry queen, all she had to do was look at a packet of flour for it to turn it into the …

CLOSED - Win it! The Body Shop Expert Brush Collection

My Nan was a pastry queen, all she had to do was look at a packet of flour for it to turn it into the …

Win a gorgeous "glow" trio with prizes from Urban Decay, New CID, & Arbonne!

My Nan was a pastry queen, all she had to do was look at a packet of flour for it to turn it into the …

Hello? Is this thing on?

My Nan was a pastry queen, all she had to do was look at a packet of flour for it to turn it into the …

Avoid the brush off with Oral-B Pro-Expert

My Nan was a pastry queen, all she had to do was look at a packet of flour for it to turn it into the …

Big savings on French Pharmacy brands, win my Escentual.com top picks!

My Nan was a pastry queen, all she had to do was look at a packet of flour for it to turn it into the …

Win it! 3 EcoTools Bamboo Bronzer Brushes to win!

My Nan was a pastry queen, all she had to do was look at a packet of flour for it to turn it into the …

FOTD Busting out of the comfort zone!

My Nan was a pastry queen, all she had to do was look at a packet of flour for it to turn it into the …

Dear Obesity...

My Nan was a pastry queen, all she had to do was look at a packet of flour for it to turn it into the …

Urban Decay The Black Palette - Photos & Swatches

My Nan was a pastry queen, all she had to do was look at a packet of flour for it to turn it into the …

COMMENTS

  • Categories

  • Archives

  • Admin

  • Ads