Food Friday: Fruit, just um… eat it.

Posted by Lipglossiping On May - 11 - 2012

I like most food, you may be able to tell from my ongoing battle with being a greedy bitch that I’m not mega-fussy with what I put in my mouth (shutup).  Having said that, there has always been one substantial food group that I’ve gone out of my way over the past 30 years to avoid… fruit.  My daughter can’t get enough of the stuff, which is just aswell because she won’t touch vegetables.  Me?  I love veggies… always have but I think I’m just a savoury girl through and through.

It’s not that I have a full-on aversion to fruit, I wouldn’t pick it off my plate if it were served alongside something else but you will never catch me digging into the fruit bowl or craving the taste of an apple.  It’s just not on my radar.  I’m making baby steps to changing this, and it really helps when you’re on a ‘diet’ that rewards you for these changes by not penalising you when you indulge.  This week has been fruit salad week… amped up.

Look…
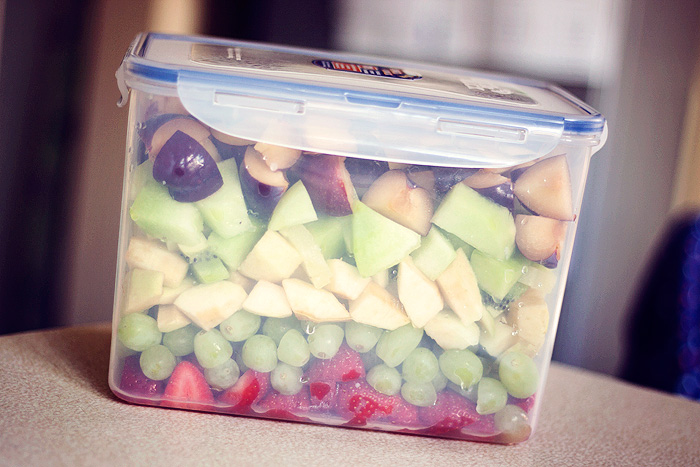
That’s our fruit box.  It’s a great big, 4L lock and lock box which I bought at The Range – as you can see, it stores quite a bit!  I’ve budgeted £6.50 per week for fruit for everyone and make sure that as soon as the shopping arrives, I’ve got the peeler, corer and paring knife out to put an end to my procrastination and get it all chopped up into bite-size pieces with a good squeeze of lemon juice to help it last.  So far, my plan is working!  It’s  infinitely more appealing to fill a bowl with a couple of spoonfuls of this than it is to reach for a sorry-looking apple in the bottom of the fruit bowl.
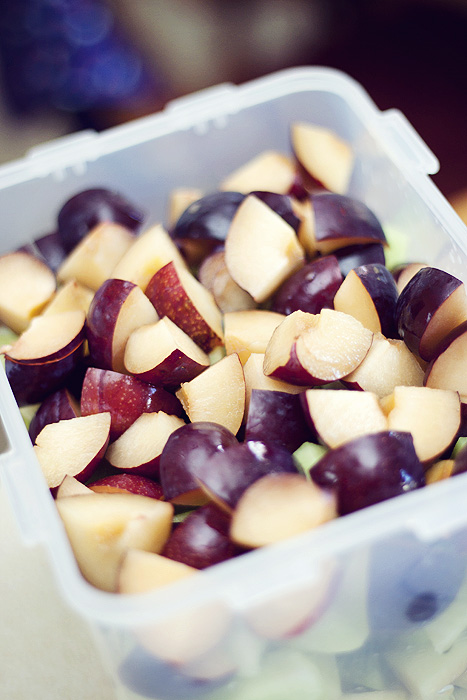
This weeks fruit box contained: plums, tinned pineapple (in natural juice), apples, kiwis, melon, strawberries, and grapes – though Mr. L says that the cheap melon I bought tastes more like cucumber.  I know that my fellow fruit-dodgers won’t be convinced by my arguments for upping your 5-a-day just yet… so how about I share with you exactly how we’ve been eating it?
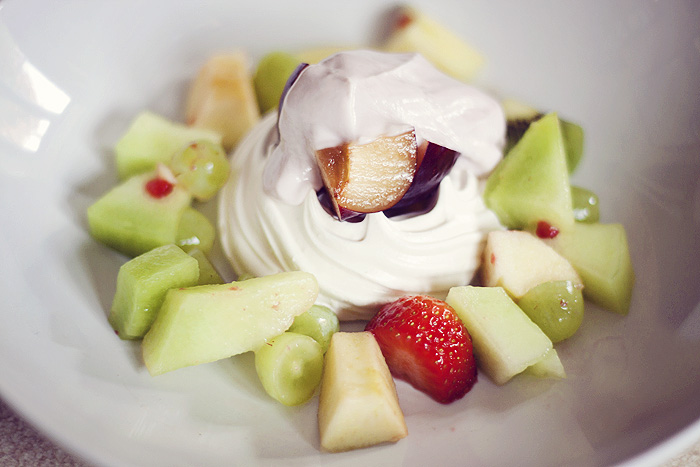
For the grand total of 2 Weight Watchers pro points (I’m on 28 a day), we’ve been submerging a meringue nest under a pile of the healthy stuff before topping it off with a Weight Watchers yoghurt or a mini Petit Filous.  Trust me, it doesn’t taste quite so healthy when you add meringue to the formula and yet, amazingly, it’s still pretty damn good for you (and far more edible!)
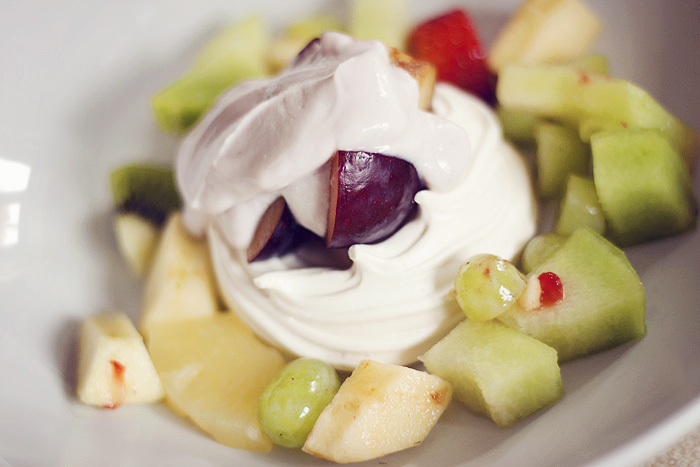
It’s a simple change to my diet and not the most groundbreaking Food Friday post, but I’m determined to keep this new habit going, especially with Summer round the corner and hopefully, cheaper berries!

Are you a natural fruit fiend or do you find ways to incorporate it into your diet?


Food Friday: Aloo Gobi Recipe

Posted by Lipglossiping On May - 4 - 2012

There are a few things that are genuinely hard to beat in this world. A beautiful smokey eye, a toddler’s podgy hand searching to find yours, a pint of pear cider on a Summer’s afternoon… and an amazing curry.

This isn’t an amazing curry, but I’m doing my best!

Whenever I order anything from the Indian takeaway, it has to be accompanied with a side of Sag Aloo which I usually come to blows over with my husband. “YOU TOTALLY HAD MORE THAN ME!” And this, from the man who doesn’t like spinach. But anyway, I digress….

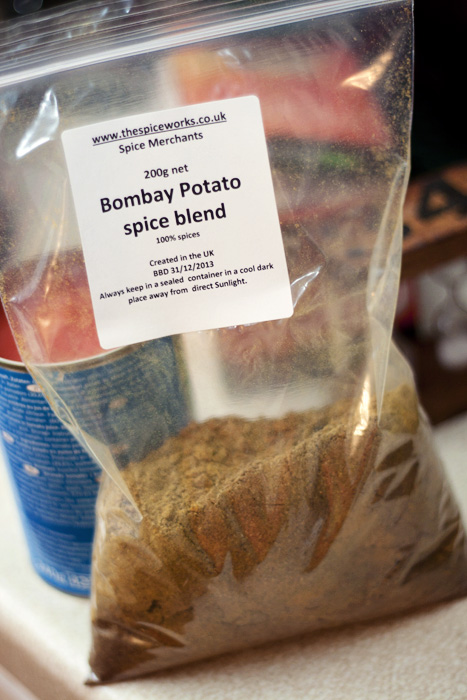
Since I found a tired-looking cauliflower in my fridge a couple of months ago, I’ve been perfecting my Aloo Gobi recipe… but in the end, I gave up and went on eBay to buy some spice mix. So should you, it’s like… really, really nice and 100x easier when you’ve finished a day’s work and you all you want to do is slump infront of Eastenders with some tasty grub. Yes, I know… slattern.

You’ll need (serves 4):

200g of potatoes, cubed (you can leave the skins on)
1 very large cauliflower (or 2 small), floretted into bite-size pieces
2 onions, diced
4/5Tbsp Bombay Potato Spice Blend from spiceworks.co.uk
2 tins peeled plum tomatoes
1 large handful of frozen peas
1kcal spray cooking oil
100ml low fat soured cream

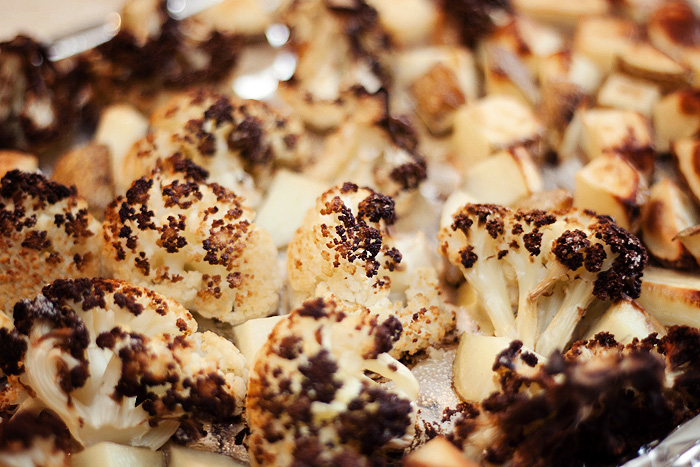
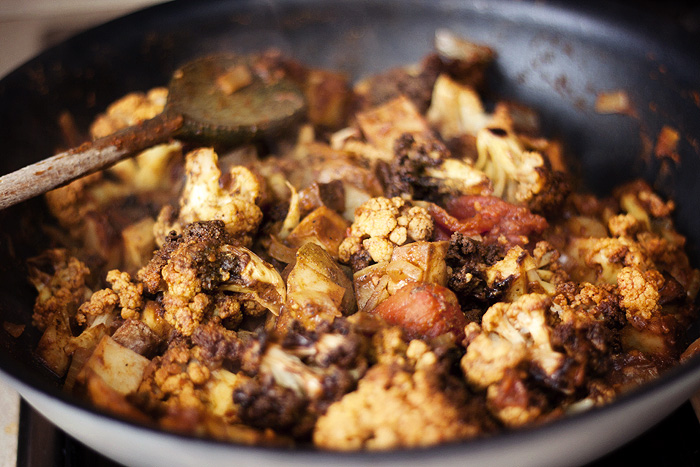
Cover a baking sheet with tin foil and arrange the potatoes and cauliflower over the surface. Spray generously with the 1kcal spray (about 30 sprays). Roast in the oven for around 30 minutes at 200 degrees celsius. You want the tips of the cauliflower to just start turning black.

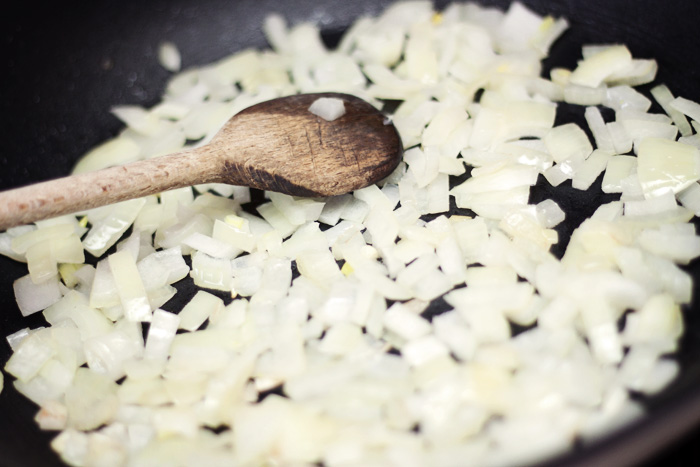
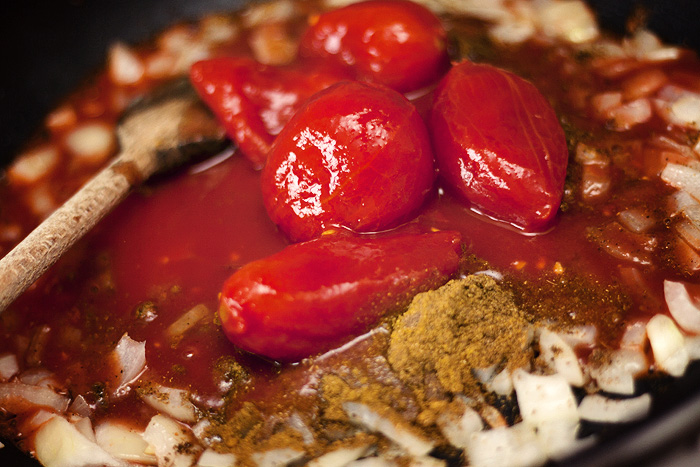
Fry the onions in a couple of sprays of the cooking oil and once translucent, add the tomatoes and spice mix.

Simmer gently until the cauliflower and potatoes are ready to come out of the oven.

Whoops, mine are a little too well done… probably by around 5 minutes. It’s all good though, they didn’t actually taste burnt. Add the roasted vegetables to the frying pan.

Add a little water (about half a cup) to the frying pan and combine all the ingredients to ensure they’re well-coated with the sauce. Simmer on a low heat with a lid on to ensure that the cauliflower is cooked through. Continue to add a little water if the cauliflower requires longer cooking.

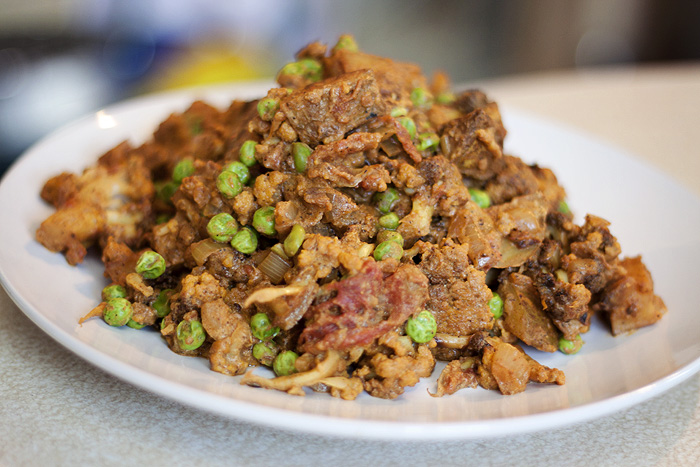
Add the frozen peas and remove the lid to reduce any excess water. Take off the heat and stir in the soured cream.

Serve! We ate this wrapped in a couple of chapatis with a salad on the side. Delicious it was too! I think that roasting the potato and cauliflower makes all the difference to this recipe, it concentrates the flavours and greatly improves the texture (imho).

* For WW, I pointed this (per portion) at 13 Pro Points, this includes the two chapatis.

Food Friday: Sheenie’s (magnificent) Butter Chicken

Posted by Lipglossiping On April - 27 - 2012

Sheenie is one half of blogging superduo Just Nice Things and the lady can’t half cook up a storm in the kitchen.  She’s just started a food blog over at Cook with Sheenie and as soon as I clapped eyes on her recipe for Butter Chicken, I knew my waistline was doomed. DOOMED I SAY!

Don’t believe me?  LOOK AT THE BUTTER.

Stop drooling, it’s unladylike.  The rest of you, stop tutting, we can’t help it.

I’m not going to include the recipe on here, for that you’ll have to point your little mice (mouses) in this direction and find out the method and quantities needed to make this culinary masterpiece.  If you try it, do let Sheenie know what you think!  This has replaced my usual “show-off” meal, you know that singular recipe that people think you can only eat nicely in restaurants?  This Butter Chicken kicks my Chicken Laksa to the KERB.

Here. have some photos to give you some idea of just how om-nom this dish is…

You want it don’t you?  I know I do…

* I did the WW points counting on this and you can have a quarter of Sheenie’s Butter Chicken (as made per her instructions) for 10 Pro Points.  That’s not bad really is it?  I added some Chapattis (5 Pro Points for two) and have been eating nothing but dust for the rest of the week.

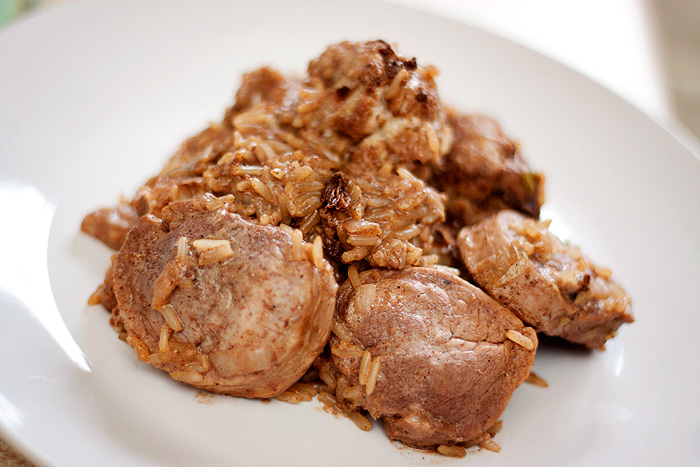
Recipe: 7-Spice Pork Fillet with Brown Rice

Posted by Lipglossiping On April - 17 - 2012

When I opened the fridge last Friday, I was greeted by a tired-looking cauliflower and whilst I adore a regular Aloo Gobi, I fancied something a little bit different.  I thought I’d take some of my favourite spices from the delicious middle-eastern makloubeh and make them fit around the ingredients I had to hand.

Because I’m following the Weight Watchers plan (still doing the same uber-veggie thing but calculating it all Pro Points stylee), I couldn’t seriously deep-fry the cauliflower whilst keeping a straight face, so I sprayed the florets with some 1cal cooking oil and roasted them in the oven until they began to turn black on the tips, about 35-40 minutes on full whack.

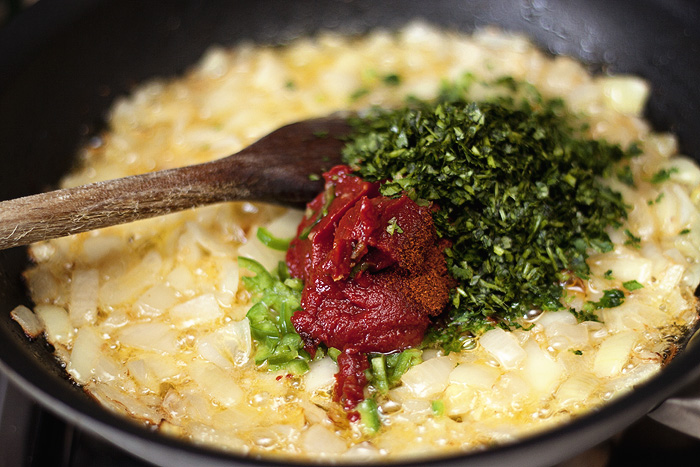
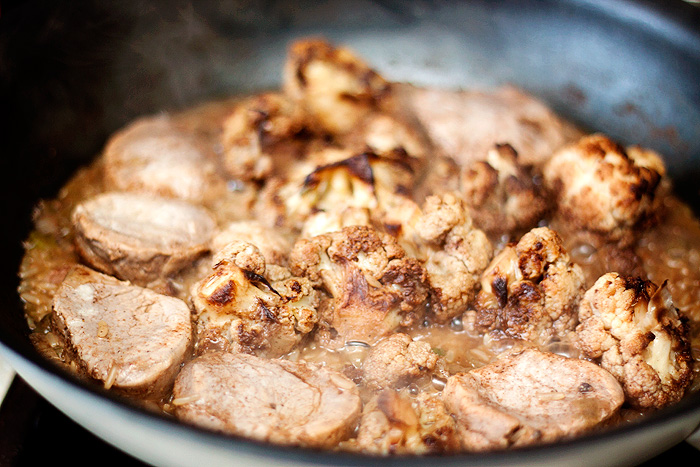
I fried off some onion (more spray) and added the roasted florets which were still a little firm.  As the oil became absorbed, I added a few Tbsp of water to prevent things from sticking and loosely covered the pan with a lid.  It was time to get the spice mix ready!  Once prepared, tip the spice-mix into the pan and stir well to coat all the ingredients.  Add the brown rice and half a cup of water, re-cover.

You’ll need to check the water levels regularly, so just keep a mugful of water to hand and add more as the rice needs it.  Cook until the rice is al-dente.

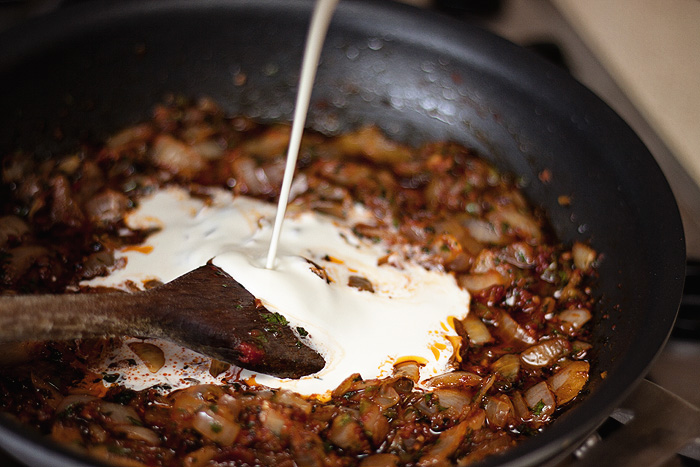
Arrange the pork fillet around the edge of the pan and re-cover.  After 6 minutes, turn the pork… and allow to cook covered for around 8 minutes.  If the rice is still too firm, you can simmer on a low heat for a little longer, just add more water as you require.  Remove the lid for the final 3/4 minutes of cooking to allow any excess water to reduce.  Before serving, stir a little room-temperature soured cream into what should be an almost-dry mixture.

Ingredients (serves 2)

1 cauliflower, floretted and lightly salted
4/6 pork fillet medallions (you can substitute other cuts/meats – lamb would be delicious)
90g brown rice
1 large onion
60ml soured cream (I used light)
1kcal cooking spray
water

1tsp allspice (not mixed spice!)
1/4 tsp ginger
1/4 tsp cinnammon
1/4tsp nutmeg
1/4tsp ground cumin
1/4 tsp black pepper
1/4 tsp ground clove

Honestly, I never want to eat cauliflower boiled again.  And incase you’re on WW too – that’s 9 Pro Points.

What lovely things have you been cooking recently?

A Week in Vegetables (Day 5 & 6)

Posted by Lipglossiping On February - 28 - 2012

You know, this eating vegetables thing isn’t so bad.  I’ve discovered that bean sprouts are pretty awesome, I’ve learnt that salad needs some kind of dressing or it’s not going in my mouth, and I’ve discovered that mushrooms sort of taste like meat if you pretend really hard.  But seriously, except for my slightly dried-out sprouts, it’s been a lot easier than I imagined.

Here’s days 5 and 6 to tempt your tastebuds:

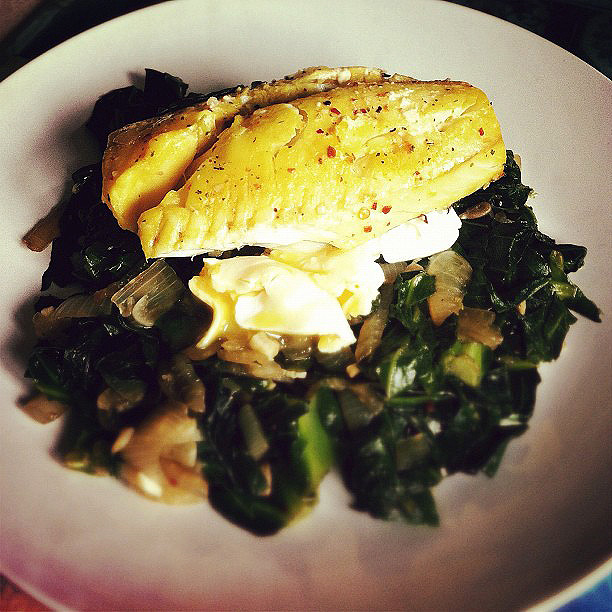
Day 5: Spring Greens

Smoked haddock with sliced greens and poached egg – 340kcal

I knew that I was gonna need something to match the strong flavour in the greens, so I went with a fillet of smoked haddock to bolster the flavours and keep things relatively balanced.

1 fillet of Smoked Haddock
125g British Sliced Greens
1/2 an Onion
2 Cloves of Garlic

1kcal Cooking Spray
1 Chicken Oxo Cube
1tbsp White Wine Vinegar
3 twists of chilli flakes

1 Egg
10g Sunflower Seeds

Place the fish on a piece of tin foil and grind/sprinkle with some chilli flakes, drizzle a tablespoon of white wine vinegar ontop and wrap the foil loosely into a parcel around the fish.  Oven cook at 180 degrees (fan) for around 18 minutes.  Make up the chicken stock as per the instructions on the Oxo packet and saute the chopped onion, greens, and garlic in a pan, with the stock until cooked.  Keep adding a little water if necessary.  Poach your egg in a pan of boiling water and serve with the fish on a bed of the greens.  Sprinkle with sunflower seeds.

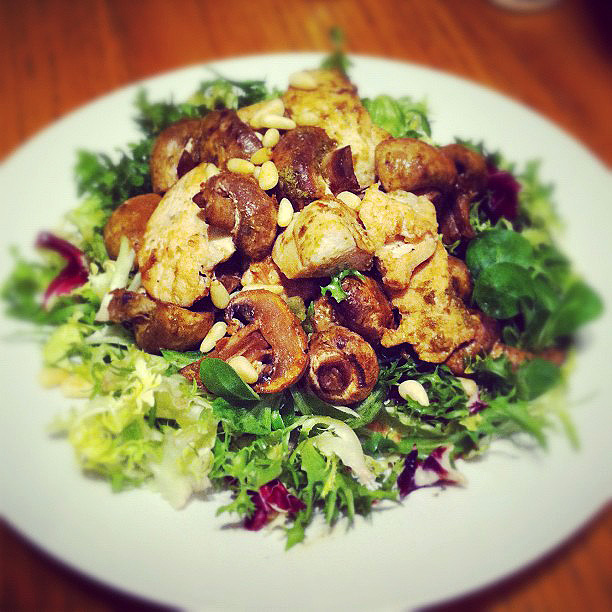
 Day 6: Mushrooms and Lettuce

Pan-fried chicken & garlic mushrooms with salad – 490kcal

I think this one may be my favourite so far, I adore mushrooms…

1 chicken breast, cubed
150g mushrooms, don’t chop too small – I halved mine
3 cloves of garlic, crushed
100g salad leaves
5g pine nuts to garnish

1 tsp green pesto
1tbsp olive oil
1tbsp white wine vinegar

1kcal cooking oil spray

Spray your non-stick frying pan with cooking oil spray (around 10 sprays should do) and on a low/medium heat, fry off the chicken and garlic.  You may need to add the occasional splash of water to stop the chicken from sticking.  Add the mushrooms and pesto, reduce the heat and cook until the mushrooms are softened.  Meanwhile, make the (very simple) salad dressing by combining the olive oil and white wine vinegar.  Serve with a garnish of sprinkled pine nuts.

Did I mention that I bought some white asparagus for next week?  *looks blankly at packet*

A Week in Vegetables (Day 3 & 4)

Posted by Lipglossiping On February - 21 - 2012

Firstly, I want to say a massive thank you for all the ideas and inspiration that you left on my last veggie post, I’m slowly working through the comments and I’ll let you know how I get on with your recipes!  Day 3 should have been the Brussels Sprouts, but I wimped out in favour of the bean variety!  It’s going well so far, partly because I’m really enjoying the “will I/won’t I like it” anticipation that comes just before tucking in!  I know it’s not exactly life-changing when it comes to dietary habits but I’m hoping that it inspires me (and maybe a couple of you!) to think about making veggies the focus of a few meals a week.

I will say one thing though, thank GOD I’m not a vegetarian… as much as I’m enjoying the green stuff, a majority of vegetables on your plate has the side-effect of making the meaty accompaniment taste even better ha!

Anyway, here’s days 3 & 4 for your delight/disgust. I’m having pancakes today because it would be sacrilege not to observe the religious festival of Jif Lemon Day 😉  Oh and incase you’re feeling nostalgic, here’s a post in celebration of today from 2 years ago.

Happy pancake-ing!


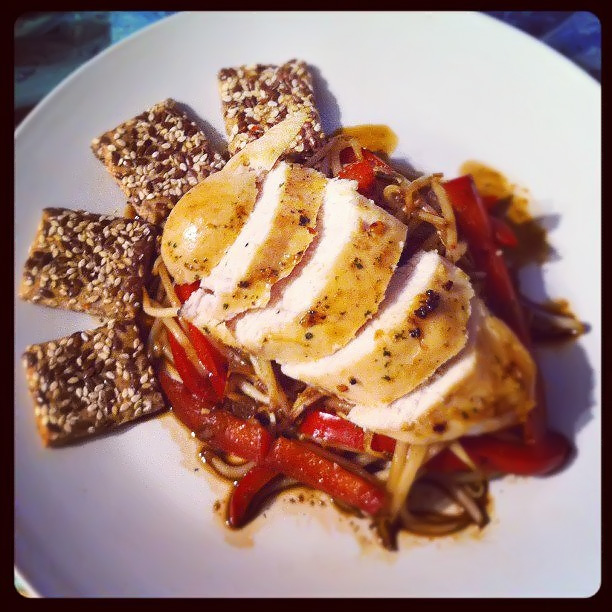
Day 3: Beansprouts

Chilli Chicken with Beansprouts and Sesame Crackers – 390kcal

A beansprout-based meal bothered me.  Should I eat them cold or stir fry them?  I’d been doing a lot of stir-frys but I wimped out of the beansprout salad option and met the idea half-way.  I cooked the beansprouts a little earlier in the day and then chilled them, it was delicious.  Possibly my favourite meal so far.  Who knew the humble beansprout could be so awesome?

200g Beansprouts
2 Spring Onioins (sliced)
1/2 Red Pepper
1 Chicken Breast

1 tsp Chicken Seasoning (I used a chilli/garlic mill)
10g Sunflower Seeds
1tbsp Light Soy Sauce
1/4 tsp Garlic Powder

4 Sesame Crackers to serve (Tesco do Poppy and Sesame ‘thins’ that are ideal)

Spray the chicken breast with cooking oil (the 1kcal stuff – you only need a couple of sprays) and season before placing it on a baking sheet in a pre-heated oven (180 degrees fan) for around 20/25 minutes until cooked.  Slice your red pepper and spring onions before lightly stir-frying them for a couple of minutes.  Add the beansprouts, garlic powder (you could use fresh but I only wanted a tiny hint of flavour), soy sauce and sunflower seeds.  Cook for a couple more minutes before setting aside to cool.  Serve with sesame crackers.

How easy is that one?!


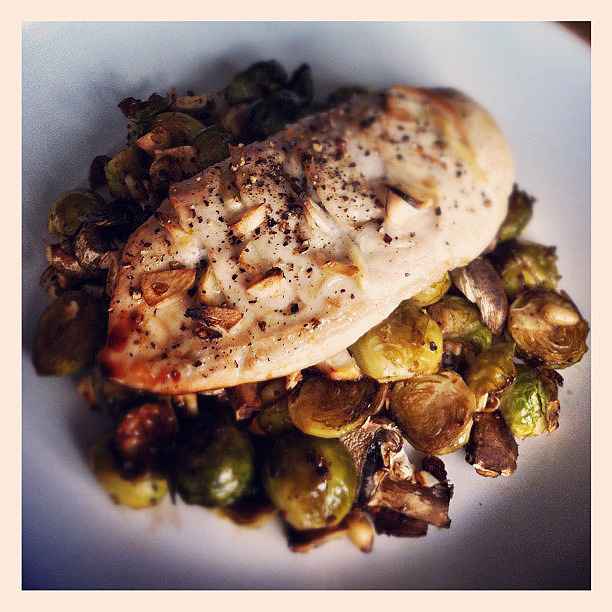
Day 4: Brussels Sprouts

Garlic Chicken with Roasted Brussels Sprouts – 470kcal

If you don’t like garlic, this recipe won’t be for you.  The combination of sprouts AND garlic will ensure you never hear from that first date again so please only opt for this one on a day that you’re either very, very alone or very, very married.

1 Chicken Breast
3 cloves Garlic (thinly sliced)
150g Brussels Sprouts (destalked and halved)
4 Mushrooms (quartered)

1 tsp Olive Oil
10g Pine Nuts
30g Parmesan Cheese
1 tsp Balsamic Vinegar

Black Pepper to taste

This one is really quick to prepare and cook as well.

Trim the ends of the sprouts and slice them in halves, ensuring that the cut transverses the stalky bit before thinly slicing the garlic.  Into a small bowl: add the olive oil, pine nuts, balsamic vinegar, sprouts, mushrooms, and garlic and mix with your fingers to ensure a good coating of oil covers the sprouts.  Lightly spray your ovenware (I use an enamel pie plate) with 1kcal cooking oil spray and arrange your sprouts on it in a single layer.  Score the chicken breast to make ‘pockets’ along its length and pop a couple of garlic slices into each pocket before lightly spraying with your 1kcal cooking oil spray.  Place both dishes into a pre-heated oven at 180 degrees (fan) for around 25 minutes or until the chicken is cooked.  Keep an eye on the sprouts, you want them to caramelise but not dry out.  As you’re using less oil than normal, they may dry out more quickly.  Sprinkle with Parmesan a couple of minutes before taking them out of the oven.

.

This one wasn’t my greatest success.  For one, I didn’t have any parmesan and substituted feta cheese – who knew that feta doesn’t like being cooked in the oven?  (Everyone except me probably).  My sprouts also dried out a little… not too much but as I was eating them, I was thinking… “could do with a glaze on these”.   The lovely Jules suggested to me on twitter that I might try cooking them in a hot pan next time, I think I might just try that and see if I can retain the roasty flavour without killing the texture.

As for the sprouts being… well, brussel (yukky) sprouty?  I can honestly say that they were improved by well over 300% when compared to boiled sprouts.  I had a couple of “slow chew” moments when I wasn’t adoring them BUT combined with the chicken, they were FINE.  Tasty if not magnificent!

What do you think of today’s recipes and are you having pancakes tonight?  Lemon and sugar or something a little more decadent?

Food Friday: Use your (wholemeal) loaf

Posted by Lipglossiping On November - 4 - 2011

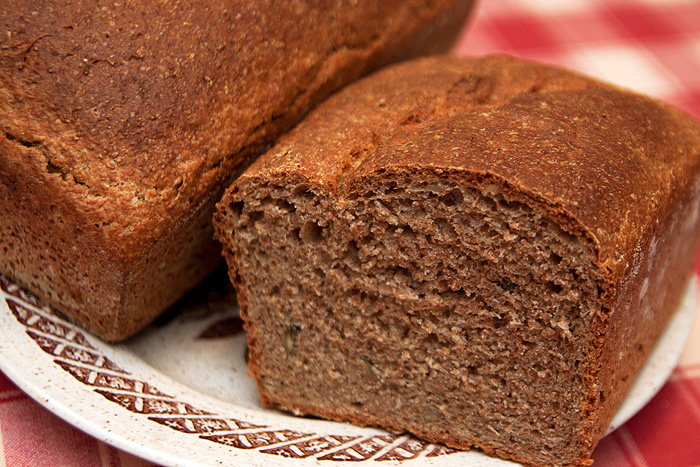
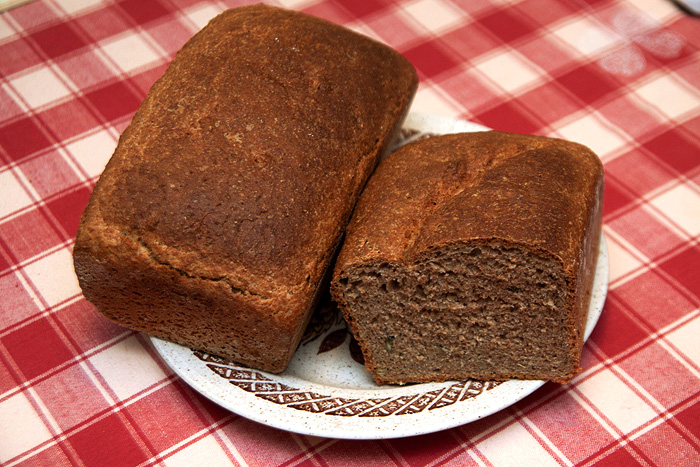
I have been practising like a demon and have finally come up with a way to make a mean loaf (or two) of relatively healthy bread.  My ambition is to get it as low GI as possible without compromising on taste.  I’m still a long way off that goal but edging ever-closer.

I don’t know if any of you are nifty with a bit of dough (and I don’t mean at the Chanel counter) but if you’ve got any tips, I’m all ears!

Wholemeal Loaf  (makes one loaf)

400g strong wholemeal flour (bread flour)
50g wholemeal spelt flour
2 tsp dried active yeast
1.5 tsp salt (can use less but expect slightly less taste)
2 tsp sugar
2 Tbsp Sunflower Seeds/Pumpkin Seeds (optional)
350ml warm water
50g melted butter
or 3Tbsp Olive Oil

1. Reactivate your yeast by stirring the yeast and sugar into your measured water.  Make sure it’s not too hot… it should be slightly warmer than tepid.  Leave for around 10 minutes, the yeast should have made the surface foamy.

2.  Combine the flours and salt together in a large mixing bowl.

3.  Add the yeasty water to the dry mixture and combine well before pouring in the melted butter/olive oil.

4.  I use a hand mixer with two dough hooks attached at this stage and mix for 5 minutes on level 3.  If you’re a traditionalist, get kneading for a good 10 minutes.  I use the hand mixer because whenever I knead by hand, I always get tougher bread.  Infact, I just bought a new hand mixer, it’s this one and I thoroughly recommend it.  I paid £18 (not inc. p&p).  Usually when sellers bump the price up like that it means that it’s temporarily out of stock.  The price should drop back down as soon as they get new stock.

6. Cover the bowl with a tea towel and place somewhere warm for ONE hour.  I put mine in the airing cupboard.

7. After an hour, turn the bowl onto a lightly floured surface and punch down to release the gas that’s built up inside the dough.

8. Give the dough a 1 minute knead/shape and place into a well-oiled bread tin.  There are lots of videos about on how to ‘shape’ a loaf.  I’m AWFUL at it.  At this stage, sprinkle in the additional seeds that you may want to add.

9. Cover again and return to warm place for no longer than 30 minutes.  I find this bread is prone to over-proofing and getting a flat top in the oven if I leave it any longer for the 2nd rise.

10.  Pre-heat the oven to 200 degrees celsius (fan oven) and whack it on the middle shelf for 45/50 minutes.

11.  Once cooked, you should hear a hollow sound when you tap the bottom of the loaf.  Allow to cool before cutting, no really… as tempting as warm bread is – cutting it too soon is death to a home-baked loaf.

.

I usually double up the quantities and make two loaves at once.  Although it sounds laborious, the actual time spent with the dough is minimal (especially if you use a hand-mixer).  This isn’t the kind of recipe you have to stand over watching, stirring etc…

The recipe above works out at around £1.04 a loaf – less if you stick to only wholemeal flour (up the quantity to 450g) and do without the seeds.  There is something very special about turning out a freshly cooked loaf of bread and watching your family come to the conclusion that they never realised that ‘proper’ bread could taste so good.

As usual, my version is kinda lazy and a little bit cheat-y.  It’s not massively low GI but the use of wholemeal/spelt and the addition of seeds means that I ‘fill up’ quicker on smaller portions and it doesn’t spike my blood sugar *quite* as rapidly as plain old white supermarket bread does.  I’m genuinely the kind of girl who could eat bread all day long and this loaf cuts very finely without disintegrating… I really get better portion control without feeling like I’m missing out.  It also tastes a 100x better.

Do you bake your own bread?


Food Friday (yes, I know it’s Saturday): Apple Pie

Posted by Lipglossiping On October - 8 - 2011

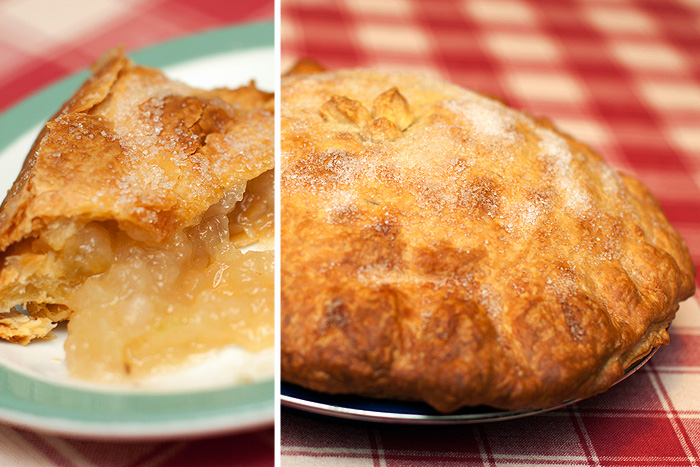
I know, I know… I should save it for next week right?  But I have a week of baking ahead of me and if I do that, I’ll have forgotten about the Apple Pie that I made this evening.  I love Apple Pie but it’s strictly off limits for me at the moment.  Poor Mr L had a particularly nasty dentist encounter on Thursday so I thought I’d cheer him up with his absolute favouritest treat in the world.

First of all, I need to tell you.  Forget about the pastry, it’s not even mine.  My Mum brought me back some ready-made French pastry rolls in the Summer and they’ve been sitting in the freezer ever since.  Yes, they were puff – I know, I’ve broken about a billion Apple Pie rules already but I don’t like waste and I couldn’t be bothered to make my own tough, not-very-nice shortcrust at gone 11pm at night.

Anyway, if you can’t be bothered either, you can buy ready rolled pastry sheets too, shortcrust or puff.  Don’t let anyone judge you.

Anyway, do you want to know the secret to making awesome pies?  It’s this.  An enamel plate.  All my pies are made on these things – apple, meat, cheese and potato… you name it, it’s been made on an enamel plate.  They cost around £2.00 and my favourite ones are made by a company called Gelert.  You need one, trust me – no more soggy bottoms.

Anyway, the Apple Pie you see in that there picture up there, goes a little something like this.

Apple Pie

4 Large Cooking Apples (eaters won’t do)
140g Sugar (whatever you’ve got, except obviously icing)
1tsp Ground Ginger (can use Cinnamon if you prefer to be a purist)
1 large handful of Sultanas

2 sheets of ready-rolled Pastry (unless you’re clever and make your own)
1 Tbsp Sugar for sprinkling

1.  Preheat your (fan) oven to 170 degrees celsius

2. Peel and core the apples before dicing them into 1/2″ square cubes.

3. Over a low heat, gently stew the apples, sugar, ginger and sultanas until the apples are just tender and you’ve created a rich, thick syrup from the sugar.  Combine well.

4. Grease and flour your pie plate to prevent sticking and lay down your first sheet of pastry into the plate, pressing gently with your knuckle to ensure there are no gaps between the plate and your pie base.

5.  Using a slotted spoon, transfer the apple mixture into your pie plate, you won’t want to use all the syrup.

6. Gently lay your top pastry sheet over the plate and fold the edges of the top pastry layer under the bottom layer and press gently into the plate edge to seal.  If you don’t like a thick crust, you can trim the edges before doing this.

7. Poke a few air vents into the top of the pie with a fork and sprinkle with sugar before placing in the oven and baking for around 40 minutes.

Enjoy!

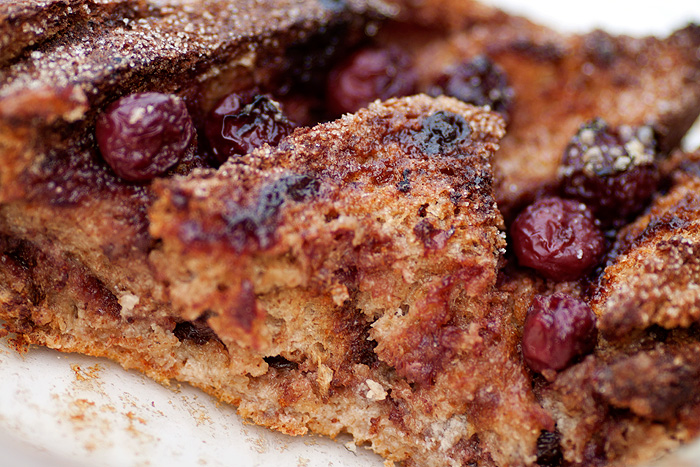
Food Friday: Luxury Bread & Butter Pudding with Cherries

Posted by Lipglossiping On September - 30 - 2011

There’s something so comforting about a hefty pudding.  Treacle sponges, chocolate mud cakes and bread & butter pudding all carry a certain amount of stodge with them and quite frankly, they beat the living crap out of anything light and wispy.  Except meringues, but let’s be honest… meringues are in a league of their own.

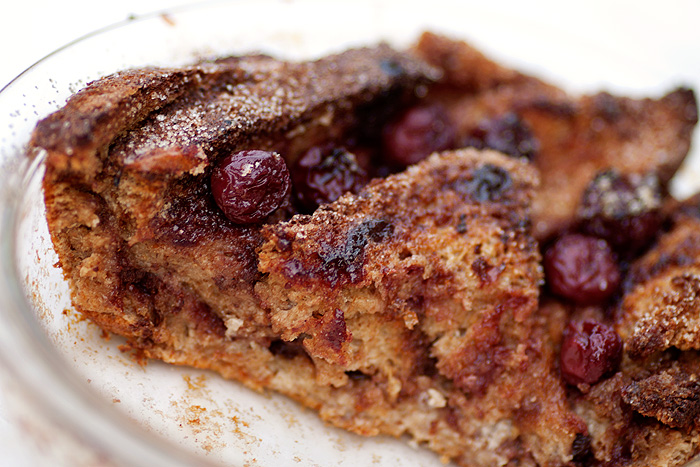
I use wholemeal bread in my Bread & Butter Pudding for no other reason than because that’s what I buy anyway.  The addition of jam and a few cherries turns this home-cooked favourite into a slightly more extravagant pud.

Luxury Bread & Butter Pudding

8 slices of bread (any kind with crusts left on)
Morello Cherry Jam (or whatever you’ve got if you’re not fussy!)
Butter

2 eggs, beaten
425ml milk
Large handful of cherries (I buy mine in a big jar from Lidl)

1 tbsp brown sugar for sprinkling

1. Butter the bread before spreading a layer of jam over each piece and cutting into triangles.

2. Grease your cooking dish well and build up the layers of bread, interspersing with cherries as you go.

3. Repeat until you run out of bread and cherries!

4. Combine the beaten egg and milk before pouring over the bread and allow to soak for a couple of minutes.

5. Sprinkle the top with brown sugar and pop in a preheated oven at 180c and bake until golden brown (around 30/35 minutes)

.

Such a simple and inexpensive pudding with a billion possible variations.  Try spreading the bread with Nutella instead of jam or throw in a handful of raisins alongside a generous glug of rum!  Adjust the quantities of egg and milk depending on how much custard you like or change up the bread to substitute plain old loaves with Brioche, Croissants or Panetone!  The possibilities are really quite limitless.

Do you have a favourite Bread & Butter Pudding recipe?  I foresee more of these on the menu as Winter draws nearer.

Cauliflower Fritters with Mozzarella

Posted by Lipglossiping On September - 16 - 2011

I bought another cauliflower this week in an attempt to get a new recipe under my belt in preparation for coming off the diet and back onto normal food.  I’ll be going the low-carb route, not the Atkins route or anything as hardcore as that, I’ll just be avoiding the “shovel as much starch, bread, pasta and rice into my mouth as possible” route.

Amanda from Beauty Blogging Blonde mentioned that she was making Cauliflower Fritters last week on Twitter and that was pretty much all the encouragement I needed.  She did send me a link to the recipe she was using but I’ve lost it, so ended up bodging something together from a few recipes I’d googled and whatever I had in the cupboards.

I need a posher name than ‘fritters’ really because ‘fritters’ rhymes with ‘squitters’ and where food is concerned, those two words should never be seen in the same sentence.

Cauliflower Fritters

1 head of Cauliflower
1 Onion, diced
2 cloves of Garlic, crushed

1 tsp Paprika
1 tsp Salt
1 tsp Black Pepper
1 tbsp Parmesan Cheese (don’t judge me, I only had dried)

3 eggs, beaten
3 tbsp plain/wholemeal flour (more if needed)

200g Mozzarella, cubed

1 tbsp oil for frying

1).  Steam the Cauliflower until tender.  I do this in a cellophane-covered bowl in the microwave with a couple of tbsp of water in the bottom.  Takes around 10 minutes of cooking time on full power.

2).  Once tender, mash the cauliflower and add the diced onion, garlic and other dry ingredients.

3).  Combine the mixture with a fork before incorporating the beaten egg.

4).  Add the flour 1 tbsp at a time, mixing well until you get a firm consistency.  You want the mixture to hold together on a spoon (just about).  You may need more or less flour depending on how large your eggs are!

5).  Add the Mozzarella and incorporate gently.

6).  Heat the oil in a frying pan on a low/medium heat.  The worst thing you can do is have your heat too high.  We need to cook the flour which means not burning the outsides!  Start low and turn the heat up as you get used to the cooking times needed.

7).  Once your oil is hot, spoon the mixture into the pan in little patties and press down lightly to shape.

8).  Leave frying (don’t be tempted to turn or peek) for a good 3/4 minutes.  If you smell burning, ignore that last instruction and remember to keep the heat LOW.

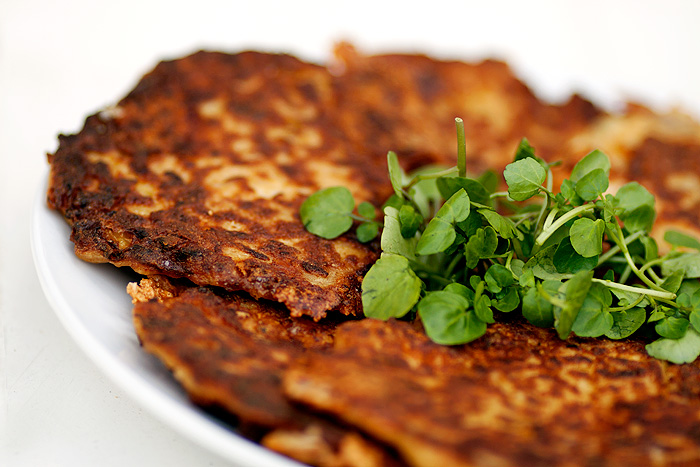
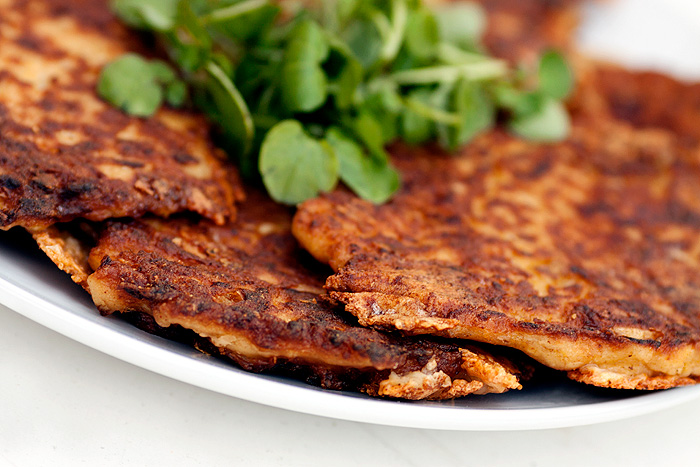
9).  Turn and cook the fritter for the same time on the other side.  You’re looking for a dark golden brown and a crispy texture – the insides will be soft with melty Mozzarella.

10).  Drain on a piece of kitchen towel and serve as a side or on their own with a salsa and salad.

.

These cauliflower fritters are ridiculously delicious and even Leila was impressed enough to attempt one.  They’re ideal eaten freshly cooked but lovely cold too (they go a bit chewy).  Best reheated from frozen in a v. hot oven.

Share your favourite cauliflower recipes with me!

RANDOM

Dear Obesity...

I bought another cauliflower this week in an attempt to get a new recipe under my belt in preparation for coming off the diet and …

Weight Watchers Friendly: Chipotle Chicken Wrap

I bought another cauliflower this week in an attempt to get a new recipe under my belt in preparation for coming off the diet and …

Make Up For Ever Aqua Cream in #19 - Pretty Purple!

I bought another cauliflower this week in an attempt to get a new recipe under my belt in preparation for coming off the diet and …

Last Chance to win a Beauty Blender!

I bought another cauliflower this week in an attempt to get a new recipe under my belt in preparation for coming off the diet and …

January Essentials - Kat Von D - True Love Palette

I bought another cauliflower this week in an attempt to get a new recipe under my belt in preparation for coming off the diet and …

ELF Eye Transformer Review & Swatches

I bought another cauliflower this week in an attempt to get a new recipe under my belt in preparation for coming off the diet and …

Ooh la la, c’est la vie, zut alors… etc. etc.

I bought another cauliflower this week in an attempt to get a new recipe under my belt in preparation for coming off the diet and …

Butter London Champers NOTD

I bought another cauliflower this week in an attempt to get a new recipe under my belt in preparation for coming off the diet and …

Entry for Tali's Brother's Grimm contest!

I bought another cauliflower this week in an attempt to get a new recipe under my belt in preparation for coming off the diet and …

Clinique Lash Power Feathering Mascara Review

I bought another cauliflower this week in an attempt to get a new recipe under my belt in preparation for coming off the diet and …

POPULAR

CLOSED: Competition Time: Givenchy Very Irresistible L'eau en Rose Perfume!

I bought another cauliflower this week in an attempt to get a new recipe under my belt in preparation for coming off the diet and …

CLOSED - Win it! The Body Shop Expert Brush Collection

I bought another cauliflower this week in an attempt to get a new recipe under my belt in preparation for coming off the diet and …

Win a gorgeous "glow" trio with prizes from Urban Decay, New CID, & Arbonne!

I bought another cauliflower this week in an attempt to get a new recipe under my belt in preparation for coming off the diet and …

Hello? Is this thing on?

I bought another cauliflower this week in an attempt to get a new recipe under my belt in preparation for coming off the diet and …

Avoid the brush off with Oral-B Pro-Expert

I bought another cauliflower this week in an attempt to get a new recipe under my belt in preparation for coming off the diet and …

Big savings on French Pharmacy brands, win my Escentual.com top picks!

I bought another cauliflower this week in an attempt to get a new recipe under my belt in preparation for coming off the diet and …

Win it! 3 EcoTools Bamboo Bronzer Brushes to win!

I bought another cauliflower this week in an attempt to get a new recipe under my belt in preparation for coming off the diet and …

FOTD Busting out of the comfort zone!

I bought another cauliflower this week in an attempt to get a new recipe under my belt in preparation for coming off the diet and …

Dear Obesity...

I bought another cauliflower this week in an attempt to get a new recipe under my belt in preparation for coming off the diet and …

Urban Decay The Black Palette - Photos & Swatches

I bought another cauliflower this week in an attempt to get a new recipe under my belt in preparation for coming off the diet and …

COMMENTS

  • Categories

  • Archives

  • Admin

  • Ads