Courgette “spaghetti”. My new favourite thing!

Posted by Lipglossiping On March - 9 - 2013

I pre-warned you earlier in the week that I’d be blogging about my new favourite thing: courgette spaghetti, and here I am!  I’ve always liked courgettes but they’re one of those vegetables that don’t really serve a huge amount of purpose aren’t they?  I mean, sure… they’re alright skewered and barbecued and they make a mean fritter but they’re not the kind of vegetable I ever “add” to other meals as a bulking ingredient.  I have to specifically plan a meal around them, and that sometimes means that I have courgettes littering up my salad box at the end of the week.

A few months ago, I bought a spiraliser.  It was an impulse purchase that in honesty, I regretted almost immediately.  When it arrived and I saw how bulky it was, my regrets deepened and I resigned it to the back of the cupboard until I’d had a chance to get my head around what to do with it.

I knew that one of the most popular dishes to make with a spiraliser was courgette spaghetti… raw.  I didn’t fancy eating it raw but it did encourage me to substitute normal pasta for a trial.  Once tasted, I was hooked!

Courgette Spaghetti_01

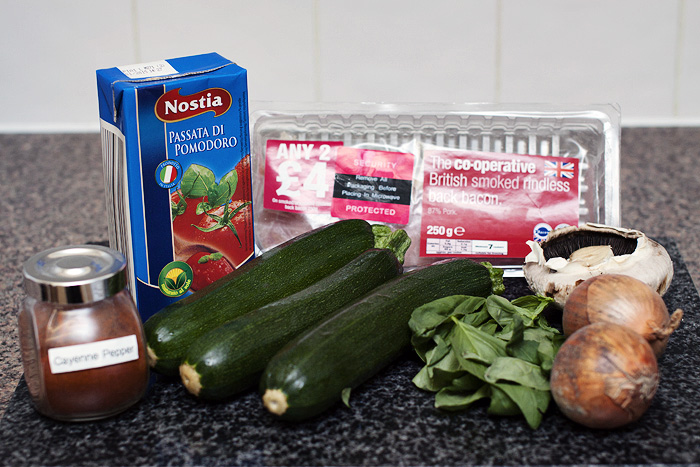
The cast of characters. You’ll need (for two people): three courgettes, fresh basil, two onions, a few mushrooms (or one big flat!), 1/4 tsp of cayenne pepper, passata.  I also used frozen peppers and frozen garlic (not shown above).  You can add some ham or bacon… as you can see, I was going to, but Mr. L decided he wanted the last two rashers saved for a bacon sandwich on Sunday morning!

Courgette Spaghetti_02

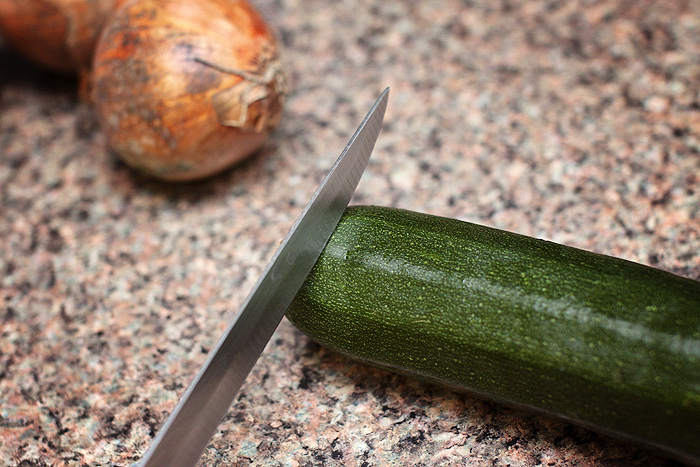
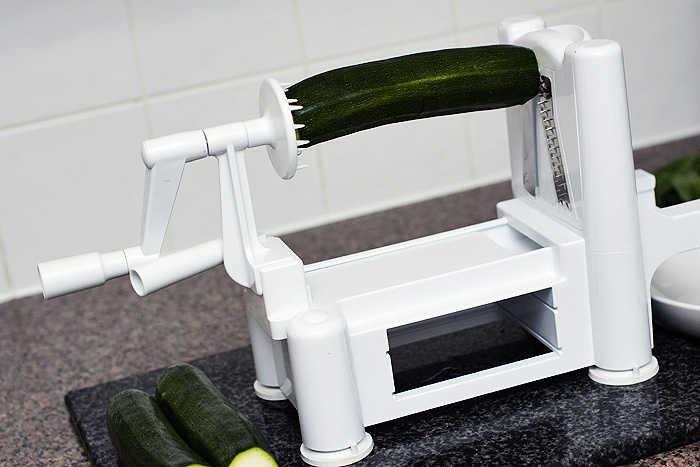
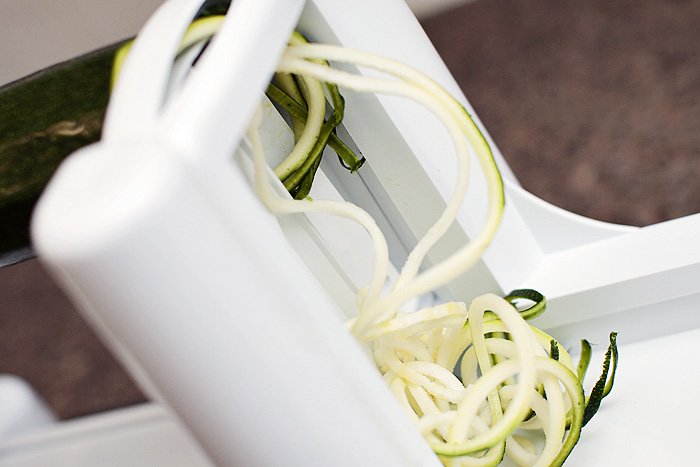
Cut the ends off your courgettes and grab your spiraliser (this one is mine).  If you don’t have room for one of these beauties, you can also buy a julienne peeler which will help get the spaghetti shape.  I have to say though, the spiraliser is far too much fun!

Courgette Spaghetti_03

Look at it in action!

Courgette Spaghetti_04

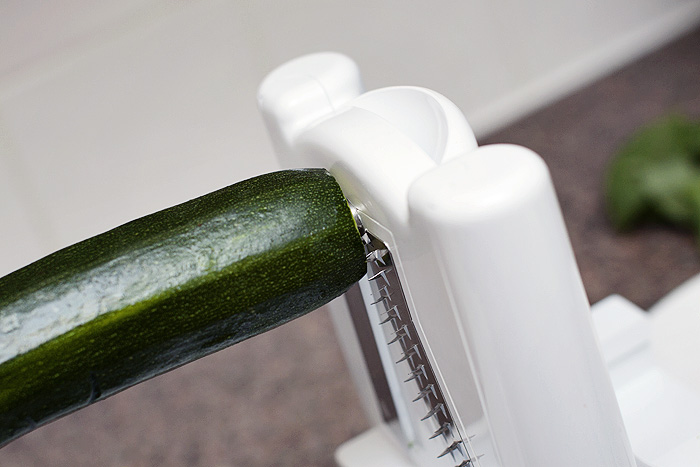
You know you want a go.

Courgette Spaghetti_05

Courgette Spaghetti_06

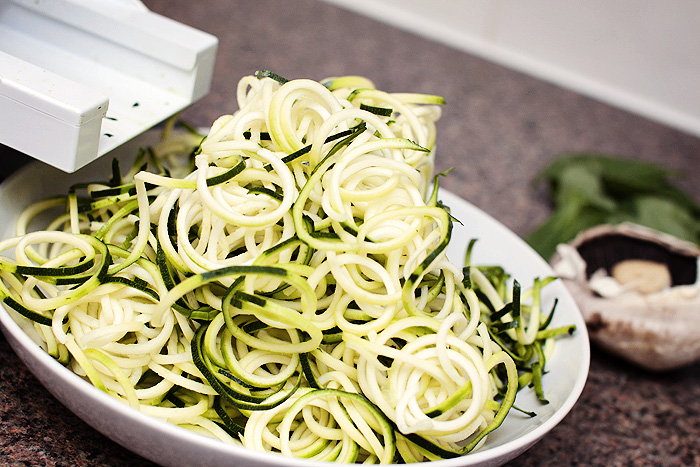
Ta-da!

Courgette Spaghetti_07

Courgette Spaghetti_10

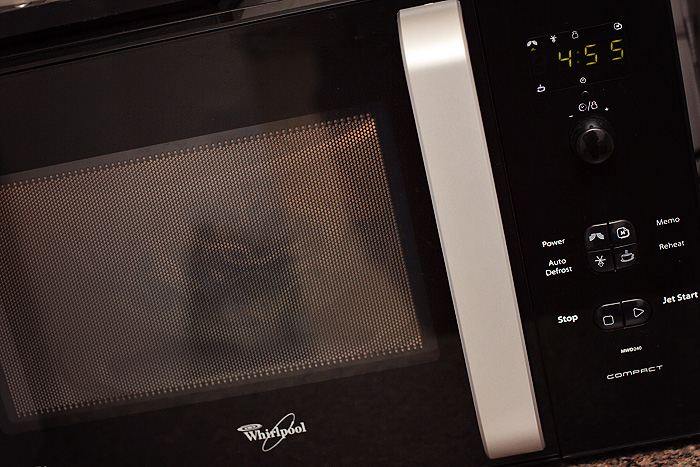
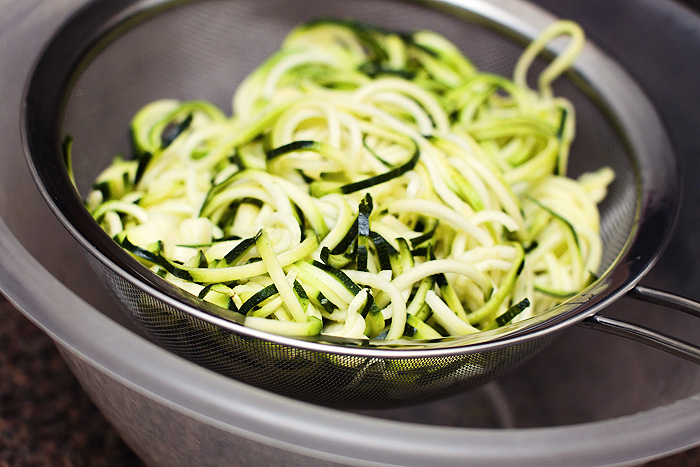
I sprinkle my courgette with a little salt and blast in the microwave on high for five minutes.  This softens the vegetable and encourages it to release some of its water content.  Once it comes out of the microwave, tip the courgette into a sieve and let it drain the excess water.  If you have a potato ricer, you could squeeze out the excess water using that.  Don’t worry too much though, if all else fails, you can cook the “spaghetti” a little longer on the hob until the excess water evaporates.

Courgette Spaghetti_08

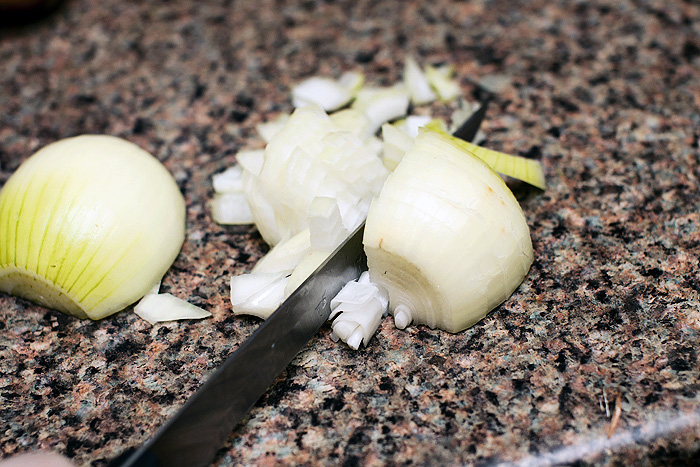
Finely chop the onion…

Courgette Spaghetti_09

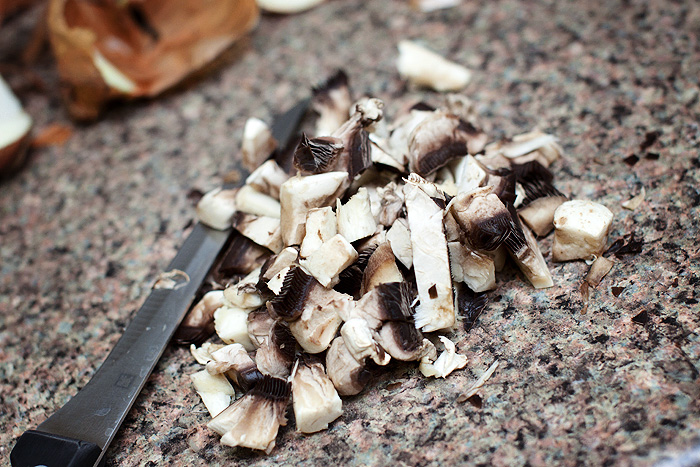
…and the mushroom…

Courgette Spaghetti_11

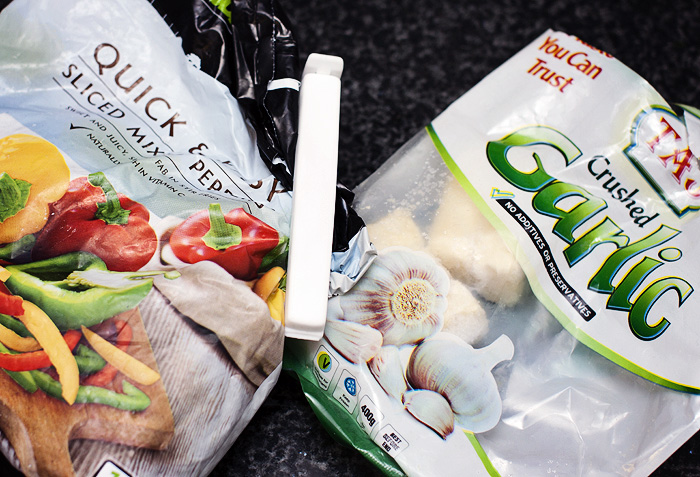
My freezer essentials include a bag of frozen peppers (how expensive are fresh?!), and frozen minced garlic that I can throw straight in the pan.  Convenience at its best.

Courgette Spaghetti_12

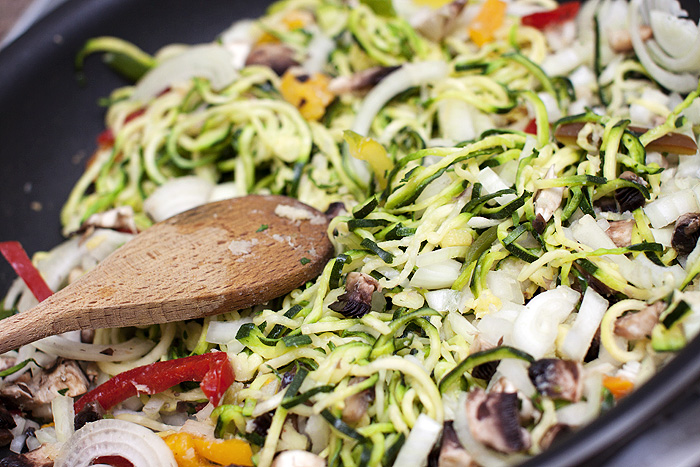
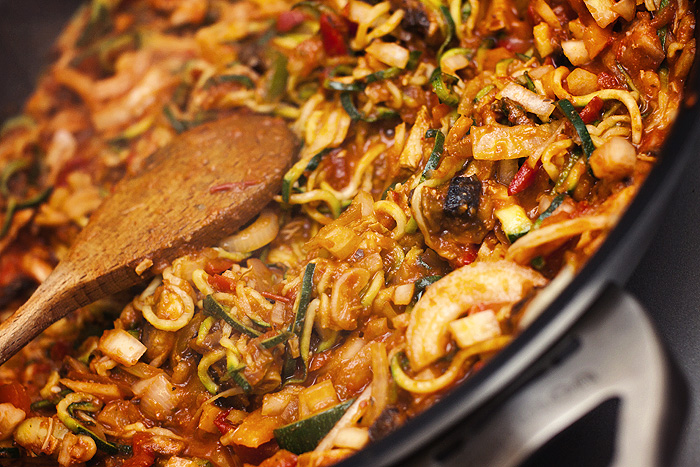
To a lightly oiled pan, add the: onions, garlic, frozen peppers, drained courgette and mushrooms.  Sprinkle over the cayenne pepper and allow to fry for five minutes.

Courgette Spaghetti_13

Pour over the pasatta and simmer gently until the liquid reduces.  Around 5-10 minutes.  Tear the fresh basil by hand and add to the pan a few minutes before serving.

Courgette Spaghetti_14

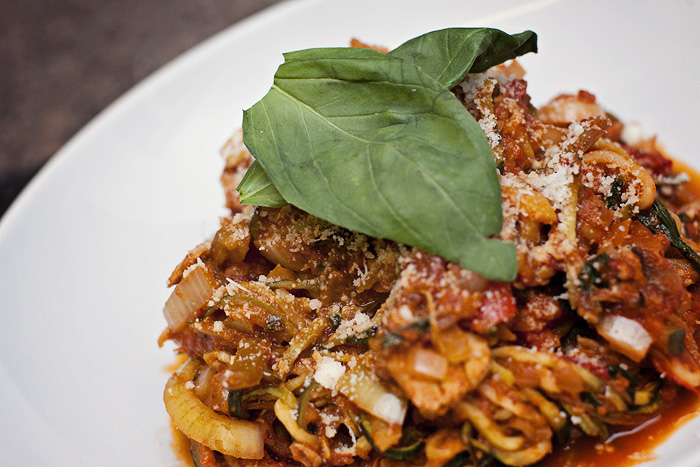
Serve with a sprinkle of parmesan.  So much fresh flavour and very filling.

It’s also a perfect dish to make on a work-night, even quicker if you buy a pot of marinara-esque sauce to throw over the top.  I’ve bought one of these to try with it next week.

But do you know perhaps my favourite thing about this dish?  The entire meal is 2 ProPoints on Weight Watchers (without the bacon), leaving plenty of points for a big chunk of garlic ciabatta or dough balls.

Have you ever made vegetable spaghetti?  If not, I dare you to try it!


Weight Watcher’s Weekly Challenge. The Mental Plateau.

Posted by Lipglossiping On March - 4 - 2013

This isn’t actually the title of this week’s official challenge.  You see, I read this week’s challenge about taking “me time” to assess your weight loss journey and it didn’t feel like something I could blog about in my own voice, so instead, I’m going to talk about what I like to call “The Mental Plateau”.

We all know about the problems with physical plateaus (wait, is the plural of plateau, plateaux?! *mind blown*) whilst on a weight-loss journey, but what about the mental obstacles that lie across our path?

Now, I’m not currently experiencing any kind of plateau, after 2 weeks of illness and takeaway-fueled recovery, my scales and my attitude are reflecting some healthy losses again but the mental plateau is my biggest problem whenever I get to a certain weight, and I’m expecting to see it raise its ugly head again at some point in the near future.

So what is a plateau?

flatlining

Well, in the simplest terms, it’s a levelling out of progress… to the extent where your weight-loss or motivation flatlines.  If it’s physical, you may feel as though you’re throwing every effort into doing all of the right things without reaping any rewards, and that can be pretty demoralising.  However, a mental plateau, in my experience, can be even more disastrous.  Mine usually hits when I reach what I consider to be an “acceptable weight”.  If I can turn sideways infront of a mirror and my boobs stick out twice as much as my belly, I’m there.  When I can see my feet in the shower without leaning over?  Get in!

It doesn’t help that when we reach that stage, weight-loss can genuinely, physically becomes harder.  They say that the closer you get to your goal weight, the harder it becomes and I’m more than happy to agree with this sentiment.  In my life, contentment has always bred laziness… like a piggy enjoying a mud bath, I’m happy to live in the moment without any thought for the bigger picture.  Inevitably, this leads to over-eating, because I genuinely feel that until something “clicks” (if it ever does), over-eating is what my psyche is programmed to do.  It doesn’t happen immediately, it’s taken over two years to put on half of what I originally lost… but it happens.  And whilst the scales are steadily climbing, my brain is still plateauing… simply not registering.

When it does finally kick into action (usually because my clothes start to feel tight), an initial reaction is anything from self-loathing to abject dismay, not the best emotions for motivation.  After a bit more wallowing (and a few more pounds on the scales), I find myself doing the “enough is enough!” thing whilst desperately trying to leap back into the saddle in blind panic before my buttons start popping.  It would be a lot more productive and easier on the emotions if I didn’t experience that mental plateau in the first place.

Lemon Portion On White

If you’re not familiar with the Weight Watchers plan, they have something called “Filling & Healthy” which is a nifty tool in your weight-loss arsenal and one that I’ve been employing on days when the motivation just isn’t there.  It works like this:

1. Pick only the foods listed as Filling & Healthy
2. Stop when you feel satisfied and not when you’re ready to burst!
3. Include 2 teaspoons of healthy oil (sunflower, olive, flaxseed, safflower or rapeseed oil)
4. Deduct the ProPoints values of any food or drink you have that isn’t Filling & Healthy from your Weekly ProPoints allowance of 49
5. Relax and don’t count!

To put it bluntly, I believe that getting fully-acquainted with the concept of Weight Watcher’s “Filling & Healthy” regime is the key to beating the future mental plateau.  And when I say “acquainted”, I mean… “overly-familiar”.  We all know that the key to losing weight (and keeping it off) is down to employing some good ol’ common-sense and their “Filling & Healthy” list is packed-full of common-sense foods.  Playing with food combinations on that list is a less taxing method of maintaining your weight when you feel that the novelty of counting points and weighing portions is wearing thin.

I like that it doesn’t do battle with what is probably just a temporary “can see my feet, so can’t be bothered to work hard!” attitude.  Instead, it lets you ride that dip in your motivation like a wave until you come back out the other side without (hopefully) having done too much damage to your hard work.

Do you suffer from the Mental Plateau?

p.s. I’ve got a lovely (healthy!) recipe that I want to share later in the week if my Asda home shop turns up today!

* I am a Weight Watchers blog ambassador and my links to their website are affiliated.  I have received no payment for this post.

Earl Grey Tea Cupcakes!

Posted by Lipglossiping On March - 2 - 2013

I may be steadfastly clawing my way back onto the healthy-eating wagon but in just the last couple of weeks, I’ve developed the most horrendous sweet tooth known to man.  My sneaky way around this intrusion into my angelic lifestyle *cough* is to fatten everyone else up instead.  Yes, I have become the ultimate feeder.

Don’t get me wrong… I’m not so saintly that I don’t taste my creations but the trick is to have one and then GET THEM THE HELL OUT OF THE FLAT.  It’s the only way I can do it, heaven forbid I still have cake in the house come night-time.  You can be sure that it wouldn’t still be there the next morning.

My latest dabble has been with cupcakes (again).  Leila has decided on the theme that she wants for her fourth birthday party in May (she’s a planner), and that theme is “ballerina”.  She wants ballerina cupcakes, which will thankfully save me a whole lot of stress because anything has got to be easier than last year’s “steam engine cake”.

And so with my raging sweet tooth in hand, I headed into the kitchen to reacquaint myself with a bit o’ cupcake nurturing.  The actual baking, I can do with my eyes closed… the icing?  Well, to be honest, I usually trowel it on with a spatula and I’m done.  I don’t enjoy the faffy bits in baking… which is probably why I’ve always preferred home-style cooking over anything more delicate.

earl grey cupcakes_01

These Earl Grey Tea cupcakes from the Hummingbird Bakery book caught my eye mostly because I’ve discovered a new-found love for Earl Grey.  I’ve been a tea-drinker for about 10-years, I used to hate it as a teenager and it was only through meeting my husband (ultimate tea drinker) that I developed a taste for it.  While he’s a simple PG Tips man, I have enjoyed dabbling in loose leafs and the clean-tasting, subtle Earl Grey has become a real pleasure.

I won’t print the recipe here for fear of getting my hands slapped, so instead, I shall link you to the lovely Laura Ashley website who are hosting a copy of the Earl Grey Tea Cupcakes recipe with permission of Hummingbird Bakery.  Incase you’re curious, it’s from their Cake Days book… the sweet-toothed girl’s bible.

The only change I made to the original recipe was to use loose leaf tea instead of teabags, which I steeped in a cup with a tea infuser.

earl grey cupcakes_02

You may have noticed that my icing didn’t go to plan.  I got a phonecall mid-bake and when I returned to the kitchen, my scales had reset themselves!  I don’t think I put quite enough icing sugar into the mix but seeing as these were going to my Mum and Dad, I knew they wouldn’t mind my collapsed swirls!

Actually, if anyone has a failproof frosting recipe, I’m all ears… I’m not a huge fan of the HB one (which generally makes too much for 12 cupcakes).

earl grey cupcakes_03

Either way, the flavour of the cake is beautiful with just a hint of bergamot to lift the sponge, it’s very spring-like and delicate without being perfume-y.

earl grey cupcakes_04

Are you planning on baking this weekend?  How would you make “ballerina” cupcakes? Throw all your cupcake/icing tips at me, I’m gonna need them!

Weight Watchers Weekly Challenge #2 – Planning Your Meals

Posted by Lipglossiping On January - 11 - 2013

Well, it’s Thursday and I’ve stayed on plan this week.  There’s been a couple of times that I’ve sneaked into my weekly PP allowance (an allowance you have in addition to your daily allowance – best reserved for treats/night outs, “emergency points” if you will) but on the whole, I’ve stuck steadfastly to my PP per day limit.  Talking of limits, after Monday’s weigh-in (I lost 3lb), my PP allowance has dropped from 30PP to 29PP, something to simultaneously cheer and grumble about.

This week’s challenge has been all about keeping track of what you’re doing and how you’re sticking to the plan.  And for me, it was a very easy one….

You see, I always plan my meals a week in advance… I have to, it reminds me when my belly rumbles at 3pm that I’ve got such-and-such dinner for tea… which is only an hour or so away so putdownthosebiscuitsrightnow.  It also allows me to use my PP effectively, and ensures that I include enough healthy and filling foods into my diet to keep the hunger pangs away.  Planning and a little forward thinking really is key to Weight Watchers in my experience.

So here’s what my weekly plan has looked like (and the meals that have gone with, thus far)

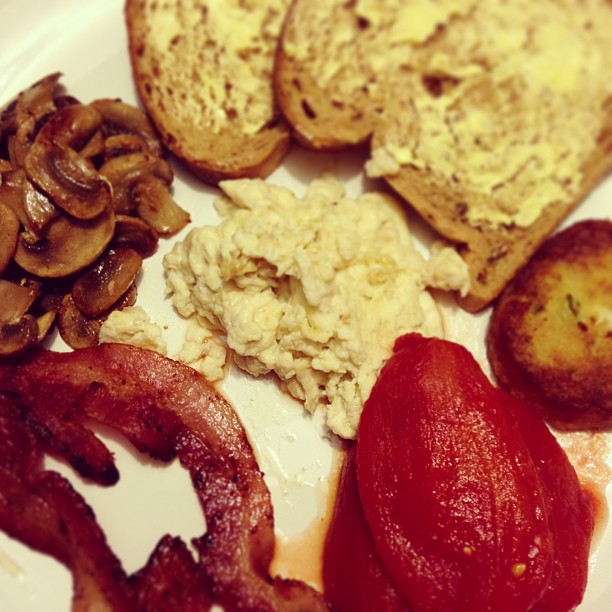
Monday: Bacon, Scrambled Egg, Tomato, Mushrooms, Bubble & Squeak patty, Bread – 10PP – Not bad for a fry up!

c71165fc582e11e2815722000a1fa518_7

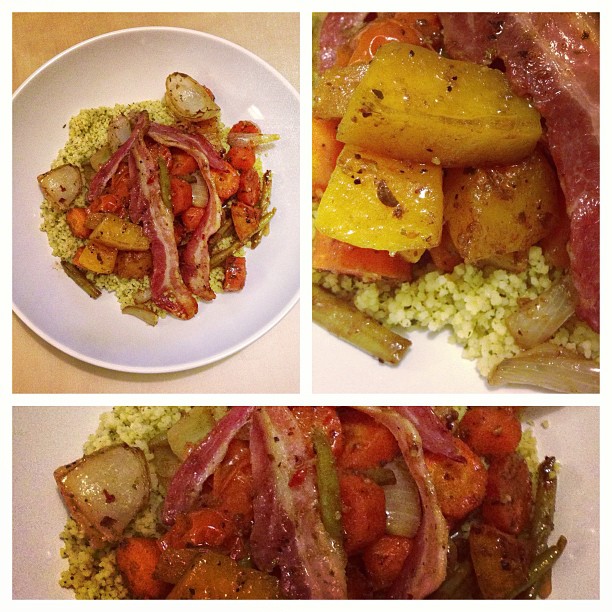
Tuesday: Balsamic roasted vegetables with streaky bacon and cous cous – 10PP – I didn’t expect to really like this one but it was probably my favourite!

balsamic roasted veg on cous cous weight watchers

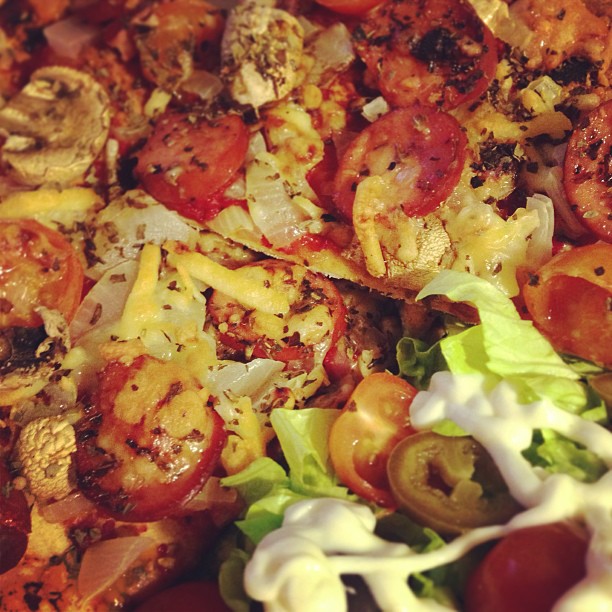
Wednesday: homemade pizza (garlic sausage, tomatoes, onion, basil, mushrooms, grated cheese) with salad – 13PP – Lovely, the homemade thin crust was 8PP on its own but LUSH.

06ac93185a9011e2948222000a1f9307_7

Thursday: Sausages, onions, carrot/swede mash, butternut squash, yorkshire puddings – 13PP – One of my favourites but I’m still searching for the perfect lowfat sausage! Oh and a word to the wise, Asda Smart Price Yorkshire Puddings are 1PP each, you’re welcome.

sausage yorkshire weight watchers

Friday: Tuna melt in a wrap with salad – 11PP

Saturday: Leek and potato gratin with blue cheese and bacon – 11PP

Sunday: Spinach and Quark Cannelloni – 10PP

My instagram page features all my main meals and if you use the hashtag #wwfooddiary, you should find many more dishes, snacks and treats to inspire from other instagrammers.

So, as you can see…. I’m not really a baked salmon on a bed of air kinda girl which, to be fair, is probably why I’m following the Weight Watchers plan in the first place.  Having said that, I’ve bought some frozen coley portions, asparagus, and lemon that doesn’t come out of a bottle in an attempt to not eat sausages every day next week.  You know I would if I could.

So far, the plan isn’t proving to be remotely difficult but then again, I am used to it and have sussed out LOADS of shopping tips to ensure that I make the clever choices when it comes to filling my basket, and my belly.  It’s Mr. L’s birthday on Sunday (21 again) so we’ll be going to the cinema and out for a meal at some point next week… we also have an afternoon champagne cream tea booked in to celebrate.  This week was easy… next week is going to be my NEMESIS.

To be continued… (back to the makeups tomorrow!)

Do you make a weekly meal plan?  What’s been your favourite healthy and filling meal this week?

* I am a Weight Watchers blog ambassador and my links to their website are affiliated.  I have received no payment for this post.

What’s in my fridge? No, really….

Posted by Lipglossiping On January - 7 - 2013

When bloggers do a “what’s in my bag”, or a “what’s on my bedside table” post.  We all know that this stuff isn’t really in their bag right?  Their bedside table doesn’t actually look like a Sense and Sensibility set at any other time than when the photo was taken for the blogpost.  I mean, I love candles but I don’t feel the need to sleep with one inches from my face or keep a collection of classic books to rival the British Library’s back catalogue adjacent to my elbow.  “Look how messy it is!” they proclaim.  Hahhahaha.  No.

Where’s the clicker? (remote controls to you normal people) the snotrags, the scrunchies that you wouldn’t be seen dead in outside of 1992?  It’s an illusion.

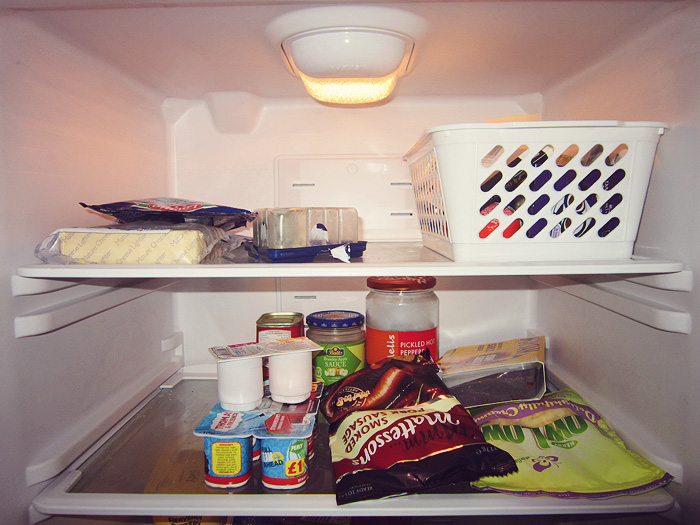
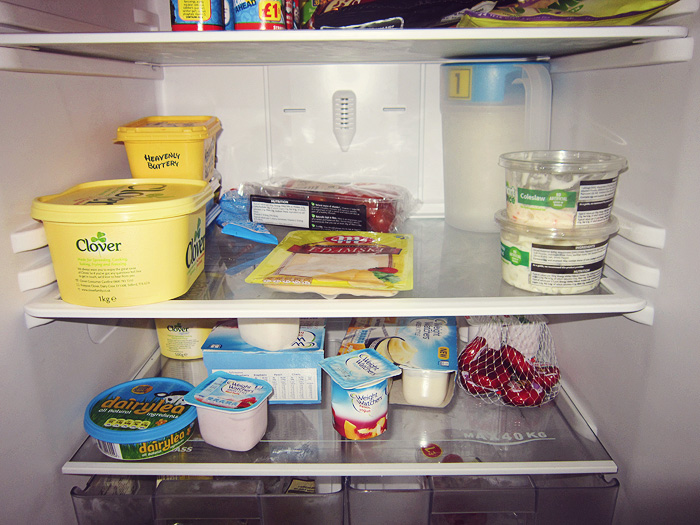
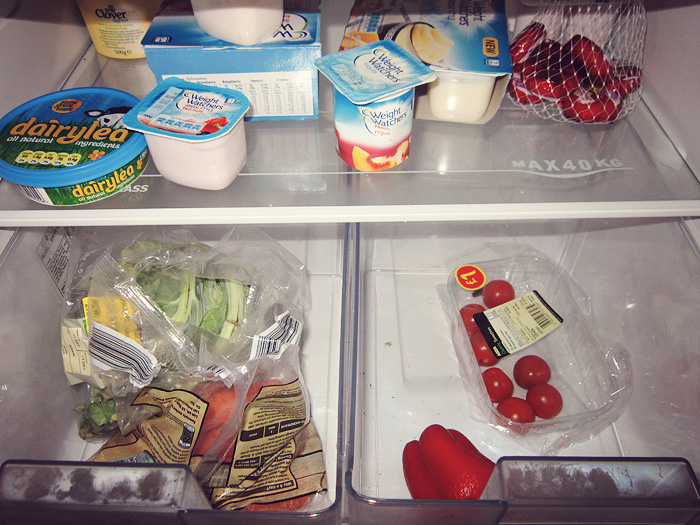
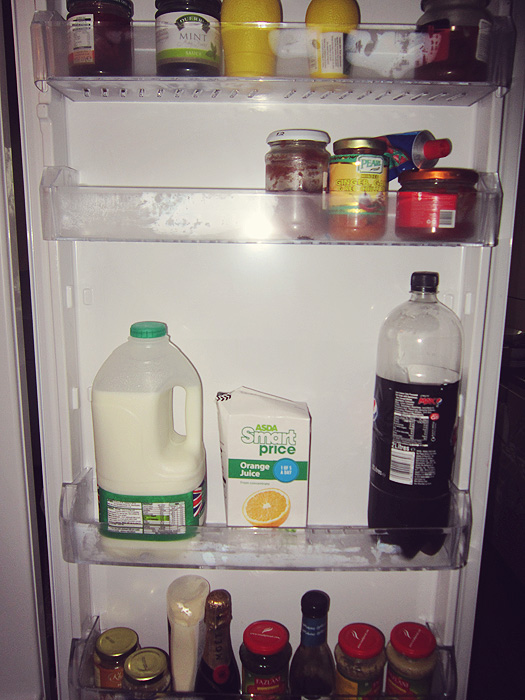
Which is why I was a little bit nervy when my first Weight Watchers challenge turned out to be photographing the contents of my fridge post-Christmas.  Of course, I did what any normal person would do and took out the two Quarterpounder Feasters (microwaveable burgers), and the Pepperami.  But what you see in the photos below is not an illusion.  It was also quite bare considering the Big Day had not long passed, I guess that accounts for the 6lbs I managed to put on over the festive period.

What's in my fridge?  No, really....

What's in my fridge?  No, really....

What's in my fridge?  No, really....

I swear those yogurts were not planted there by a Weight Watchers crack team

What's in my fridge?  No, really....

So, what have we got here then?  A crap-ton of garlic, coriander, ginger, madras etc. type pastes… because they can turn nothing into everything.  Some tired looking vegetables, many yogurts, leftover coleslaw, a tin of corned beef (it’s easier to slice cold!), mattesons sausage, the chocolate/treat container (shh), butter-esque spreads, and a bottle of mini champagne in-case something nice happens one day.

The thing that surprised me looking back at the photos, is this… considering how little there is in the fridge, there’s an awful lot of cheese in there.  We’ve got: cheddar, parmesan, dairylea, lowlow grated, blue, edam slices, and babybel.  Just how much cheese does one poorly-stocked fridge need?

So why am I showing you the contents of my fridge anyway?  Ladies, the challenge from Weight Watchers HQ was simple

This week we want you to sort your fridge by hiding all your high PPV foods.

Store that Stilton, move that muffin and put all these temptations into containers or drawers that are hidden away.

Turn all the leftovers  you can into tasty low ProPoints values meals and share one recipe you’ve made.

I’m not storing my Stilton!  Stilton is a bleedin’ lifesaver when you’re trying to create tasty-but-virtuous meals thanks to its potency.  The reality is, you only need to use a little bit to really lift the flavour of something… and that’s what I’m going to show you in my “leftovers” recipe below.  In-case you were wondering, the mattesons sausage totally got stored.  I also went through my freezer and gave my stash of beef mince to my Mum who picked me up a few packets of turkey mince on her next food shop.

Anyway, the recipe…

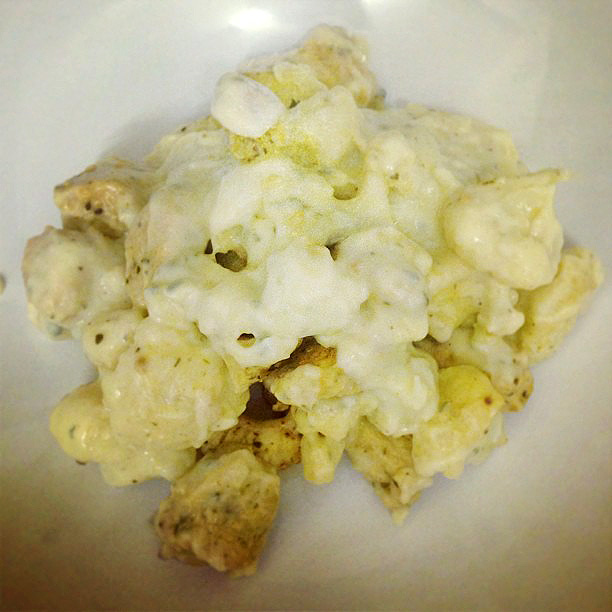
Cauliflower, Turkey, and Blue Cheese Bake – 10 ProPoints Values

62940da054fa11e2890a22000a1fbc9a_7

Now, I know it looks a bit like baby vom and at the very least needed a sprig of parsley artistically placed somewhere but believe me when I tell you that it tasted better than it looked.  I’m no Smitten Kitchen when it comes to cooking but this was pretty yum for a weight loss friendly, fridge-rescue mission.  I do have one confession to make though… I stole the turkey to make it from my Mum’s fridge, hers was (and still is) heaving!

1 head of cauliflower, broken into florets
15g butter
15g plain flour
140ml semi-skimmed milk
50g blue cheese
200g roast turkey meat, pulled into pieces
black pepper to taste

1.  Steam the cauliflower until tender and transfer into a baking dish.

2.  Make the roux by melting the butter in a saucepan on medium/low heat.  Once melted, quickly stir in the flour before adding the milk – a little at a time until you have a creamy sauce.

3.  Crumble and add the blue cheese to the sauce, keep stirring until it melts and then remove from the heat.  Grind a little black pepper into the sauce if you wish.

4.  Add the turkey pieces to the baking dish and pour over the blue cheese sauce.

5.  Pop under a hot grill until the top begins to darken.

The rich flavour of the blue cheese and the unadulterated creaminess of the sauce makes this meal seem far naughtier than it is and I felt no guilt when I logged on to the Weight Watchers website later in the evening to track my day’s progress.

How’s your fridge looking in the gloom of January’s dull presence?  My first food shop since Chrimbo came on Friday and I must say, it’s looking a lot healthier this week!

* I am a Weight Watchers blog ambassador and my links to their website are affiliated.  I have received no payment for this post.

5 days on the Purifyne Beautifyne Juice Cleanse…

Posted by Lipglossiping On November - 19 - 2012

I’m not your classic party girl… but if I were, I’d be panicking right about now.  You see, December is the most traditional of party seasons, that time of year when you’re really not supposed to wear the same dress twice.  And as thankful as I am for a red carpet-void lifestyle, I’m even more thankful for the fact that I don’t have to embark on strict beauty rituals to maintain an appearance fit for public consumption.

So why the hell did I agree to trial a Beauty Juice Cleanse for 5 days?  Well, because I had massive bloat, felt like a spotty teenager, and wanted a kick up the backside toward behaving more healthily again.

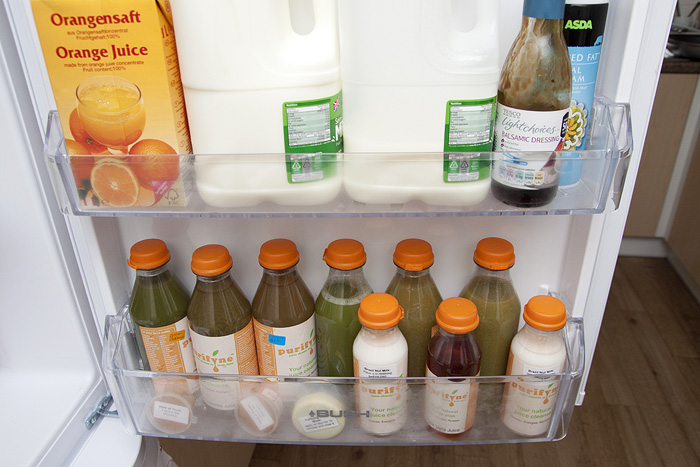
Purifyne Beautifyne Juice Cleanse

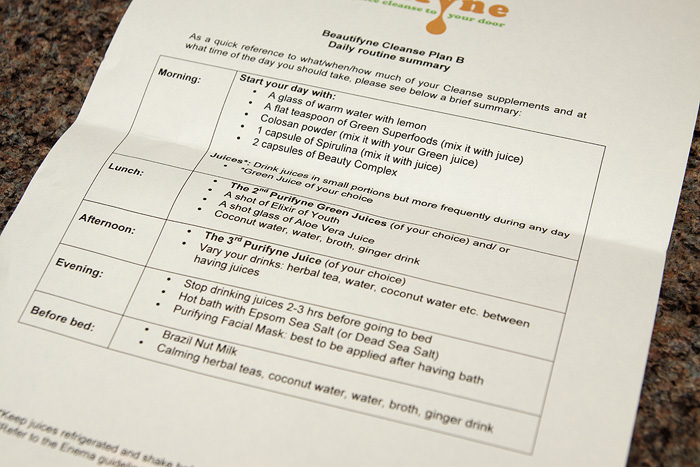
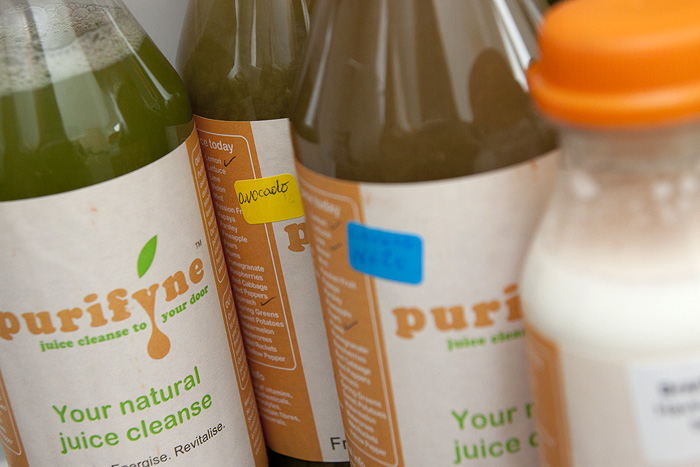
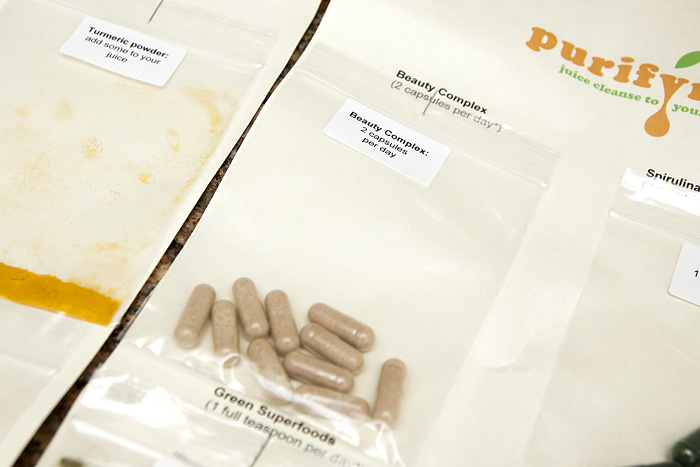
Almost everything is provided on the plan, the juices (and supplements) arrived by early-morning post and were still cold on arrival thanks to a well-insulated cool bag and a nip in the air.  I eyed them suspiciously, I’m of the firm opinion that rarely does anything green actually taste pleasant.  I was proven both right (and wrong), as you’ll soon discover.

The morning ritual consisted of starting the day with a barrage of powders, capsules and warm water that tasted suspiciously of sub-standard supermarket lemons (my fault) before consuming the first of the day’s three Purifyne juices.  The Colosan powder ensures that you purge the waste efficiently whilst taking on the benefits of the juices.  Unless you know your tolerance for herbal laxatives, start small and build your way up.  And don’t stray too far from a toilet at first.  Trust.

Purifyne Beautifyne Juice Cleanse

I continued to sip at my juices throughout the day, alternating them with filtered water – by the end of day one, I would have robbed your granny for a Pepsi Max.  I can honestly say that I didn’t feel hunger throughout the 5 days of the plan.  Not once.

But don’t confuse that for one-second with “not wanting to eat anything” because as your granny was getting back on her feet, I’d have knocked her back down again for the Greggs sausage roll in her handbag.  Infact, on day 2 and day 4, I had to put myself to bed early because I was quite the grumpiest of baggages without a square meal inside of me.

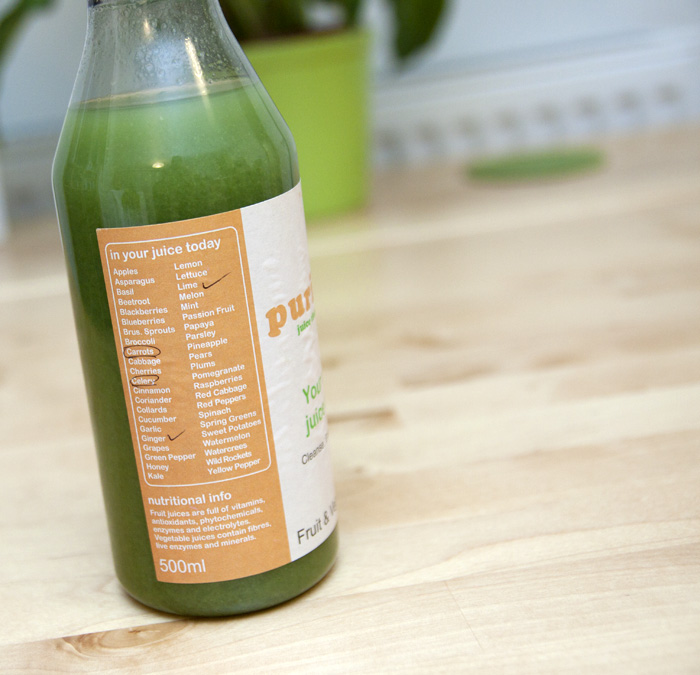
Having said that, with the exception of one… the juices were good.  Hilariously, out of all of them, it was only the very greenest of juices that I couldn’t stomach (there’s a picture of it toward the bottom of the post).  I ended up pouring it down the sink, I just couldn’t deal.

Purifyne Beautifyne Juice Cleanse

I must have gone into ketosis at some point between day 3 and day 4 because I felt a little shaky and light-headed on the morning of day 3 and recognised those symptoms from the Cambridge Diet – however, this isn’t a “diet”… not at all, and I definitely suffered less carb withdrawals (headaches etc.) on this plan.

Afternoons involved taking a beauty “shot”, of a substance quite hopefully named “elixir of youth”, and do you know – it was delicious!  Unfortunately, I had to follow that up with a shot of Aloe Vera juice, which… I could only get down my throat by holding my nose and praying for instant sinusitis.

Purifyne Beautifyne Juice Cleanse

One of the most enjoyable aspects of the Purifyne Beautifyne Juice Cleanse is the wonderful excuse for a bit of pampering.  Every evening, I bathed in Dead Sea salts whilst sporting a hideously unnattractive mud mask.  Creature from the Black Lagoon much?  You could have thrown in a bit of seaweed and I’d have been dodging harpoons left, right and centre.  I felt so completely relaxed (and slightly wobbly) after pulling the plug each night that I was more than happy to head to bed with my final drink of the evening, Brazil Nut Milk.  Not quite a hot chocolate… but refreshing nonetheless.

Purifyne Beautifyne Juice Cleanse

Day 4, the penultimate day…. was a strange one.  I felt SO ready to eat normal food, but I was also just starting to feel the benefits of four days of juice injection.  Mr L told me that my eyes looked sparkly.  I wasn’t sure if he’d caught me remembering what a KFC tasted like or whether I was actually reaping the benefits of all those vitamins, either way – he was kind enough to notice that I was looking more perky than usual.  Of course, I weighed myself every morning… I wasn’t going to, but I couldn’t resist.  I lost a total of 8lbs over the course of the five days.

I also put 4lbs back on within 72hrs, but then I didn’t follow the “aftercare” plan and I was well aware that a lot of what I’d lost would have been water, which pops straight back on when you start eating refined carbs, sugars, salt etc.  But anyway, I didn’t do it to lose weight… hell, this juice cleanse isn’t even about that.  The Beautifyne Juice Cleanse offers the opportunity to “enhance your beauty” through chlorophyll-packed Green Juices and carefully selected supplements.

Did it?

Well, I’ll let you be the judge of that.

Purifyne Beautifyne Juice Cleanse

I will say that my spots and blemishes healed remarkably quickly compared to normal and I felt that my “lush-flush” (a.k.a diffused redness across my nose/cheeks) seemed less angry.  I also think that you can actually see I’ve lost half a stone in the before/after pictures – even if it didn’t stay off for long…

The plan is cleverly-devised, simple to follow and well-supported.  Any queries I had over email were answered within the hour and I was also provided with a daily email alert reminding me how to stay on track and get the most from the experience.  My only complaint is that I would have liked to have been provided with an “in preparation” shopping list so I could have been ready with things like fresh, organic lemons/epsom salt/additional drinks.

Ultimately, would I do it again?  Well, if I had the money and was told that I’d be wedged between Watts and Mendes for a couple of pap shots, I’d be chugging back the “elixir of youth” shots in a heartbeat.

I definitely felt better for it but I also won’t pretend that I skipped around sipping at my pantothenic acid, folic acid, carotene and choline-rich juices like Mary Poppins’ cheerier sister.  I snarled on more than one occasion.  I’m also divorced now 😉

The 5-day Purifyne Beautifyne Juice Cleanse costs £345 and works well to hand-hold your way through what is, after all, quite a serious detox.  For more advice, you can talk to the guys behind the cleanse on Twitter and Facebook.

* press sample

Food Friday: Christmas Chutney!

Posted by Lipglossiping On October - 26 - 2012

Before I start, I want to give a big shout out to Franky for not only providing the recipe, but also for completely inspiring me to take a chance on something I’d never attempted before.  I can’t tell you how much fun I had making the chutney and filling the flat with the delicious scent of Christmas.  And let’s not forget the intense satisfaction I get from opening the cupboard to check on my little jars of slowly-maturing chutney… something that I find myself doing more often than is strictly necessary!

What can I say?  I am a smitten-kitten for chutney-making… a process which feels almost soulful in its approach.  Jars full of genuine goodness, a whole lot of instinctive-cooking (the best kind), and just a touch of the crafty bits that I usually suck so badly at employing.  Chutney needs a little while to mature, so if you’re thinking of giving it a go for Christmas presents… I’d say get on it this weekend!

Just reading Franky’s Christmas Chutney recipe got me in the mood for the holiday season.  The list of ingredients alone had me whistling Jingle Bells before I’d reached the end of her post.  So be warned, I accept no responsibility if you’ve got the Christmas tree up and decorated by the time you reach the bottom of this page.

First things first, you’re gonna need some jars.

You can beg/borrow or steal empty jars from friends and family or you can do what I did and head for the value ranges at the Supermarket.  It’s horribly wasteful and I did feel very guilty knowing that I was buying perfectly good food with the intention of wasting the contents but I don’t intend to make a habit of it now that I’ve caught the chutney-making bug.  I hereby promise to wash and save all my jars in the future.  However, if you’re like me… I don’t mind sharing that the Asda Smart Price Sweet Pickle jars are pretty good for the job – the labels soak off cleanly in a few hours (hot, soapy water a must), they’re not too big AND they’re only 24p each.

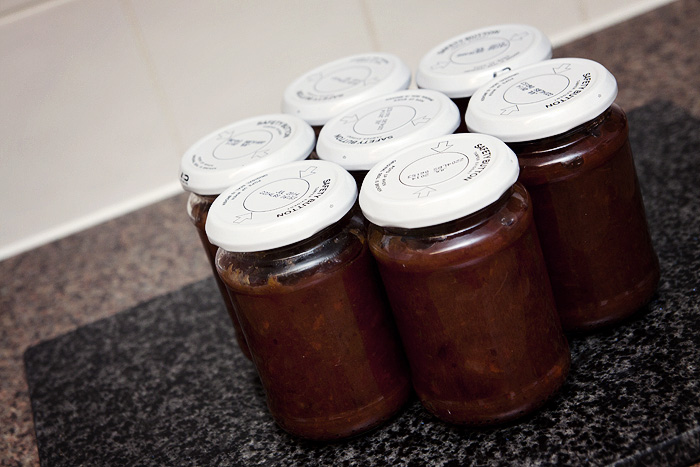
From Franky’s recipe below, I was able to fill 7 of them.

You will need:

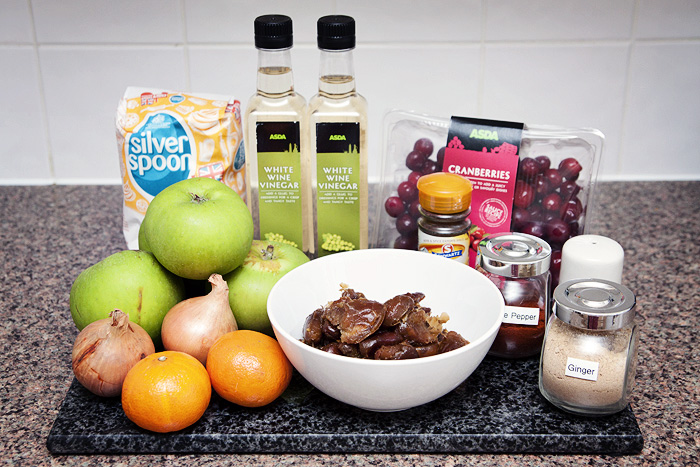
~ 750g cooking apples, peeled, cored and chopped small (for me, that equated to around 1kg unpeeled apples)
~ 1 medium onion, peeled and roughly chopped (I used two small onions)
~ 500g fresh or frozen cranberries, thawed if frozen (I used 1x 350g pack of frozen because of the expense)
~ 250g soft pitted dates, each date cut into 3 (I soaked dried dates overnight in boiling water and used around 300g)
zest, pulp and juice of 2 clementines/satsumas (I got bored of “zesting” after 30 seconds, so I liquidized the bastards)
~ 400g caster sugar
~ 1/2 teaspoon ground cloves
~ 1 teaspoon ground ginger
~ 1/4 teaspoon cayenne pepper
~ 500ml white wine vinegar
~ 2 teaspoons Maldon salt or 1 teaspoon table salt

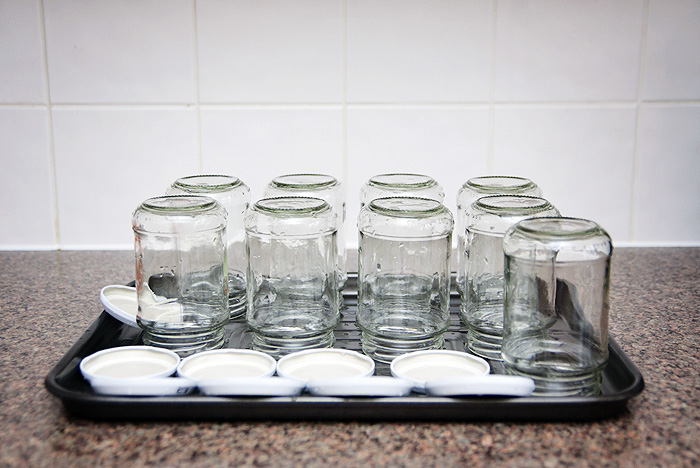
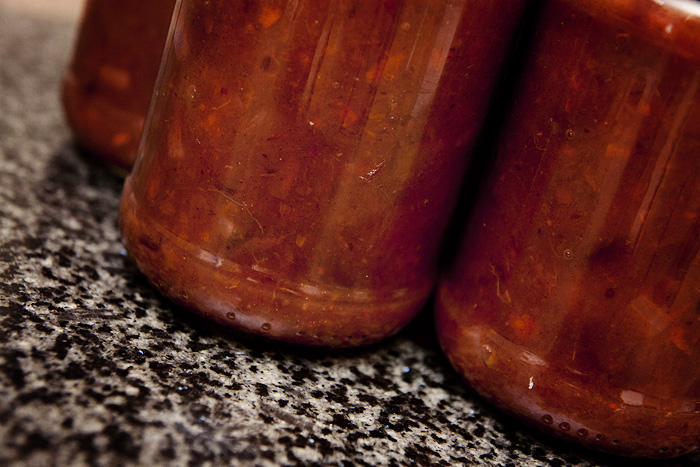
The jars.  You’ll need to wash and sterilise – this is less daunting than it sounds.  For sterilising, simply arrange the (still wet) jars on a baking tray like this and leave to dry in a 150 degree celsius oven for around 30 minutes.  Don’t do this until you’re almost ready to fill them, they should still be warm when you spoon in the chutney to avoid cracking.  Top tip:  If you have jars with safety (pop up) lids, you can get these to depress by filling the jar, screwing the lid on tightly and then inverting the jar once.  Tip the jar back up the correct way and as it cools, the “button” should slowly invert back to its “safe” position.  Neat huh?

Ok, enough about jars…

Make yourself a big cup of tea and start peeling/chopping.

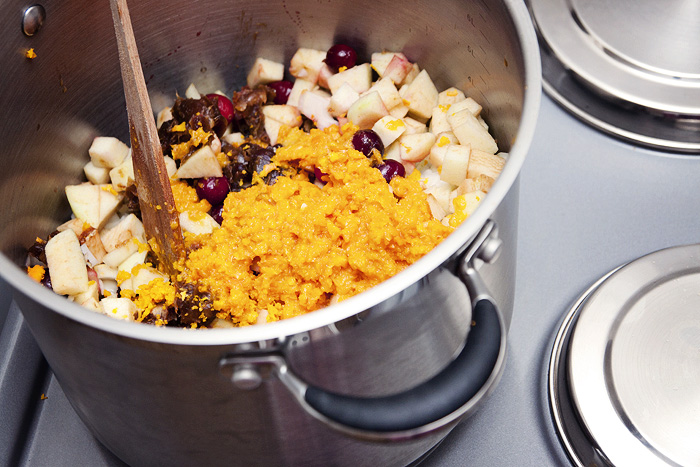
1. Place the apples, onion, cranberries and dates into a large pan.

2. Zest the citrus fruit over the top, squeeze in the juice and then scrape in the pulp.

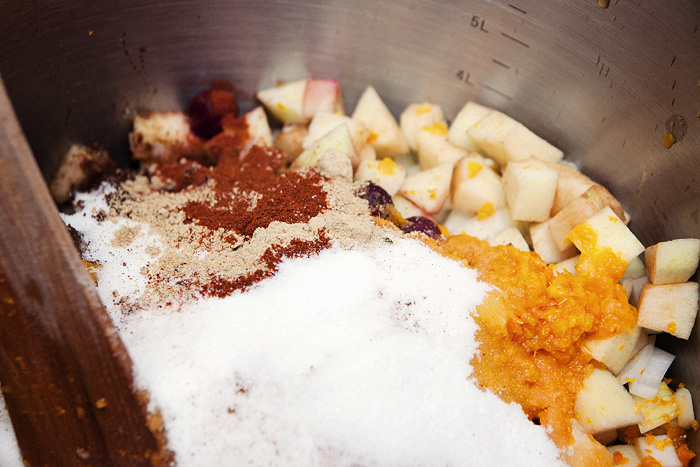
3. Add the sugar and all the spices before pouring over the vinegar and sprinkling in the salt.

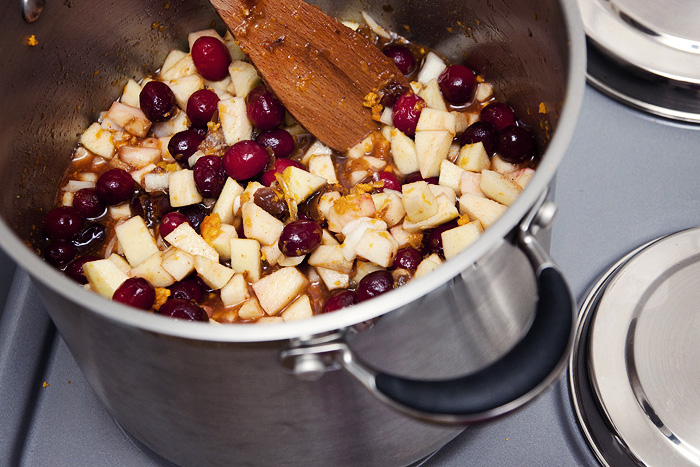
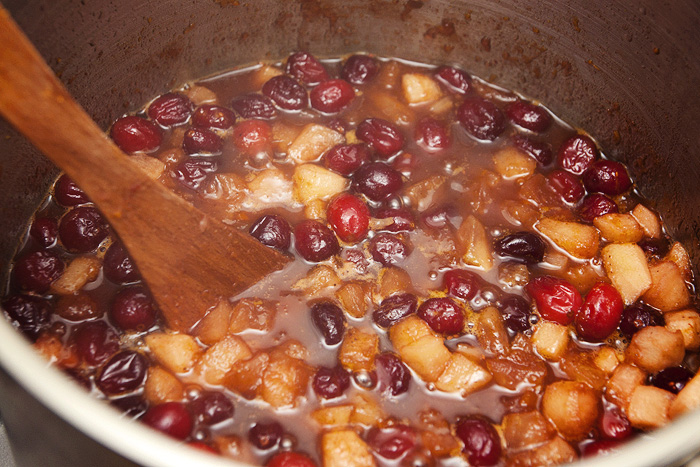
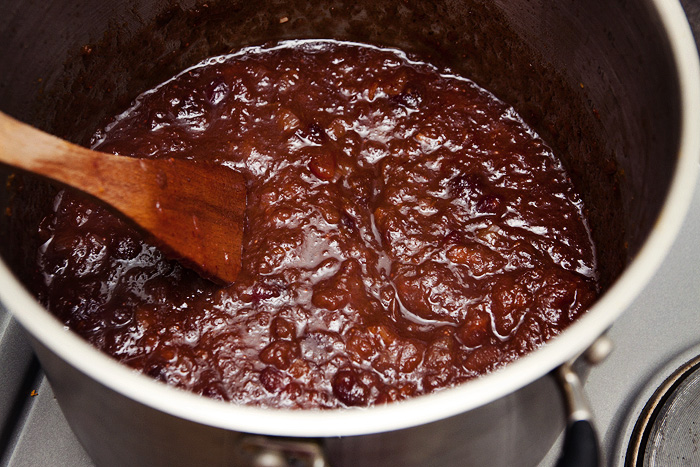
4. All that remains to be done is to give it a good stir, turn on the heat, bring to a boil, then turn down the heat and let it bubble, uncovered, for about an hour or until it has become a pulpy mass.

5. Spoon into your warm, prepared jars and seal.

The chutney can be made up to 2 months before using {or giving}. Indeed, the longer it has to ‘mature’, the better. It should be stored in a cool, dark place for up to a year. Once opened, store in the fridge and consume within one month.

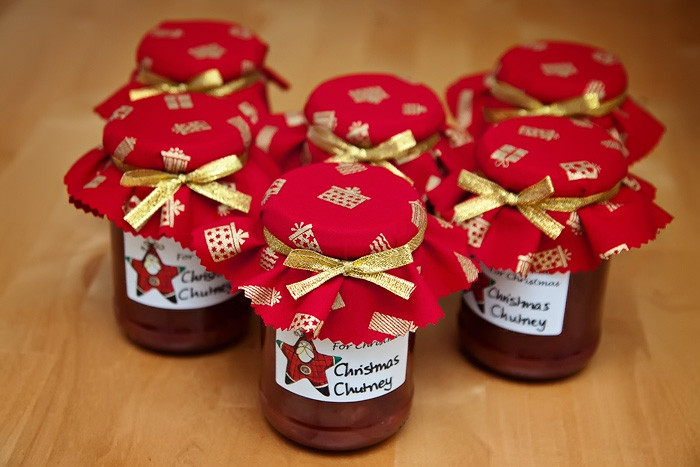
In terms of cost – each filled jar worked out at under £2 – including all decoration.  Not bad huh?  The more you make, the more cost-effective the process.  I wish I was crafty/savvy/clever enough to make all my own Christmas presents – it gives me so much pleasure… but for now, these are going to make great “topups” for the pressies that I’ve already squirreled away.

What do you think?  Will you give Franky’s recipe a go?

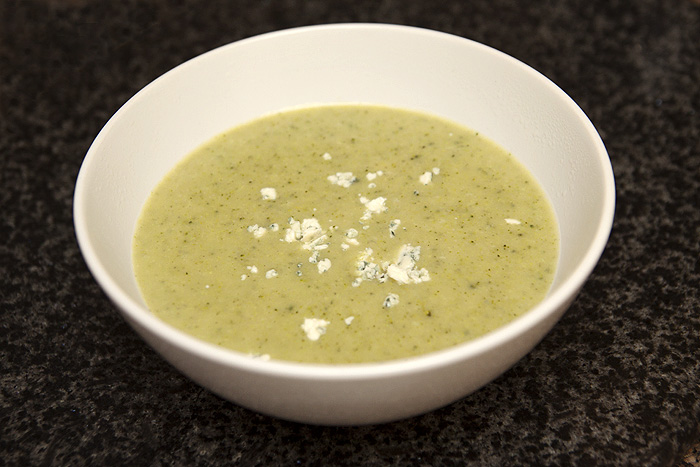
Food Friday: Broccoli & Blue Cheese Soup

Posted by Lipglossiping On October - 12 - 2012

If you’re looking for an Autumn-warmer that’s both versatile and nutritious, then you need look no further than good ol’ fashioned home-made soup.  It’s the kind of meal (yes, you CAN have soup for a main meal) that practically cooks itself and tastes even better the second time around.   I usually cook a batch of soup late at night, let it cool, then pop it in the fridge in the morning – we rarely have soup on the same day that I cook it, I generally feel that a good soup needs a day or two to mellow and intensify in flavour before it’s ready for serving.

I’m an advocate for simple, unfussy food.  I like cooking, no… I love cooking just so long as I don’t have to do anything that requires the patience of a saint.  The same with baking… as soon as I see any mention of meticulous decorating or sugarcraft, I close the cover on the book – the finesse of cooking, just doesn’t appeal to me.

With that in mind, today’s recipe is a hearty, if not meaty soup that has been really popular in our household lately.  Except with Leila.  It’s green you see, and Leila doesn’t trust anything that’s green.

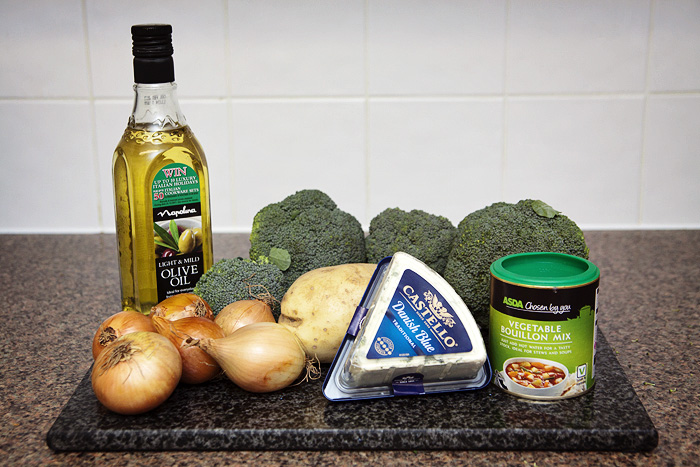
One of the best things about this particular soup is that you only need a handful of ingredients to prepare it.  And trust me, despite the lack of content, there is a surfeit of flavour.

Broccoli & Blue Cheese Soup (makes around 3L, serves 8 – enough for freezing)

Olive Oil for frying
5/6 small onions (3 medium ones)
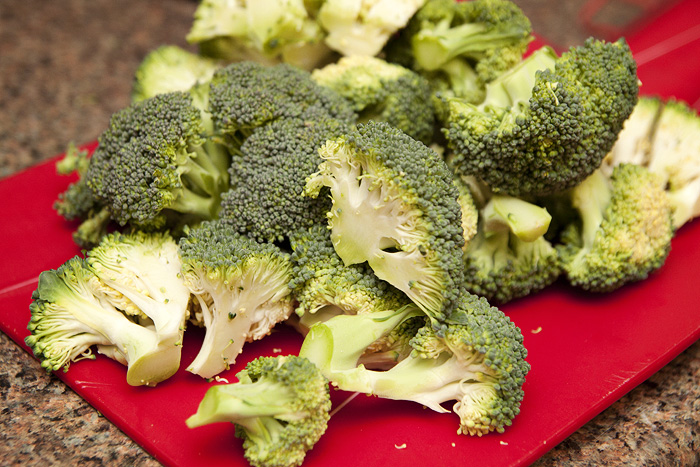
2 heads of broccoli (about 700g worth)
1 large potato (killer jacket sized)
2L of vegetable stock (I use a Bouillon)
100g blue cheese and a little more for crumbling (1 normal sized packet will do it)

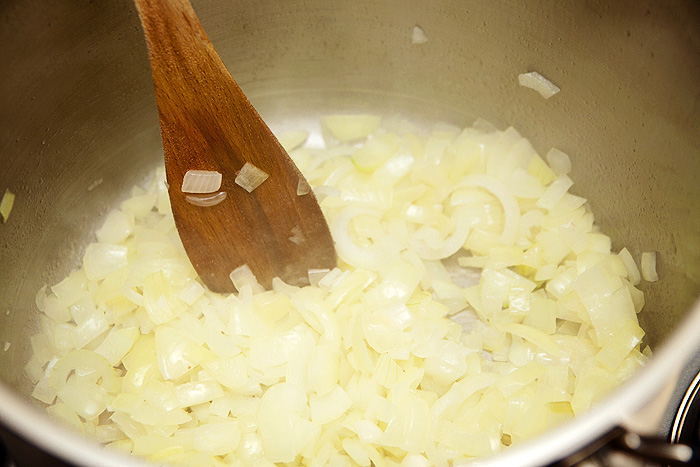
1. Chop and fry the onions in a little olive oil (use a stockpot) for this.

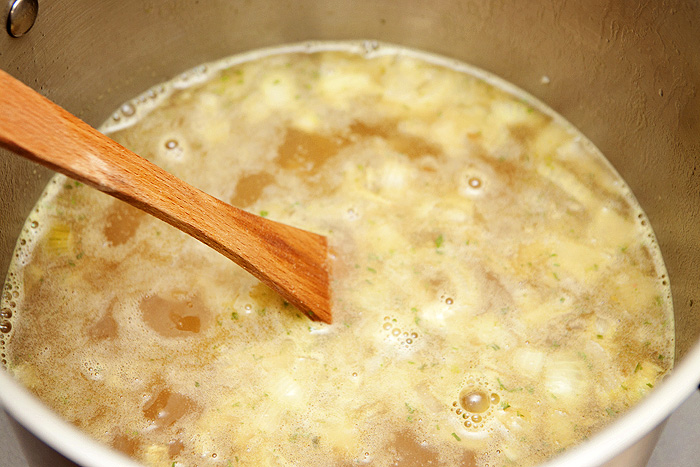
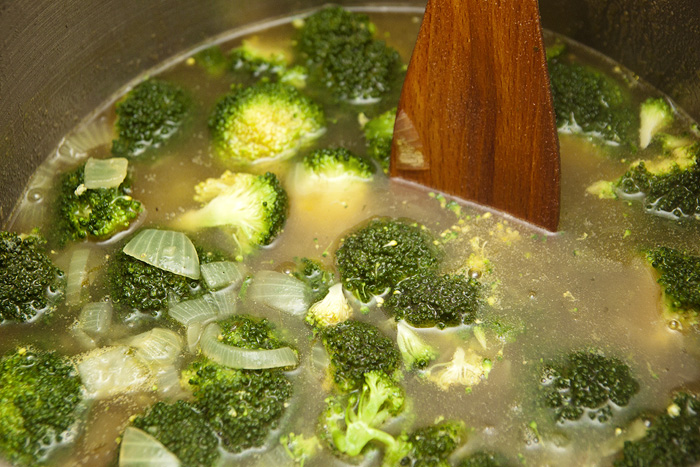
2. Peel and dice the potatoes, make up the stock and add to the stockpot (I used 8tsp of bouillon to 2L of boiling water).  Simmer for around 10/15 minutes or until the potatoes are tender.

3. Roughly chop the broccoli (the smaller you chop, the easier it will be to blend later) and add it to the simmering mixture.  Allow to cook for a further ten minutes.

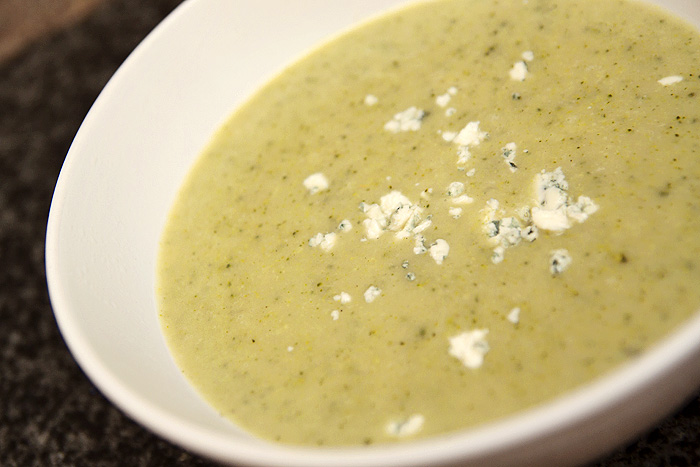
4. Crumble the blue cheese into the soup and stir gently until melted.

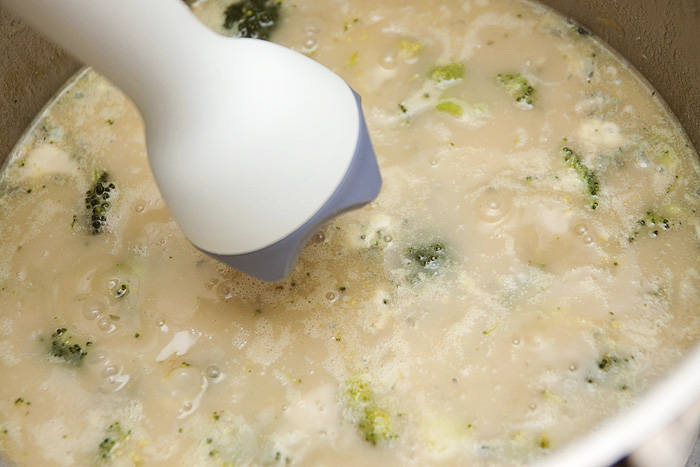
5. Grab your hand blender and whizz the mixture until smooth.

6. That’s it!  How unfathomably easy is that?
Some pictures of the process…

Sooooo good with fresh bread (homemade of course!).

Especially good with more fresh bread than you know is healthy for you and a little swirl of double cream – but that’s between you, me and the carbs.

What’s your favourite Autumn soup?

Food Friday: Strawberry Muffins

Posted by Lipglossiping On September - 28 - 2012

Having moved out of a hoarder’s paradise, it’s been interesting to discover just how many of my mother’s ways I’ve managed to pick up over the years.

The one trait that I can’t afford to have inherited is wastefulness. I don’t mean the big things (how harsh am I sounding on my Mum?). I just mean that over the years, the number of things that were bought and never used/eaten up made an impression on me.

Every week, I make it my mission to clear the fridge of anything lurking at the back. Frittatas are great for leftovers, slow-cooked soups are also brilliant. The latter being easily freezable for another day, important criteria when your meal plans are pretty tight.

So, this week… it was a whole punnet of strawberries that I’d completely forgotten about. Leila adores fruit… but is a fickle little madam, her tastes change weekly – and this had obviously been a don’t-like-strawberries-anymore week.

Fine.

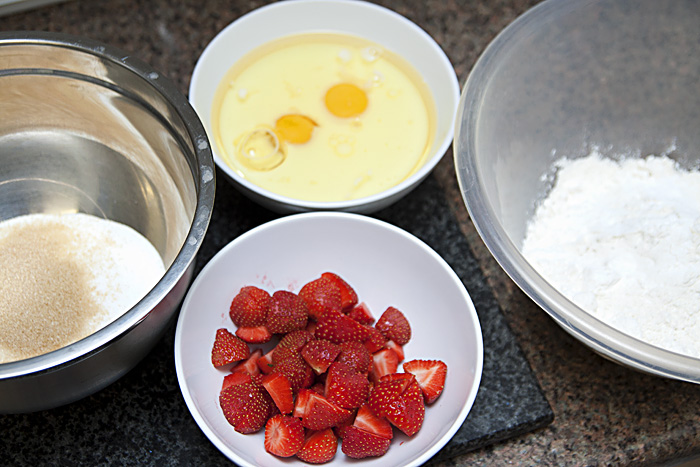
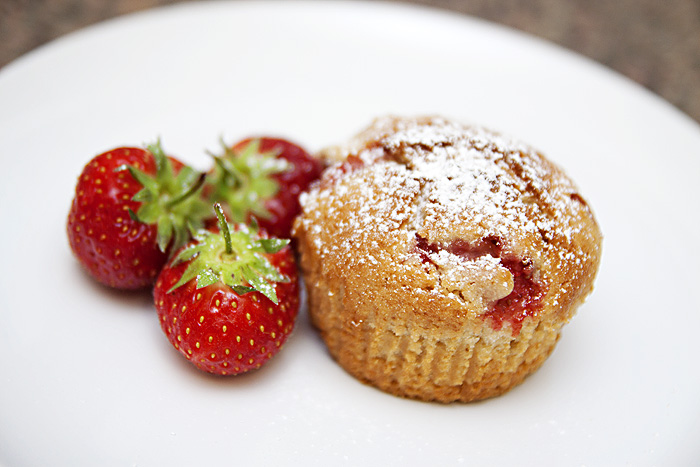
I made muffins.  They’re quick, easy, taste amazing, and freeze beautifully. Sorted. Here’s the recipe incase you ever find yourself with a strawbs glut. Perish the thought.

Strawberry Muffins – makes 12

375g plain flour
2tsp baking powder
150g caster sugar
170g chopped strawberries
2 medium eggs
150ml milk
150ml oil (I usually substitute half for apple sauce)

Heat the oven to 190 degrees celsius (170 degrees for a fan oven) and prepare your muffin cases/tin ready for baking.

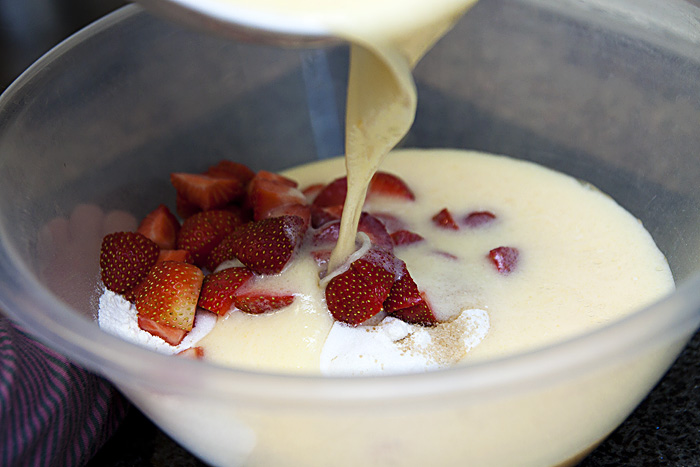
Add the flour, baking powder and sugar to a large bowl.  Drop the chopped strawberries ontop.

In a separate bowl, lightly whisk the milk, eggs and oil (apple sauce) before pouring over the dry mixture.

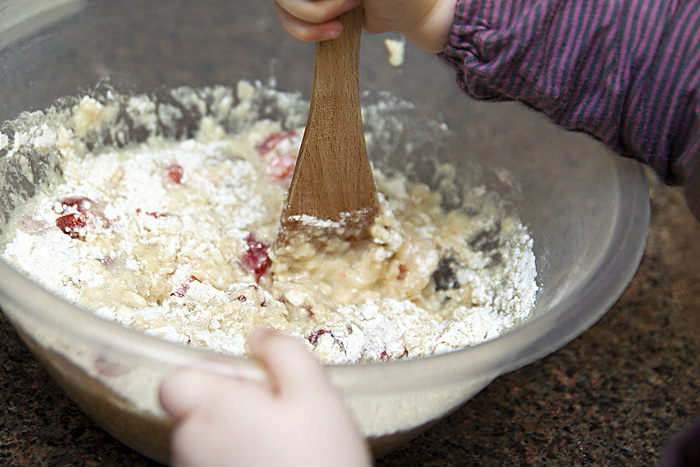
With a large spoon, mix until *just* combined.  It doesn’t matter if you still see a few specks of flour, the secret to good muffins (cough) is to never overmix them!

Spoon the mixture into your muffin cases/tin and bake in the oven for around 20 minutes.  Check on them regularly, yours may need longer – mine took nearly 30 minutes on the middle shelf before Leila oddly decided that, she did, infact, like strawberries again.

Enjoy!

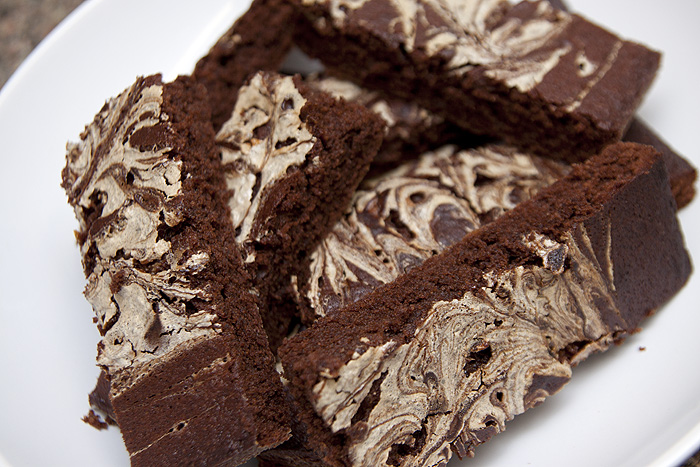
“Fluffy” Chocolate Brownies anyone?

Posted by Lipglossiping On September - 10 - 2012

I know many people think that chocolate brownies are one of the most over-hyped cake(y) substances known to man.  That and macarons.  And cupcakes.  Probably also whoopie pies.

Killjoys.

Although in fairness, I’m inclined to agree on the macaron front, I mean wtf are they all about anyway?  They’re like suped-up communion wafers that weld themselves to the backs of your teeth while simultaneously scouring your soft palette so fiercly, you can’t consume a hot drink for a month without whimpering.  Sure, they look pretty but I ain’t shallow.  Much.

But brownies… A good chocolate brownie is heavenly, and if you think they’re overrated, I’d hazard a guess that you’ve been buying yours from Costa Coffee for too long.

I’d also like it to be known that I’m squarely in the fudgy-is-best camp when it comes to brownies.  If I wanted a “cakey” brownie, I’d go buy a fucking cake.

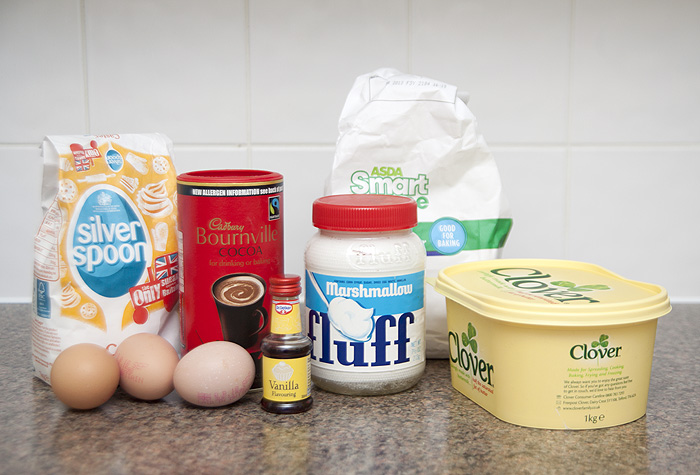
Anyway, I found a jar of slightly-out-of-date Marshmallow Fluff that I’d bought purely for the novelty factor and promptly forgot to use, so I googled for some recipes but didn’t like the sound of anything that was coming up on the search.

Instead, I decided to make a batch of my favourite brownies, omit my usual chocolate/fudge pieces and marble some swirly Fluff into the baking tin instead.

For the Brownies (makes 12 – use a smaller tin or double the quantities for a 30cm long tin)

140g  butter, softened
190g caster sugar
3 medium eggs
50g cocoa powder
50g self-raising flour
1/2tsp baking powder

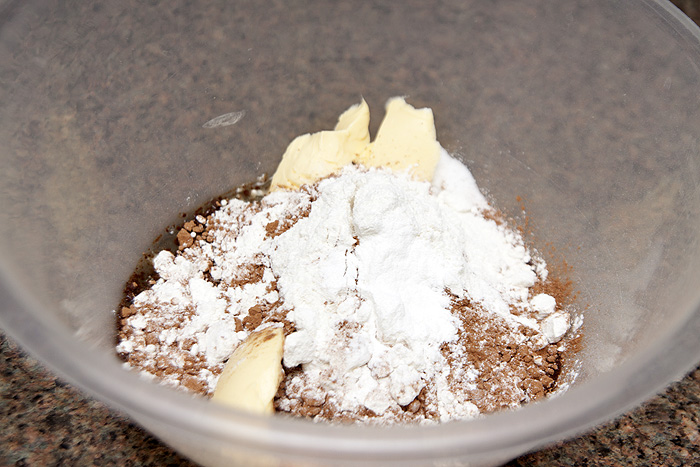
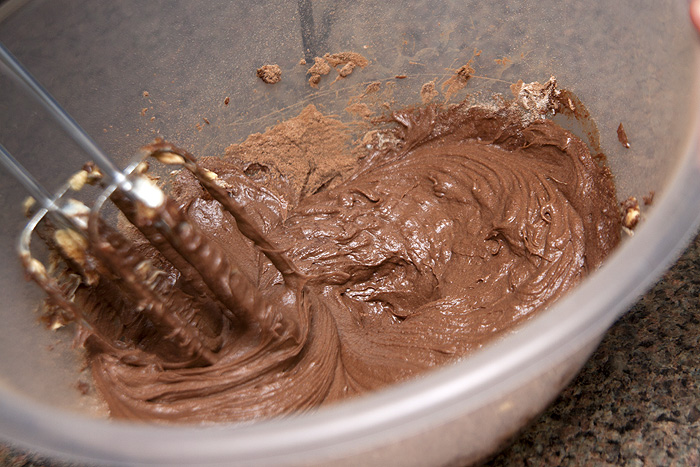
Chuck all of the ingredients (yes, all at once – another reason I love this recipe), into a bowl and mix until combined and smooth.  Don’t overmix, you just want to get everything together and looking glossy.

Spoon the mixture into a greased tin and use a spatula to spread it across the surface.

For the Fluff topping

50g Marshmallow Fluff
20g butter, softened
1/2 tsp vanilla essence

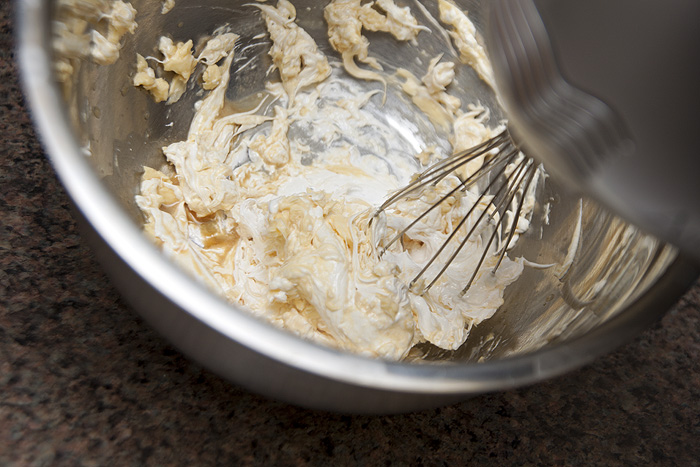
Add the topping ingredients into a bowl and beat with a whisk until combined, you can add a tsp of water to thin the consistency if needed.  It should be smooth, silky but not “runny”.

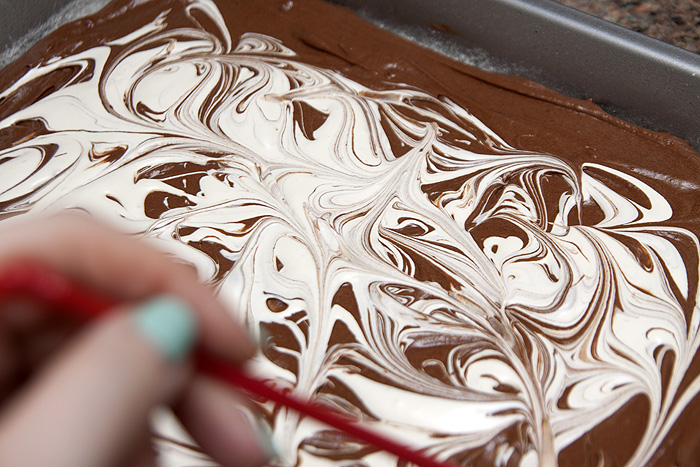
Spoon the topping over the (uncooked) brownie mixture in tsp-sized “blobs” and use a skewer (I only had a straw to hand) to “marble” the topping.

Bake in a pre-heated oven (180 degrees/160 fan) for around20/25 minutes.  Test with a knife to check if it’s done and if you’ve got any leftover “topping” mixture, you know what you need to do – don’t you?

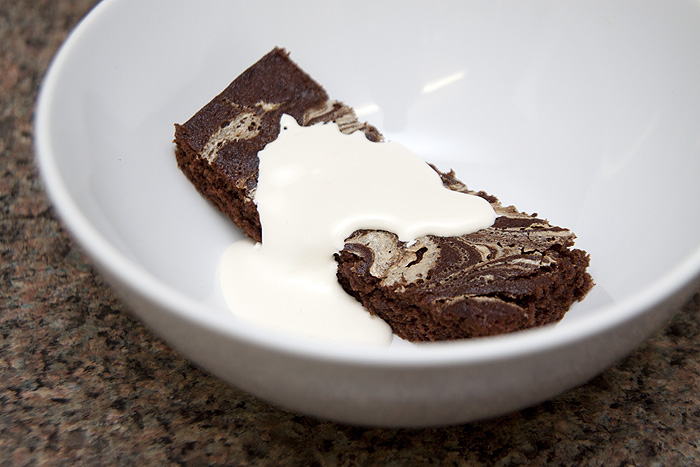
Overall, they’re not my best experiment to be honest.  The brownie is definitely more fudgy than cakey and the Marshmallow Fluff, whilst it adds a teeny bit of chew to the topping… doesn’t add much else.  I’d suggest adding a crap-ton more than I did and to hell with whether it marbles or not.  Also, don’t leave out the chocolate and/or fudgy pieces… these are definitely more cakey than fudgy.  Bother.

Having said all that, they’re still nice.  They’re just not better than my usual recipe which I’ll post here sometime closer to Halloween.

Did you get your “bake” on last weekend?

I like to pretend that I’m not really a cupcake person.  I mean, we all know what cupcake ‘people’ are like right?  They have TONS of hair, usually swept horizontally across their foreheads in a faux-bo style (hair jewellery optional).  They giggle.  A lot.  And they wear far too many layers.

I’m not a giggly person (lies – it’s a nervous thing rather than an affectual thing though) and I don’t have much hair.  As for layers, I find it a struggle to co-ordinate my top with my bottoms let alone style an outfit akin to a fucking onion.

But cupcakes, well… I can’t help it – as much as I want to hate them (and everything they stand for), they taste too good.  I’d like to make them all muffin-sized though.

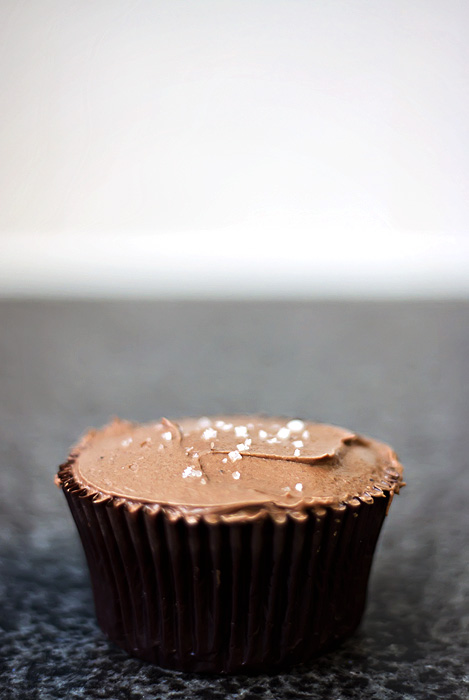
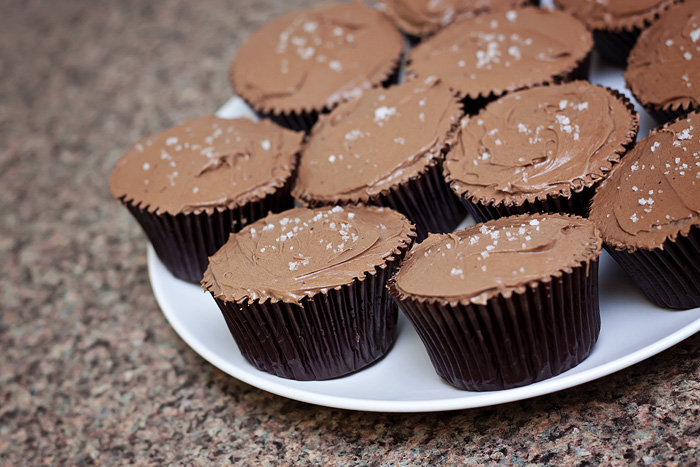
Look what I made last night.

OHMYGODSOGOODITHURTSMYTEETH.

The touch of Fleur de Sel makes the whole cupcake affair slightly less twatty don’t you think?  I like salted sweet things.  Have I ever told you about my favourite chocs?  These are them (you can find them in Selfridges) and when I was a kid, I could only have dreamt about paying out £13 for some chocolates.  Mr. L looks equally disappointed and elated whenever I bring a box home, which to be fair, is only about twice a year.  But still…

These cupcakes present a cheaper way of getting my salted chocolate fix, read on for the recipe – which isn’t mine by the way but is my absolute favouritest no-fail chocolate cupcake recipe – courtesy of Hummingbird Bakery

yields 12 chocolate cupcakes

100g plain flour
20g cocoa powder
140g caster sugar
1½tsp baking powder
a pinch of salt
40g unsalted butter (I use clover, don’t shout at me)
120ml whole milk
1 egg
¼tsp vanilla extract

Pre-heat the oven to 170 degrees celsius.

Add the flour, cocoa powder, sugar, baking powder, salt and butter to a bowl and using the lowest setting on your hand-mixer, whisk until the mixture begins to look ‘sandy’.  Watch out for flour clouds.

In another bowl, whisk the egg, milk and vanilla extract together before adding it to the dry mixture, a little at a time, whisking all the while until you get a smooth consistency, don’t overmix.

Fill 12 cupcake cases around 2/3 full and bake for 20-25 minutes.  Mine were nicely done by the 20-minute mark.  The surface should spring back when pressed.  Allow to cool completely on a wire rack before icing.

Now, as for the buttercream… I may be in a minority here, but there is definitely such a thing as TOO MUCH OF A GOOD THING.  I simply don’t like towers of icing that drown my cupcake, I want the icing to complement, not invade and conquer the cake below.  What say you?

That’s not to say I’m a joyless spoil-sport… *wipes buttercream from mouth* I just generally find that when making buttercream, I can usually half the recommended quantities listed in the recipe book and still get my chocolate, sugary, gooey fix.

Here’s how I made it:

for the Buttercream

150g icing sugar
50g unsalted butter, at room temperature (again, Clover for me)
20g cocoa powder, sifted
20ml milk

Whisk everything except the milk… then add the milk a spoonful at a time.  Continue whisking until you get bored.  The longer you whisk, the lighter/fluffier the buttercream.

And the magic ingredient?  Just a little sprinkle of Fleur de Sel ontop of each one does the job… you can leave the salt off some of them if you like, it’s not everyone’s cup of tea now is it?

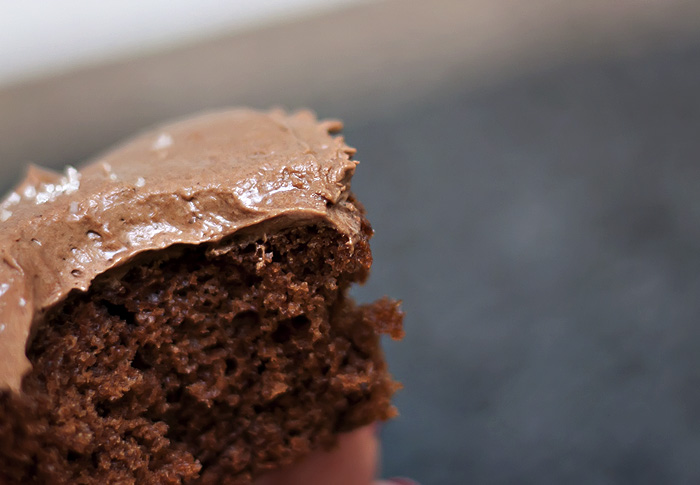
These are SO light and airy, with just the right amount of buttercream and that little salty tingle on the tongue that reminds you just how incredibly bad these actually are for your health.  Stunning.

In other news, not-cake related.  I’m off on holiday tomorrow for a week in Liverpool/Manchester – thank god the diet is starting the week after eh?  All those curry cafes are making extra portions in preparation for my arrival.  As always, any insider tips/places to visit/things to do/goodies to eat – I’m all ears, you made my last holiday earlier this year in Torquay, absolutely blinding with a little local knowledge!

I’m probably not going to be posting much, if at all, next week – I just haven’t built up any reserves in my draft folder to see me through the drought.  Hope you all have a fabulous week, and long may this warm spell continue – though if it could stop by bedtime, that would be great, thanks.

x

…baking!

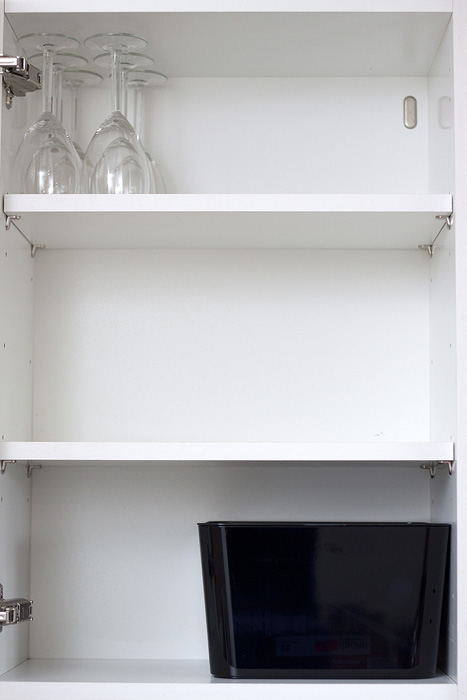
I don’t know if it’s ‘normal’ to have a baking cupboard – but most of my cupboards currently look like this:

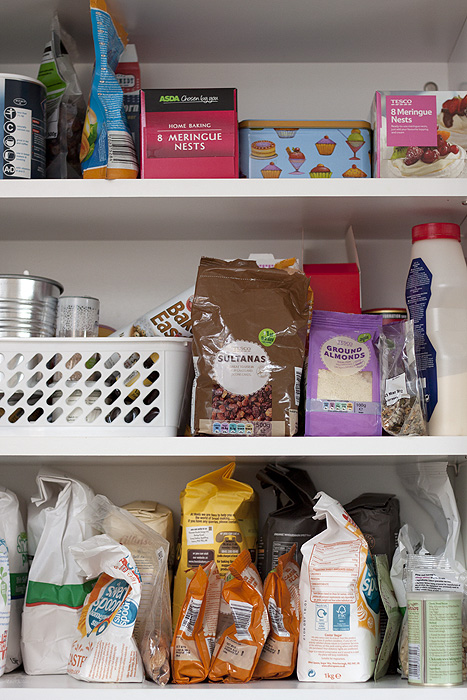
…except this one, which I’ve designated as home for all things cakery:

*HOARDER ALARM SOUNDS  IN THE DISTANCE*

So, anyway, I thought it was about time me and L put our heads together and made a cake in our new flat – it rained all morning today, an excellent opportunity to get messy with a bit of flour, no?  And before you ask, yes – my daughter is still in her nightie, rockin’ some fluffy bed hair, it’s how we roll.

Date Loaf Cake

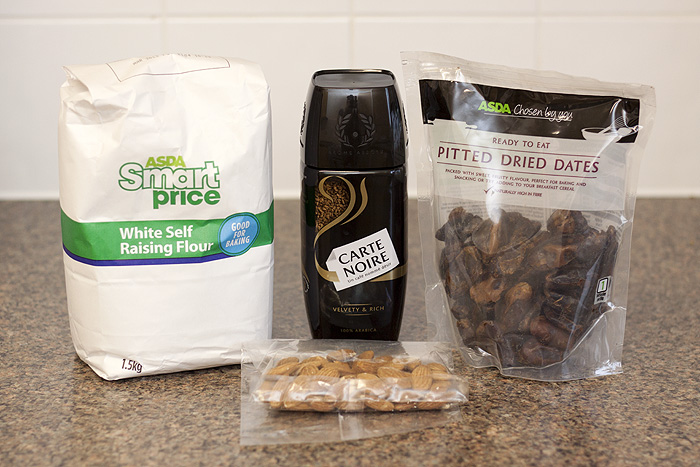
375g dates, chopped
2 tsp. instant coffee
1 cup (175g) self raising flour
1/4 cup flaked almonds

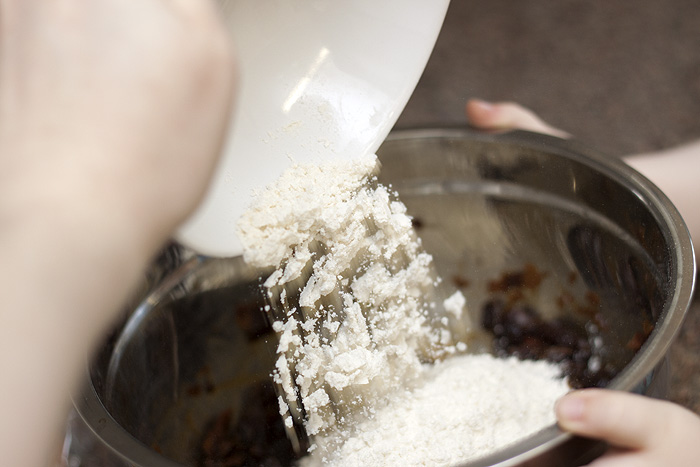
I like loaf cakes.  You see, I like their simplicity, I like how easy they are to store and I like their fuss-free attitude to life.  I also probably just like the fact that they look like loaves, carb fiend here with the blood sugar levels to fucking prove it.  We opted to make a simple date loaf because I don’t have any of my cake spices over here yet and I also didn’t have any oats, otherwise we would have gone down the “let’s kid ourselves they’re wholesome” muffins route.

This particular date loaf is exceptionally simple because it only contains four ingredients.  Yes, four.  There’s more ingredients in my cup of tea than that – especially if you include the midge that just dive bombed it, kamikaze style.  Poor midge, it isn’t even caffeinated.

I digress.

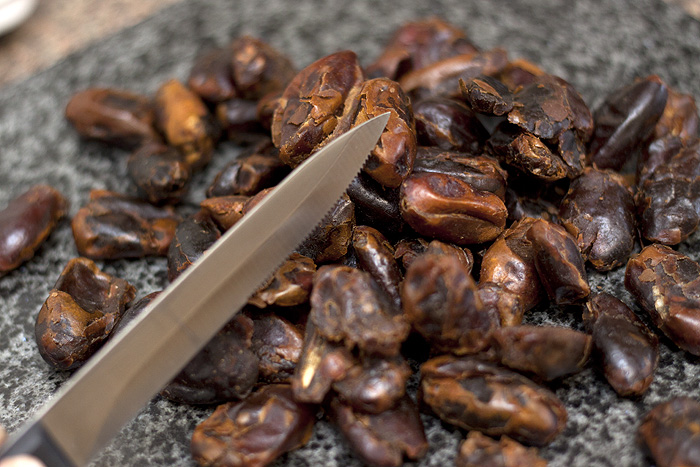
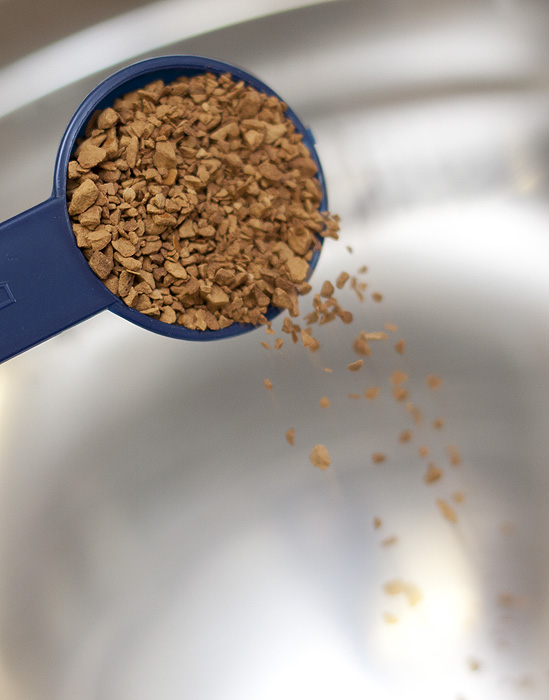
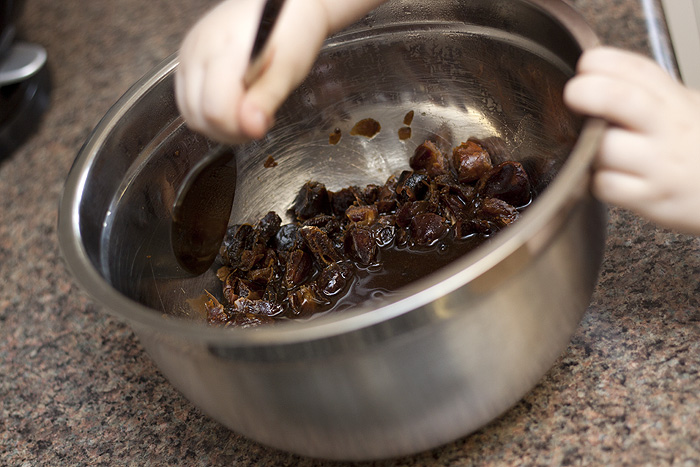
Roughly chop your dates and soak them for a few hours (overnight if you’re more prepared than I am) in your coffee solution – 2tsp instant coffee, 1 cup of boiling water.  This will allow them to get all squishy and happy… they don’t take on much of a coffee flavour, I detected only the tiniest hint.

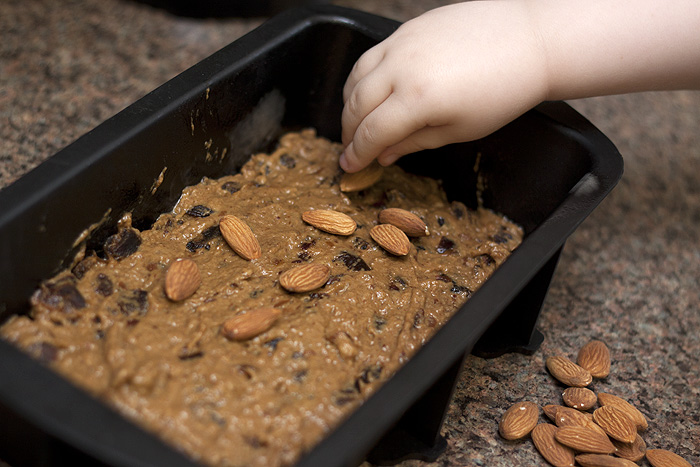
If, like me, you have a small child – get them to add the chopped dates into the prepared coffee and marvel at how. fucking. long. it takes for them to meticulously plop each piece into the bowl from varying heights, meticulously checking and double-checking (OCD alert) that each stoned-piece of shrivelled fruit has landed just where they want it.

Then, just as you’re about to sweep the whole pile of dates into the bowl in a fit of irritation, ignoring any patterns they’ve been painstakingly creating – they give you a side-smile like this and you suddenly re-discover limitless patience.  Clever this whole self-preservation thing.

Give it all a bit of a stir and walk. away.  Seriously, the longer you leave the fruit to soak, the better the results.  Have patience fellow cake-munchers.

Once your dates have been suitably soaked, add 175g of self-raising flour and combine the mixture before pouring into a greased/floured loaf tin.  Don’t be stupid and use a 3lb loaf tin like we did when the sum of your ingredients only weighs like, 500g at the most.

Get aforementioned OCD chid to meticulously place flaked almonds (or whole, whatevs) on top and bake in the centre of the universe oven at 160 degrees celsius for 45 minutes.  Considering it has NO fat or sugar in it, you get a surprisingly moist, sweet loaf.  Them dates are pretty clever things!  I guess you can’t have brains AND beauty huh?

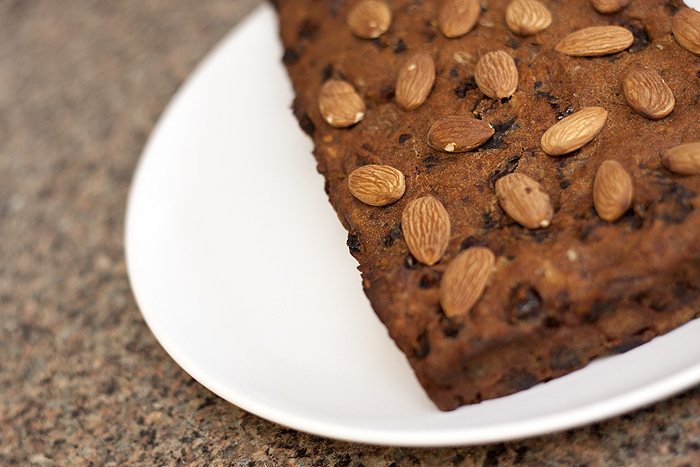
Our slightly-too-flat-because-our-tin-was-too-big date loaf cake.  Four ingredients, minimal washing up.  Hoorah.  Especially nice spread with a little, or you know… shit-loads of butter.

So proud.  Her, not me.

Oh ok, me too.

RANDOM

Just a friendly reminder…

…baking! I don’t know if it’s ‘normal’ to have a baking cupboard – but most of my cupboards currently look like this: …except this one, …

Deal Alert: Agent Provocateur at CheapSmells.com (and a fragrance review!)

…baking! I don’t know if it’s ‘normal’ to have a baking cupboard – but most of my cupboards currently look like this: …except this one, …

Clinique Summer Skin Event!

…baking! I don’t know if it’s ‘normal’ to have a baking cupboard – but most of my cupboards currently look like this: …except this one, …

Ayurveda (in its broadest sense) on the high street...

…baking! I don’t know if it’s ‘normal’ to have a baking cupboard – but most of my cupboards currently look like this: …except this one, …

Deal Alert: Organic Surge Mega Bundle - £60 worth of product for only £24

…baking! I don’t know if it’s ‘normal’ to have a baking cupboard – but most of my cupboards currently look like this: …except this one, …

LUSH Colour Supplement in Light Pink

…baking! I don’t know if it’s ‘normal’ to have a baking cupboard – but most of my cupboards currently look like this: …except this one, …

Revlon Scented Nail Enamel in Peach Smoothie NOTD

…baking! I don’t know if it’s ‘normal’ to have a baking cupboard – but most of my cupboards currently look like this: …except this one, …

Eye Candy: Helena Rubinstein Loose Eye Shadow in Plum Rock

…baking! I don’t know if it’s ‘normal’ to have a baking cupboard – but most of my cupboards currently look like this: …except this one, …

Heal Gel, the closest I've come to "miracle in a jar" beauty

…baking! I don’t know if it’s ‘normal’ to have a baking cupboard – but most of my cupboards currently look like this: …except this one, …

The Body Shop - Sweet Lemon Bath & Body Range

…baking! I don’t know if it’s ‘normal’ to have a baking cupboard – but most of my cupboards currently look like this: …except this one, …

POPULAR

CLOSED: Competition Time: Givenchy Very Irresistible L'eau en Rose Perfume!

…baking! I don’t know if it’s ‘normal’ to have a baking cupboard – but most of my cupboards currently look like this: …except this one, …

CLOSED - Win it! The Body Shop Expert Brush Collection
…baking! I don’t know if it’s ‘normal’ to have a baking cupboard – but most of my cupboards currently look like this: …except this one, …

Win a gorgeous "glow" trio with prizes from Urban Decay, New CID, & Arbonne!

…baking! I don’t know if it’s ‘normal’ to have a baking cupboard – but most of my cupboards currently look like this: …except this one, …

Hello? Is this thing on?

…baking! I don’t know if it’s ‘normal’ to have a baking cupboard – but most of my cupboards currently look like this: …except this one, …

Avoid the brush off with Oral-B Pro-Expert

…baking! I don’t know if it’s ‘normal’ to have a baking cupboard – but most of my cupboards currently look like this: …except this one, …

Big savings on French Pharmacy brands, win my Escentual.com top picks!

…baking! I don’t know if it’s ‘normal’ to have a baking cupboard – but most of my cupboards currently look like this: …except this one, …

Win it! 3 EcoTools Bamboo Bronzer Brushes to win!
…baking! I don’t know if it’s ‘normal’ to have a baking cupboard – but most of my cupboards currently look like this: …except this one, …

FOTD Busting out of the comfort zone!

…baking! I don’t know if it’s ‘normal’ to have a baking cupboard – but most of my cupboards currently look like this: …except this one, …

Dear Obesity...

…baking! I don’t know if it’s ‘normal’ to have a baking cupboard – but most of my cupboards currently look like this: …except this one, …

Urban Decay The Black Palette - Photos & Swatches

…baking! I don’t know if it’s ‘normal’ to have a baking cupboard – but most of my cupboards currently look like this: …except this one, …

COMMENTS

  • Categories

  • Archives

  • Admin

  • Ads