Courgette “spaghetti”. My new favourite thing!

Posted by Lipglossiping On March - 9 - 2013

I pre-warned you earlier in the week that I’d be blogging about my new favourite thing: courgette spaghetti, and here I am!  I’ve always liked courgettes but they’re one of those vegetables that don’t really serve a huge amount of purpose aren’t they?  I mean, sure… they’re alright skewered and barbecued and they make a mean fritter but they’re not the kind of vegetable I ever “add” to other meals as a bulking ingredient.  I have to specifically plan a meal around them, and that sometimes means that I have courgettes littering up my salad box at the end of the week.

A few months ago, I bought a spiraliser.  It was an impulse purchase that in honesty, I regretted almost immediately.  When it arrived and I saw how bulky it was, my regrets deepened and I resigned it to the back of the cupboard until I’d had a chance to get my head around what to do with it.

I knew that one of the most popular dishes to make with a spiraliser was courgette spaghetti… raw.  I didn’t fancy eating it raw but it did encourage me to substitute normal pasta for a trial.  Once tasted, I was hooked!

Courgette Spaghetti_01

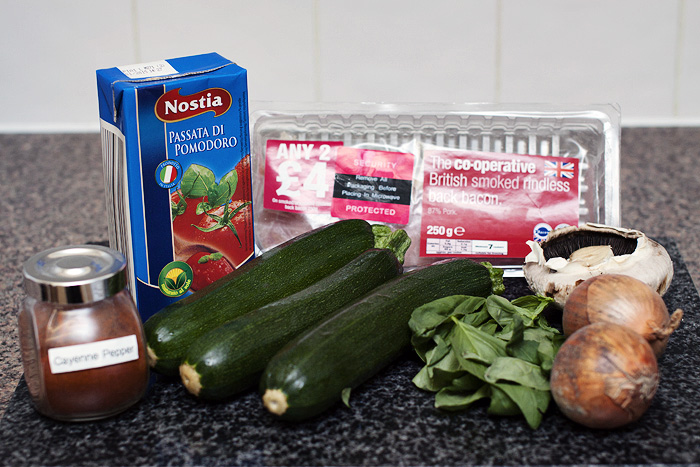
The cast of characters. You’ll need (for two people): three courgettes, fresh basil, two onions, a few mushrooms (or one big flat!), 1/4 tsp of cayenne pepper, passata.  I also used frozen peppers and frozen garlic (not shown above).  You can add some ham or bacon… as you can see, I was going to, but Mr. L decided he wanted the last two rashers saved for a bacon sandwich on Sunday morning!

Courgette Spaghetti_02

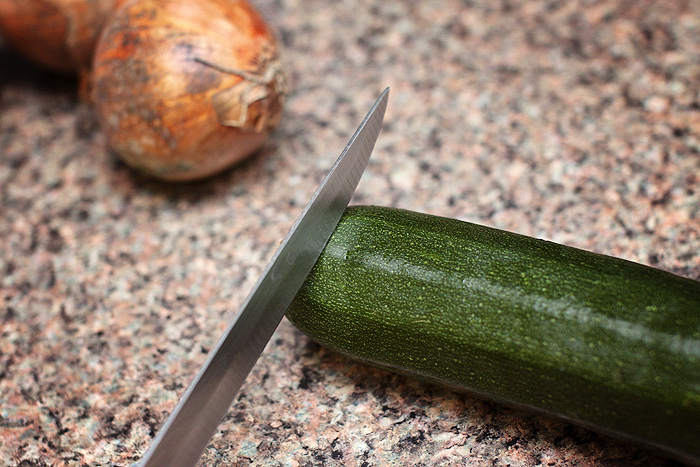
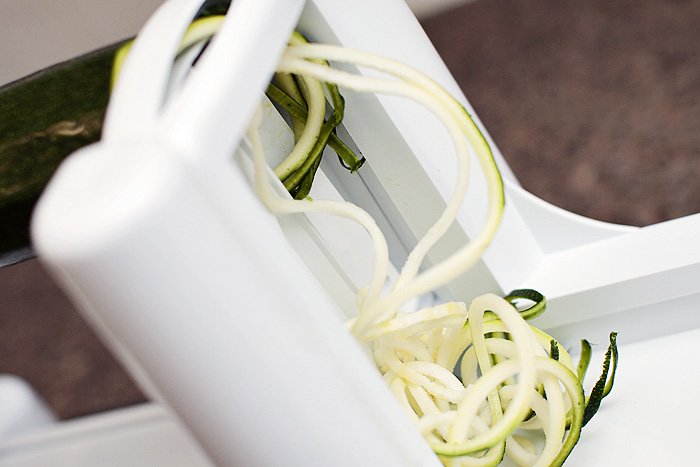
Cut the ends off your courgettes and grab your spiraliser (this one is mine).  If you don’t have room for one of these beauties, you can also buy a julienne peeler which will help get the spaghetti shape.  I have to say though, the spiraliser is far too much fun!

Courgette Spaghetti_03

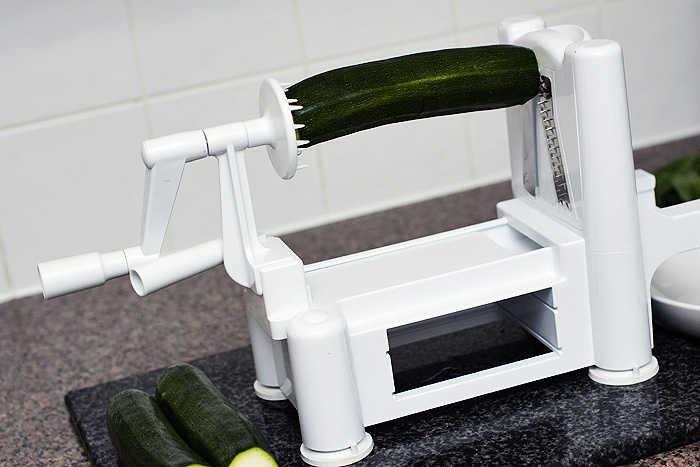
Look at it in action!

Courgette Spaghetti_04

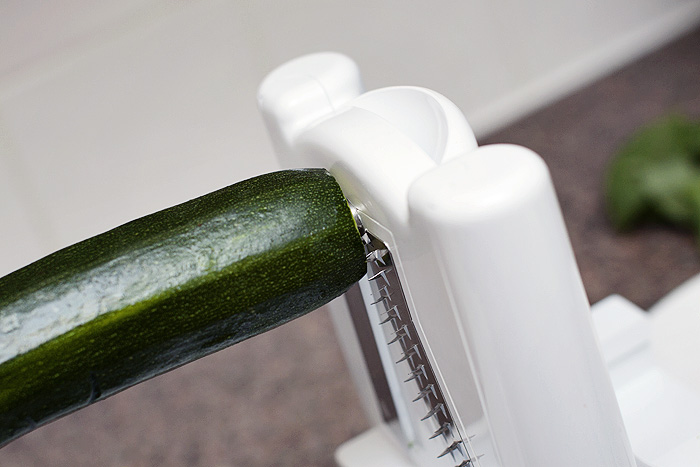
You know you want a go.
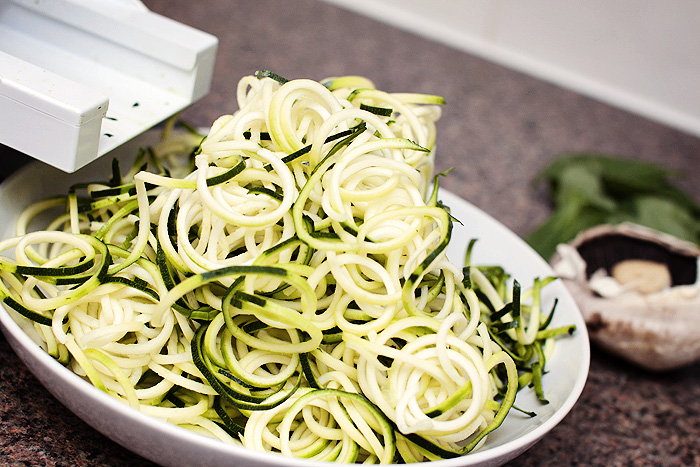
Courgette Spaghetti_05

Courgette Spaghetti_06

Ta-da!

Courgette Spaghetti_07

Courgette Spaghetti_10

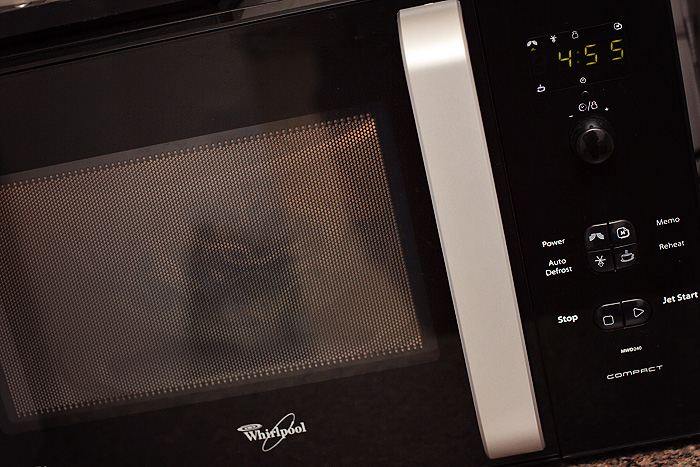
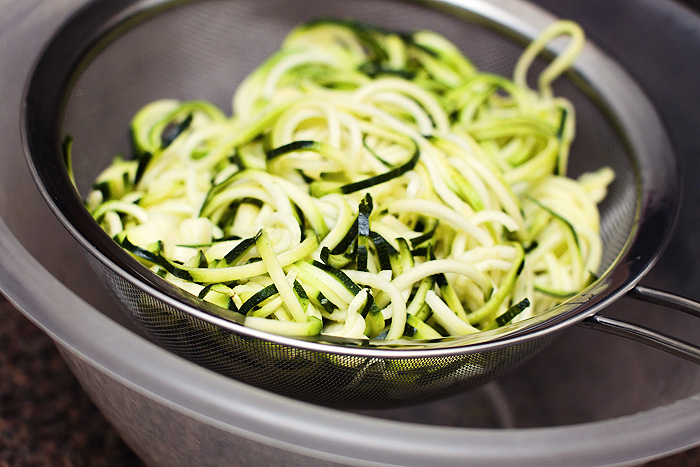
I sprinkle my courgette with a little salt and blast in the microwave on high for five minutes.  This softens the vegetable and encourages it to release some of its water content.  Once it comes out of the microwave, tip the courgette into a sieve and let it drain the excess water.  If you have a potato ricer, you could squeeze out the excess water using that.  Don’t worry too much though, if all else fails, you can cook the “spaghetti” a little longer on the hob until the excess water evaporates.

Courgette Spaghetti_08

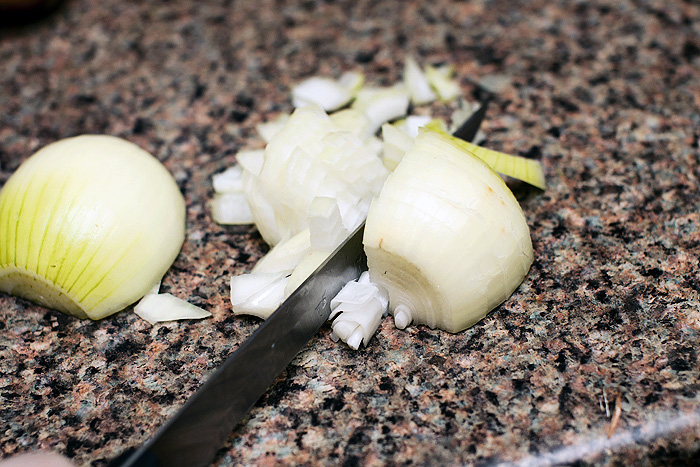
Finely chop the onion…
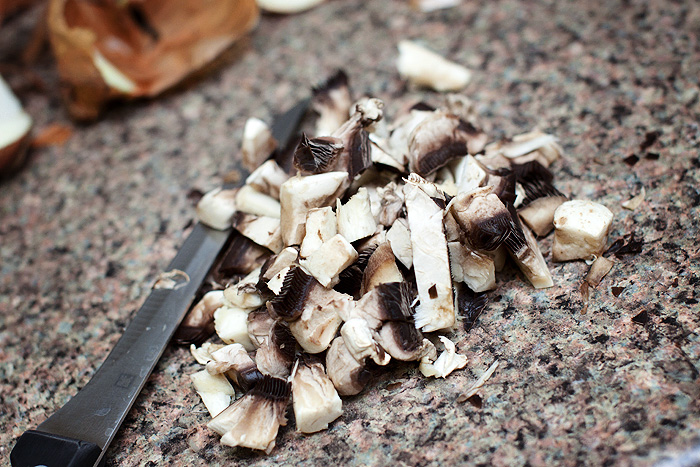
Courgette Spaghetti_09

…and the mushroom…

Courgette Spaghetti_11

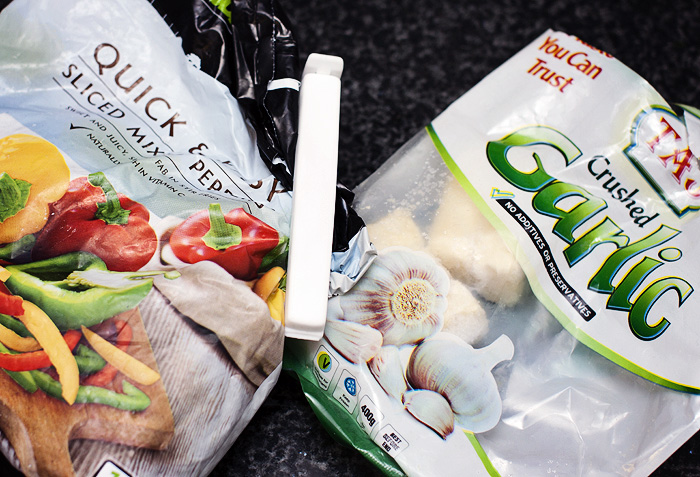
My freezer essentials include a bag of frozen peppers (how expensive are fresh?!), and frozen minced garlic that I can throw straight in the pan.  Convenience at its best.

Courgette Spaghetti_12

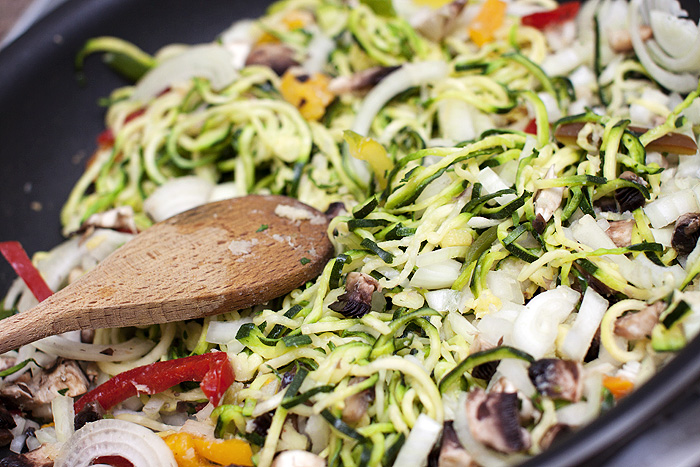
To a lightly oiled pan, add the: onions, garlic, frozen peppers, drained courgette and mushrooms.  Sprinkle over the cayenne pepper and allow to fry for five minutes.

Courgette Spaghetti_13

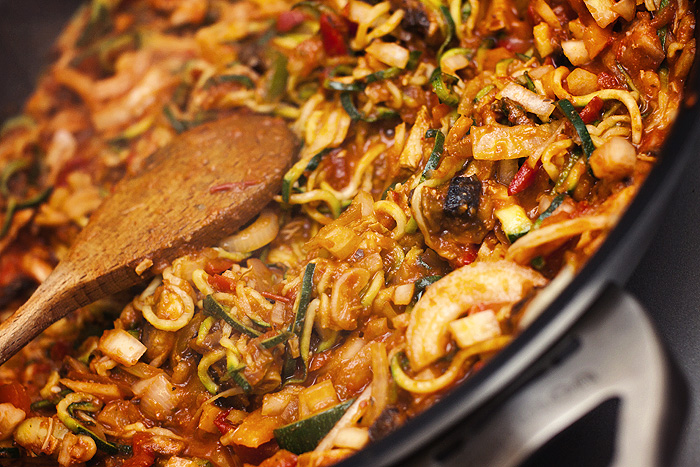
Pour over the pasatta and simmer gently until the liquid reduces.  Around 5-10 minutes.  Tear the fresh basil by hand and add to the pan a few minutes before serving.

Courgette Spaghetti_14

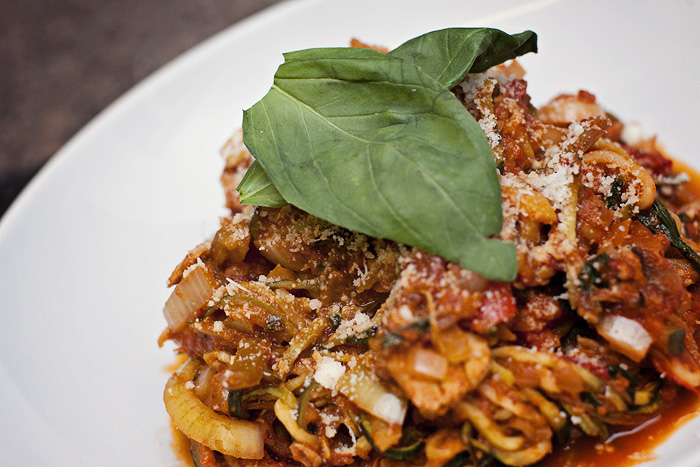
Serve with a sprinkle of parmesan.  So much fresh flavour and very filling.

It’s also a perfect dish to make on a work-night, even quicker if you buy a pot of marinara-esque sauce to throw over the top.  I’ve bought one of these to try with it next week.

But do you know perhaps my favourite thing about this dish?  The entire meal is 2 ProPoints on Weight Watchers (without the bacon), leaving plenty of points for a big chunk of garlic ciabatta or dough balls.

Have you ever made vegetable spaghetti?  If not, I dare you to try it!


Earl Grey Tea Cupcakes!

Posted by Lipglossiping On March - 2 - 2013

I may be steadfastly clawing my way back onto the healthy-eating wagon but in just the last couple of weeks, I’ve developed the most horrendous sweet tooth known to man.  My sneaky way around this intrusion into my angelic lifestyle *cough* is to fatten everyone else up instead.  Yes, I have become the ultimate feeder.

Don’t get me wrong… I’m not so saintly that I don’t taste my creations but the trick is to have one and then GET THEM THE HELL OUT OF THE FLAT.  It’s the only way I can do it, heaven forbid I still have cake in the house come night-time.  You can be sure that it wouldn’t still be there the next morning.

My latest dabble has been with cupcakes (again).  Leila has decided on the theme that she wants for her fourth birthday party in May (she’s a planner), and that theme is “ballerina”.  She wants ballerina cupcakes, which will thankfully save me a whole lot of stress because anything has got to be easier than last year’s “steam engine cake”.

And so with my raging sweet tooth in hand, I headed into the kitchen to reacquaint myself with a bit o’ cupcake nurturing.  The actual baking, I can do with my eyes closed… the icing?  Well, to be honest, I usually trowel it on with a spatula and I’m done.  I don’t enjoy the faffy bits in baking… which is probably why I’ve always preferred home-style cooking over anything more delicate.

earl grey cupcakes_01

These Earl Grey Tea cupcakes from the Hummingbird Bakery book caught my eye mostly because I’ve discovered a new-found love for Earl Grey.  I’ve been a tea-drinker for about 10-years, I used to hate it as a teenager and it was only through meeting my husband (ultimate tea drinker) that I developed a taste for it.  While he’s a simple PG Tips man, I have enjoyed dabbling in loose leafs and the clean-tasting, subtle Earl Grey has become a real pleasure.

I won’t print the recipe here for fear of getting my hands slapped, so instead, I shall link you to the lovely Laura Ashley website who are hosting a copy of the Earl Grey Tea Cupcakes recipe with permission of Hummingbird Bakery.  Incase you’re curious, it’s from their Cake Days book… the sweet-toothed girl’s bible.

The only change I made to the original recipe was to use loose leaf tea instead of teabags, which I steeped in a cup with a tea infuser.

earl grey cupcakes_02

You may have noticed that my icing didn’t go to plan.  I got a phonecall mid-bake and when I returned to the kitchen, my scales had reset themselves!  I don’t think I put quite enough icing sugar into the mix but seeing as these were going to my Mum and Dad, I knew they wouldn’t mind my collapsed swirls!

Actually, if anyone has a failproof frosting recipe, I’m all ears… I’m not a huge fan of the HB one (which generally makes too much for 12 cupcakes).

earl grey cupcakes_03

Either way, the flavour of the cake is beautiful with just a hint of bergamot to lift the sponge, it’s very spring-like and delicate without being perfume-y.

earl grey cupcakes_04

Are you planning on baking this weekend?  How would you make “ballerina” cupcakes? Throw all your cupcake/icing tips at me, I’m gonna need them!

Food Friday *cough* Monday: Spinach & Quark Lasagne

Posted by Lipglossiping On July - 9 - 2012

Until I started Weight Watchers, I thought Quark was just an old skool page layout program.  Or a particle.  Turns out it’s a cheese that’s approximately half as disgusting as cottage cheese, which makes it pretty edible when you’re looking for lower-fat cheese alternatives.

I’ve been craving pasta like crazy since I’ve been following the weight watchers plan and whilst I can totally still have pasta (perhaps not my favourite mega-bowl of pasta shells and pesto), it just feels like such a damn waste of points.  Have you ever weighed pasta?  It’s surprisingly heavy.  You need to play that pasta at its own sneaky game and get clever.

Instead of spirals, bows and shells – opt for lasagne sheets and cannelloni tubes – you can construct a hefty portion of your favourite pasta dish without feeling short-changed just by making this simple substitution.  On the menu last night was this, Spinach & Quark (just pretend it’s ricotta) Lasagne.

My husband hates fresh Spinach but he tolerates (and secretly enjoys) the frozen stuff.  I don’t understand why, but I figure that it means at least I don’t have to wash the leaves.  Pick your battles.

Serves 2:

5/6 “lumps” (technical term) Frozen Spinach
80g Lasagne Sheets (that’s approximately 4/5 sheets)
250g Quark
2 cloves of garlic
1tsp Smoked Paprika
80g low fat Mature cheese, grated (i’m still loving the Cathedral City one best)
1 tomato, sliced
Salt and Pepper to taste (quark is generally unsalted)

Finely slice the garlic and defrost the spinach in the microwave, retaining any excess water (if you’re stuffing cannelloni tubes with the mixture, drain the water).  Stir in the Quark, Smoked Paprika and garlic until well-combined.  Grab a shallow dish and spoon 1/3 of the spinach mixture on the bottom.  Layer the lasagne sheets ontop and repeat the process. I usually get two layers of pasta and three layers of spinach from the above quantities but your mileage will obviously vary depending on the size of your dish!

Top the final layer of spinach with the sliced tomato and sprinkle with the grated cheese.

Cook in a pre-heated (190 degrees celsius) oven for around 30 minutes or until the cheese begins to brown.

We had a red pepper looking a bit wrinkly in the fridge, so I halved it and sprinkled with balsamic vinegar before popping it in the oven alongside the lasange for around 25 minutes.  Serve with a side salad.

9 Weight Watchers Pro Points for a super-cheesy, easy-peasy lasagne.

Do you buy Quark?  What are your favourite recipes with it?

Weight Watchers Friendly Pizza!

Posted by Lipglossiping On May - 25 - 2012

Pizza is one of my (many) vices… hot, cold, hot then cold then warmed up again – however I eat it, I love it.  The spicier and more garlicky, the better – jalapenos are a must, I helpfully remind myself that spicy foods raise the metabolism, therefore burning fat more quickly no?  I excel at self-delusion.  When I first joined Weight Watchers, I read the most horrifying piece of information that my eyes had ever digested: one slice of stuffed-crust pizza is 10 points.  That’s a single slice… a single fucking slice, I’m only allowed 26 points a day!  I can hoover up a whole pizza (what, 8 slices?) in the time it takes my husband to work through one slice.

So pizza was off the menu then.  Except it so isn’t.

The pizza you see above scores an incredible 7 points.  That’s 7 points for the entire pizza.  I think we all need to take a moment….

…for those of you who don’t know follow Weight Watchers, we’re talking around 350kcal.

You don’t need to make your own pizza dough and it only requires about 10 minutes in the oven.  Here’s what you’ll need:

1 Warburtons Square-ish Wrap
1 tbsp Tomato Puree (I mix a tsp of garlic puree in too!)
Your choice of 0 point topping (onions, peppers, mushrooms, tomato, jalapenos)
50g “wafer” ham
Dash of Worcester Sauce/Tabasco/Balsamic Vinegar (whichever you prefer)
Sprinkling of Italian herbs
30g Cathedral City Light Mature Cheese (this is the only ‘light’ cheese I’ve found to melt properly)

I keep my wraps in the freezer and just take one out and cook it from frozen.  Spoon the Tomato Puree onto the wrap and spread evenly to the edges.  Top your “pizza base” with the ham, veggie toppings and Italian herbs before sprinkling the cheese over the top.  Finish off with a sprinkling of sauce before cooking it in a pre-heated oven at around 200 degrees celsius for around 10 minutes.

Serve with a side salad and feel ridiculously virtuous about it.

What is your biggest foodie vice and do you have a healthier alternative for it?

Low Fat Mango Frozen Yoghurt (without an ice-cream maker)

Posted by Lipglossiping On April - 24 - 2012

First of all, I want to apologise for another foodie post.  I realise that Lipglossiping isn’t a food blog and that I may be alienating many of you by posting recipes and such but after three years of daily blogging, you have to blog about what is making you passionate or else you’ll burn out.  Currently, I’m rediscovering a love (as opposed to obsession!) for food and trying to hone it into a love for food that won’t put me in an early grave.  Thinking about it, planning it, shopping for it and actually cooking it is taking up a lot of my real world time, so it’s only representative to blog about it too.  So please indulge me, if I keep feeling the desire to do foodie posts, I’ll probably include a separate section on the blog, specifically for this but for now, I’m far too disorganised to sort any of that out.

So, who’s for some Low Fat Mango Frozen Yoghurt?  You with me?

I was treated to some delicious fresh mangoes after moaning on Twitter that I hadn’t had a decent mango since I was last in Australia in 2003.  That’s a long time to go without a good mango.  But the thing is, I don’t really know anything about mangoes – I didn’t even realise that there were so many different varieties and that the stuff we got in UK supermarkets are basically impossible-to-ripen, bland things.  What I should have done is ignore Tesco et al and headed straight to my nearest Asian supermarket/convenience store where some of the best mangoes in the world are currently in season.  There’s a really great article here on why UK supermarket mangoes are pretty sub-standard and detailed information on all the mango varieties in the world (which is an astounding number!)

I made this batch of frozen yoghurt with Kesar mangoes, and the taste is incredible.  To be honest, we actually got through about 5 mangoes just with our hands and a knife before I’d gotten as far as bringing the other ingredients down from the cupboard.

So why frozen yoghurt?  Well, I’ve pretty much done a U-turn on my stance on frozen yoghurt.  I used to think that it was a trendy pud that simply didn’t live up to the greatness of ice-cream.  I’m not exaggerating when I say that I am an ice-cream fiend.  I live for the stuff.  When you hear the ice cream van in the distance, it’s not Leila doing a jig with excitement.  Having said that, ice-cream is rarely good for the waistline – full of sugar and fats, frozen yoghurt is an excellent alternative.  But be aware, there is a great frozen yoghurt swizz, often marketed under an umbrella ‘healthy alternative’ to ice cream stance, a lot of it really isn’t much different in terms of calories, fat and all that other good bad stuff.

So make this instead.

Low Fat, Low Sugar Mango Frozen Yoghurt – 24 Weight Watchers Pro Points for the entire tub (around 2 points a 100g serving)

6 Mangoes (get a good variety!)
200ml Low Fat Coconut Milk
1000g 0% Fat Plain Yoghurt (Greek has the lovely tang – two large pots)
1/2 cup of Splenda (you don’t need much because of the sweetness from the mango)
2tsp Vanilla extract
3tbsp Malibu (vodka works as a tasteless alternative – you use the alcohol to get a softer freeze)

1. Prepare 5 of the mangoes and scoop the flesh into a food processor.

2. Add the remaining ingredients and blitz until smoothly pureed.  You may need to do this in two batches if your food processor is a small one.  Simply divide the ingredients between the two batches, it will all come together at the end anyway!


Once blitzed, I don’t mind admitting that I stuck a teaspoon in there to have a taste and check that everything was sweet enough/mango-ey enough for me.  Your mileage may vary… if it does, adjust the recipe to suit your taste-buds at this point.

3. Pour the yoghurt mixture into a freezable carton.  You could use an old ice cream tub or a tupperware container.  I like to use a wide, shallow container which allows me to drag my ice cream scoop over a larger surface area as this will freeze quite hard (I’m going to experiment with adding some glycerin to my next batch in order to get a softer freeze).

4. Pop the container into the freezer and bring it back out every hour or so to stir and break up the ice crystals.  This part is a little tedious and essentially, here you’re doing the job of an ice-cream maker which continually churns the mixture as it freezes.  My timings for getting it out of the freezer usually go: 1.5 hours, 1 hour, 1 hour, 1 hour (leave to freeze solid).  When you’re mixing the partially frozen yoghurt, use a large metal spoon and scrape down the sides, breaking up any chunks and incorporating them back into the mixture.  After the second or third freeze, add chopped up pieces of the remaining mango… if you add them too early, they’ll sink to the bottom!

5. When it’s fully frozen, you’ll need to allow it around 15/20 minutes to defrost enough so that you can serve.  I generally put mine in the microwave (on the fruit defrost setting) for around 10 minutes – if you do this, please keep an eye on it, you’re not trying to cook it!  When you serve, it should still be very hard – but soft enough that you can actually scrape the scoop across the surface!

Guilt-free frozen yoghurt with a beautifully tropical taste.  If you’re on the Weight Watchers plan you can scoff a 100g bowl of this for around 2 points (the shop bought alternatives are around 4/5 points for less!).  Calorie-wise, I worked it out to be around 90kcal for 100g (the majority of the calories come from the fruit), but I’m not a nutritional expert, don’t hold me to it!

Do you like frozen yoghurt?  Ever make it?

Courgette Chocolate Brownies anyone?

Posted by Lipglossiping On April - 21 - 2012

In my vain attempts at shedding the remaining 3 1/2 excess stones that are hanging from my bones, I’ve been customising various recipes and generally bastardising them until they’re less likely to (fat) bastardise me.  My latest batch of chocolate brownies packed a concealed weapon of the green variety.  Courgette.  Zucchini… whatever you want to call it.  A veggie commonly used in cakes n’ stuff because of it’s moisture giving properties.

You wouldn’t know it to look at them though huh?

They’re sublimely moist, beautifully chocolatey, could do with a little more sweetening and have a satisying, though-not-very-cakey texture.  Half of you will be grimacing at your screens with an “Ugh, sick!” expression, the other half will be piqued by the possibility of being able to indulge in chocolate brownies whilst wearing a smug look of virtue on your faces.  At least I hope.

Courgette Chocolate Brownies (makes 24-ish, approximately 104kcal each piece, 3 Weight Watchers Pro Points)

2 1/2 large courgettes (pulverised in a food processor)
140g Apple Sauce
200g Caster Sugar (I’d add about 50g Splenda to this next time)
300g Plain Flour
100g Cocoa Powder (I used Tesco’s Fat-Reduced Cocoa Powder)
100g Plain Chocolate (broken into little pieces)
1 1/2 tsp Bicarbonate of Soda
2 tsp Vanilla Extract

1. Add the apple sauce to a bowl and stir in the sugar and vanilla extract.

2. In a separate bowl, combine the flour, cocoa powder and bicarb.

3. Stiry the dry ingredients into the wet and combine.  The resulting mixture, will be very dry but don’t worry, here comes the courgettes to save the day!

4. Add the courgettes to the mixture, followed by the plain chocolate pieces.

5. Pour the mixture into a greased brownie tin and bake in a pre-heated oven at 170 degrees celsius for around 25-30 minutes.

6. Allow to cool a little before turning out and cutting.  Remember, 6×4 = 24!

What treats are you enjoying this weekend?

Recipe: 7-Spice Pork Fillet with Brown Rice

Posted by Lipglossiping On April - 17 - 2012

When I opened the fridge last Friday, I was greeted by a tired-looking cauliflower and whilst I adore a regular Aloo Gobi, I fancied something a little bit different.  I thought I’d take some of my favourite spices from the delicious middle-eastern makloubeh and make them fit around the ingredients I had to hand.

Because I’m following the Weight Watchers plan (still doing the same uber-veggie thing but calculating it all Pro Points stylee), I couldn’t seriously deep-fry the cauliflower whilst keeping a straight face, so I sprayed the florets with some 1cal cooking oil and roasted them in the oven until they began to turn black on the tips, about 35-40 minutes on full whack.

I fried off some onion (more spray) and added the roasted florets which were still a little firm.  As the oil became absorbed, I added a few Tbsp of water to prevent things from sticking and loosely covered the pan with a lid.  It was time to get the spice mix ready!  Once prepared, tip the spice-mix into the pan and stir well to coat all the ingredients.  Add the brown rice and half a cup of water, re-cover.

You’ll need to check the water levels regularly, so just keep a mugful of water to hand and add more as the rice needs it.  Cook until the rice is al-dente.

Arrange the pork fillet around the edge of the pan and re-cover.  After 6 minutes, turn the pork… and allow to cook covered for around 8 minutes.  If the rice is still too firm, you can simmer on a low heat for a little longer, just add more water as you require.  Remove the lid for the final 3/4 minutes of cooking to allow any excess water to reduce.  Before serving, stir a little room-temperature soured cream into what should be an almost-dry mixture.

Ingredients (serves 2)

1 cauliflower, floretted and lightly salted
4/6 pork fillet medallions (you can substitute other cuts/meats – lamb would be delicious)
90g brown rice
1 large onion
60ml soured cream (I used light)
1kcal cooking spray
water

1tsp allspice (not mixed spice!)
1/4 tsp ginger
1/4 tsp cinnammon
1/4tsp nutmeg
1/4tsp ground cumin
1/4 tsp black pepper
1/4 tsp ground clove

Honestly, I never want to eat cauliflower boiled again.  And incase you’re on WW too – that’s 9 Pro Points.

What lovely things have you been cooking recently?

A Week in Vegetables (Day 1 & 2)

Posted by Lipglossiping On February - 19 - 2012

Yes, really.  Since coming off the Cambridge Diet last October, I’ve put a bit back on… or a lot back on, depending on how kind I’m feeling about myself when I think about it.  In total, I lost just over 4st (but didn’t reach goal before quitting) and have since put 1.5st back on and it’s still creeping.  I don’t want it to creep, it would be so easy to let myself slide back up the scales.  The fact is, I love food.  I love food and I don’t care too much for exercise.  True, I have a hormone imbalance which means that I’m slightly more susceptible to piling on the pounds just by looking at an unrefined carb BUT, that’s not to take away from the fact that essentially, I’m a greedy guts.

In the past month, I’ve yo-yoed from famine to feast – knowing that this isn’t how I *should* be losing weight and it’s been (as I’m sure you can imagine) a rollercoaster of highs and lows as a result.  It also means that whenever I treat myself to a couple of days off the famine, I’ve piled about 7lbs back on in 48hrs as my body retains both water and energy stores in an attempt to get me through the ensuing ‘famine’.

This week, I’m making a few changes.

I love my meal replacements, though I know that many will frown – and I will be replacing my breakfast and lunch with protein-based shakes.  Because of my hormone imbalance, my sugar levels soar with porridge and cereals, and through personal choice (i.e. I can’t stop at one slice), bread is out.  This leaves things like fruit and yoghurt and well, I don’t know about you – but I’d need to eat a LOT of fruit and yoghurt to sustain my appetite throughout the morning.

As most meal replacement programs suggest, I will be limiting my evening meal to 600kcal – but I want to make those calories work as hard as possible.  This week, I’ve been creating my evening meals based around a particular vegetable.  It forces me to get imaginative and will hopefully expand upon the range of veggies that I eat in the future.  Now, lectures about how to eat healthily aside (please), I thought I’d share with you the evening meals that I’ve been enjoying this week and the veggies that have taken pride of place each day!

Day 1: Broccoli

Broccoli and King Prawn Stir Fry – 400kcal

100g Ready-To-Eat Jumbo King Prawns
200g Broccoli Florets
100g Mushrooms
1/2 Red Pepper
1 clove sliced Garlic

15ml (1tbsp) Amoy Light Soy Sauce
1/4 tsp Red Cayenne Pepper
15ml (1tbsp) Balsamic Vinegar

25g Easy Cook Brown Rice (uncooked weight, cooked in microwave)
10g Pine Nuts

The quantities and kcal listed above are for a single portion.  I used that 1cal oil spray stuff for cooking… generally seem to end up with about 30 sprays of the stuff though (all factored in to my kcal counting though *polishes halo*)

Spray a non-stick pan with oil and stir-fry the broccoli and red pepper over a medium heat until the broccoli begins to soften a little (about 7 minutes).  If you feel that your pan is getting too dry, add a little water, about a tbsp at a time.  Meanwhile, cook the brown rice – I always cook mine in the microwave, remember that brown rice will take longer to cook than basmati!  Add the soy sauce, balsamic vinegar and cayenne pepper – giving the pan a swirl to coat the vegetables.  Let cook for a further 5 minutes.  Throw in the mushrooms and garlic and continue to cook until everything has softened to a firmness you like.  Add the prawns, rice and pine nuts and loosely cover the frying pan with a lid to contain the heat for a maximum of two minutes.  Serve!

Day 2: Cauliflower

Cauliflower and King Prawn Curry – 510kcal

100g Ready-To-Eat Jumbo King Prawns
200g Cauliflower Florets (cut the large florets in half to allow them to cook through)
1 diced Green Pepper
2 Large Mushrooms
3 cloves of Garlic minced (don’t judge me)
25g Easy Cook Brown Rice

1tbsp Cooking Oil
Water

1/2tsp Ground Cumin
1/2tsp Ground Ginger (fresh if you have it!)
1/2tsp Ground Coriander
1tsp Ground Turmeric
1tsp Garam Masala
10g Chilli Paste (I used a sachet)
1tsp Peanut Butter

10g Shelled Sunflower Seeds
1tbsp Plain Yoghurt or Soured Cream to serve

Not the most colourful dish in the world, but the fantastic flavour makes up for its mono-shade.  Add the oil, cumin, ginger, garlic, chilli paste and coriander to the pan before throwing in the cauliflower.  Add about 1/4 cup of water and allow it to cook gently for 5 minutes.  Pour on a little more water before adding the uncooked rice, green pepper and turmeric.  Gently simmer while the rice absorbs the water and the cauliflower begins to soften.  You’ll need to keep adding water during this process as the pan dries out, just test the rice every so often and prod the cauliflower to judge readiness.  While the rice is still a little toothsome, add the mushrooms, peanut butter, garam masala and sunflower seeds.  Cook for a further 5 minutes until the mushrooms are soft and the rice is cooked.  Add the prawns and cover with a large pan lid for 2 minutes to ensure everything is piping hot.  Serve with a spoonful of plain yoghurt or soured cream.

Wish me luck – it’s Brussel Sprout night tonight, not even kidding.  What are your favourite and most inventive ways to cook broccoli and cauliflower?

Food Friday (yes, I know it’s Saturday): Apple Pie

Posted by Lipglossiping On October - 8 - 2011

I know, I know… I should save it for next week right?  But I have a week of baking ahead of me and if I do that, I’ll have forgotten about the Apple Pie that I made this evening.  I love Apple Pie but it’s strictly off limits for me at the moment.  Poor Mr L had a particularly nasty dentist encounter on Thursday so I thought I’d cheer him up with his absolute favouritest treat in the world.

First of all, I need to tell you.  Forget about the pastry, it’s not even mine.  My Mum brought me back some ready-made French pastry rolls in the Summer and they’ve been sitting in the freezer ever since.  Yes, they were puff – I know, I’ve broken about a billion Apple Pie rules already but I don’t like waste and I couldn’t be bothered to make my own tough, not-very-nice shortcrust at gone 11pm at night.

Anyway, if you can’t be bothered either, you can buy ready rolled pastry sheets too, shortcrust or puff.  Don’t let anyone judge you.

Anyway, do you want to know the secret to making awesome pies?  It’s this.  An enamel plate.  All my pies are made on these things – apple, meat, cheese and potato… you name it, it’s been made on an enamel plate.  They cost around £2.00 and my favourite ones are made by a company called Gelert.  You need one, trust me – no more soggy bottoms.

Anyway, the Apple Pie you see in that there picture up there, goes a little something like this.

Apple Pie

4 Large Cooking Apples (eaters won’t do)
140g Sugar (whatever you’ve got, except obviously icing)
1tsp Ground Ginger (can use Cinnamon if you prefer to be a purist)
1 large handful of Sultanas

2 sheets of ready-rolled Pastry (unless you’re clever and make your own)
1 Tbsp Sugar for sprinkling

1.  Preheat your (fan) oven to 170 degrees celsius

2. Peel and core the apples before dicing them into 1/2″ square cubes.

3. Over a low heat, gently stew the apples, sugar, ginger and sultanas until the apples are just tender and you’ve created a rich, thick syrup from the sugar.  Combine well.

4. Grease and flour your pie plate to prevent sticking and lay down your first sheet of pastry into the plate, pressing gently with your knuckle to ensure there are no gaps between the plate and your pie base.

5.  Using a slotted spoon, transfer the apple mixture into your pie plate, you won’t want to use all the syrup.

6. Gently lay your top pastry sheet over the plate and fold the edges of the top pastry layer under the bottom layer and press gently into the plate edge to seal.  If you don’t like a thick crust, you can trim the edges before doing this.

7. Poke a few air vents into the top of the pie with a fork and sprinkle with sugar before placing in the oven and baking for around 40 minutes.

Enjoy!

Food Friday: Luxury Bread & Butter Pudding with Cherries

Posted by Lipglossiping On September - 30 - 2011

There’s something so comforting about a hefty pudding.  Treacle sponges, chocolate mud cakes and bread & butter pudding all carry a certain amount of stodge with them and quite frankly, they beat the living crap out of anything light and wispy.  Except meringues, but let’s be honest… meringues are in a league of their own.

I use wholemeal bread in my Bread & Butter Pudding for no other reason than because that’s what I buy anyway.  The addition of jam and a few cherries turns this home-cooked favourite into a slightly more extravagant pud.

Luxury Bread & Butter Pudding

8 slices of bread (any kind with crusts left on)
Morello Cherry Jam (or whatever you’ve got if you’re not fussy!)
Butter

2 eggs, beaten
425ml milk
Large handful of cherries (I buy mine in a big jar from Lidl)

1 tbsp brown sugar for sprinkling

1. Butter the bread before spreading a layer of jam over each piece and cutting into triangles.

2. Grease your cooking dish well and build up the layers of bread, interspersing with cherries as you go.

3. Repeat until you run out of bread and cherries!

4. Combine the beaten egg and milk before pouring over the bread and allow to soak for a couple of minutes.

5. Sprinkle the top with brown sugar and pop in a preheated oven at 180c and bake until golden brown (around 30/35 minutes)

.

Such a simple and inexpensive pudding with a billion possible variations.  Try spreading the bread with Nutella instead of jam or throw in a handful of raisins alongside a generous glug of rum!  Adjust the quantities of egg and milk depending on how much custard you like or change up the bread to substitute plain old loaves with Brioche, Croissants or Panetone!  The possibilities are really quite limitless.

Do you have a favourite Bread & Butter Pudding recipe?  I foresee more of these on the menu as Winter draws nearer.

Cauliflower Fritters with Mozzarella

Posted by Lipglossiping On September - 16 - 2011

I bought another cauliflower this week in an attempt to get a new recipe under my belt in preparation for coming off the diet and back onto normal food.  I’ll be going the low-carb route, not the Atkins route or anything as hardcore as that, I’ll just be avoiding the “shovel as much starch, bread, pasta and rice into my mouth as possible” route.

Amanda from Beauty Blogging Blonde mentioned that she was making Cauliflower Fritters last week on Twitter and that was pretty much all the encouragement I needed.  She did send me a link to the recipe she was using but I’ve lost it, so ended up bodging something together from a few recipes I’d googled and whatever I had in the cupboards.

I need a posher name than ‘fritters’ really because ‘fritters’ rhymes with ‘squitters’ and where food is concerned, those two words should never be seen in the same sentence.

Cauliflower Fritters

1 head of Cauliflower
1 Onion, diced
2 cloves of Garlic, crushed

1 tsp Paprika
1 tsp Salt
1 tsp Black Pepper
1 tbsp Parmesan Cheese (don’t judge me, I only had dried)

3 eggs, beaten
3 tbsp plain/wholemeal flour (more if needed)

200g Mozzarella, cubed

1 tbsp oil for frying

1).  Steam the Cauliflower until tender.  I do this in a cellophane-covered bowl in the microwave with a couple of tbsp of water in the bottom.  Takes around 10 minutes of cooking time on full power.

2).  Once tender, mash the cauliflower and add the diced onion, garlic and other dry ingredients.

3).  Combine the mixture with a fork before incorporating the beaten egg.

4).  Add the flour 1 tbsp at a time, mixing well until you get a firm consistency.  You want the mixture to hold together on a spoon (just about).  You may need more or less flour depending on how large your eggs are!

5).  Add the Mozzarella and incorporate gently.

6).  Heat the oil in a frying pan on a low/medium heat.  The worst thing you can do is have your heat too high.  We need to cook the flour which means not burning the outsides!  Start low and turn the heat up as you get used to the cooking times needed.

7).  Once your oil is hot, spoon the mixture into the pan in little patties and press down lightly to shape.

8).  Leave frying (don’t be tempted to turn or peek) for a good 3/4 minutes.  If you smell burning, ignore that last instruction and remember to keep the heat LOW.

9).  Turn and cook the fritter for the same time on the other side.  You’re looking for a dark golden brown and a crispy texture – the insides will be soft with melty Mozzarella.

10).  Drain on a piece of kitchen towel and serve as a side or on their own with a salsa and salad.

.

These cauliflower fritters are ridiculously delicious and even Leila was impressed enough to attempt one.  They’re ideal eaten freshly cooked but lovely cold too (they go a bit chewy).  Best reheated from frozen in a v. hot oven.

Share your favourite cauliflower recipes with me!

RANDOM

Red Lipped Readers – Part Three!

I bought another cauliflower this week in an attempt to get a new recipe under my belt in preparation for coming off the diet and …

Food Friday: Summer grilling with the Tefal Optigrill

I bought another cauliflower this week in an attempt to get a new recipe under my belt in preparation for coming off the diet and …

Mii Cosmetics Illuminating Face Base SPF15

I bought another cauliflower this week in an attempt to get a new recipe under my belt in preparation for coming off the diet and …

FOTD: The four product school run

I bought another cauliflower this week in an attempt to get a new recipe under my belt in preparation for coming off the diet and …

Red Lips Day 7: Urban Decay Revolution

I bought another cauliflower this week in an attempt to get a new recipe under my belt in preparation for coming off the diet and …

Burberry Fresh Glow Fluid Base in 01 Nude Radiance

I bought another cauliflower this week in an attempt to get a new recipe under my belt in preparation for coming off the diet and …

Deal Alert: 25% off at Cult Beauty

I bought another cauliflower this week in an attempt to get a new recipe under my belt in preparation for coming off the diet and …

NOTD - Nails Inc. - Chinatown

I bought another cauliflower this week in an attempt to get a new recipe under my belt in preparation for coming off the diet and …

HQ Hair introduces me to David Scheffen…

I bought another cauliflower this week in an attempt to get a new recipe under my belt in preparation for coming off the diet and …

Wordless Wednesday: Spring is coming!!

I bought another cauliflower this week in an attempt to get a new recipe under my belt in preparation for coming off the diet and …

POPULAR

CLOSED: Competition Time: Givenchy Very Irresistible L'eau en Rose Perfume!

I bought another cauliflower this week in an attempt to get a new recipe under my belt in preparation for coming off the diet and …

CLOSED - Win it! The Body Shop Expert Brush Collection

I bought another cauliflower this week in an attempt to get a new recipe under my belt in preparation for coming off the diet and …

Win a gorgeous "glow" trio with prizes from Urban Decay, New CID, & Arbonne!

I bought another cauliflower this week in an attempt to get a new recipe under my belt in preparation for coming off the diet and …

Hello? Is this thing on?

I bought another cauliflower this week in an attempt to get a new recipe under my belt in preparation for coming off the diet and …

Avoid the brush off with Oral-B Pro-Expert

I bought another cauliflower this week in an attempt to get a new recipe under my belt in preparation for coming off the diet and …

Big savings on French Pharmacy brands, win my Escentual.com top picks!

I bought another cauliflower this week in an attempt to get a new recipe under my belt in preparation for coming off the diet and …

Win it! 3 EcoTools Bamboo Bronzer Brushes to win!

I bought another cauliflower this week in an attempt to get a new recipe under my belt in preparation for coming off the diet and …

FOTD Busting out of the comfort zone!

I bought another cauliflower this week in an attempt to get a new recipe under my belt in preparation for coming off the diet and …

Dear Obesity...

I bought another cauliflower this week in an attempt to get a new recipe under my belt in preparation for coming off the diet and …

Urban Decay The Black Palette - Photos & Swatches

I bought another cauliflower this week in an attempt to get a new recipe under my belt in preparation for coming off the diet and …

COMMENTS

  • Categories

  • Archives

  • Admin

  • Ads