Food Friday: Diet-Friendly Eggs Benedict!

Posted by Lipglossiping On August - 16 - 2013

I can take or leave breakfast. I know you’re supposed to eat it religiously… that it kick-starts the metabolism for the day. What is it they say? Eat breakfast like a king, lunch like a prince, dinner like a pauper… blah blah blah…

The thing is, I just don’t feel remotely hungry upon waking. It takes me a good hour or more to be able to face the thought of food.

Unless you put this infront of me.

IMG_2209

I die for a dippy egg.

Truth is though, I can’t poach eggs for shit. I’ve tried, oh… I’ve tried so many times. With vinegar, without vinegar… eggs so fresh, they still feel warm. A whirlpool in my pan that would sink a battleship… I just can’t do it. Praise the lord for silicone egg poachers, that’s all I can say.

I call this version of Eggs Benedict “diet friendly”… and it’s not actually too bad for the waistline. I make a cheat’s version of hollandaise, I don’t have the skillz for a real, homemade version and this one is far lower in fat than the proper, gourmet treat. I’m also the only one in the house who actually likes Eggs Benedict so it doesn’t make much sense to keep a jar of hollandaise in the fridge, I just wouldn’t get through it (without a very big spoon and a lack of shame).

Anyway, if you want to indulge in a weekend breakfast treat… stick with me, and read on…
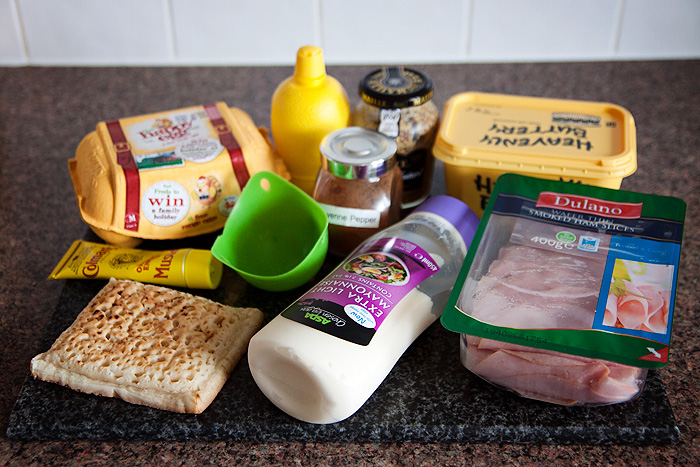
IMG_2169

You’ll need:

1 crumpet or muffin (mine are cool square-shaped ones from Asda)
2 slices of wafer thin ham (or bacon if you’re a fatty)
1 whole egg
1.5 Tbsp low-fat mayonnaise
A squirt of lemon juice
1/4 tsp mustard (I use whatever I have… I’ve made it before with english, dijon, and wholegrain… I like the texture of wholegrain)
1/2 tsp melted butter
A pinch of cayenne pepper (optional)

IMG_2178

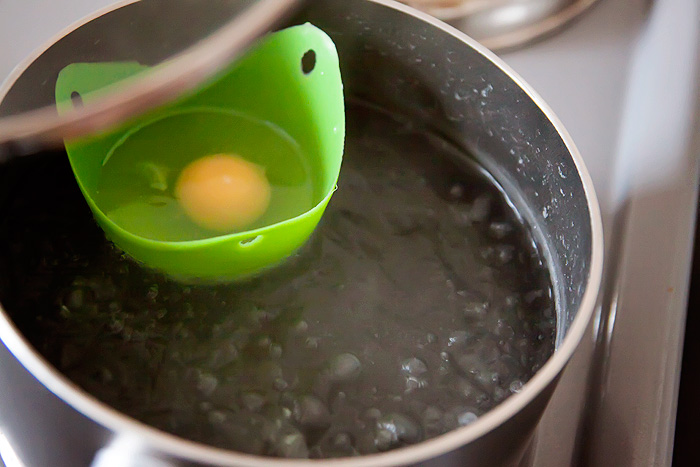
Bring a pan of water to a boil before turning down the heat slightly. Spritz your silicone egg poacher with a couple of sprays of oil (frylight or similar) and crack your egg into the well. Place your egg poacher into the pan and cover, set a timer for 5 minutes.

IMG_2181

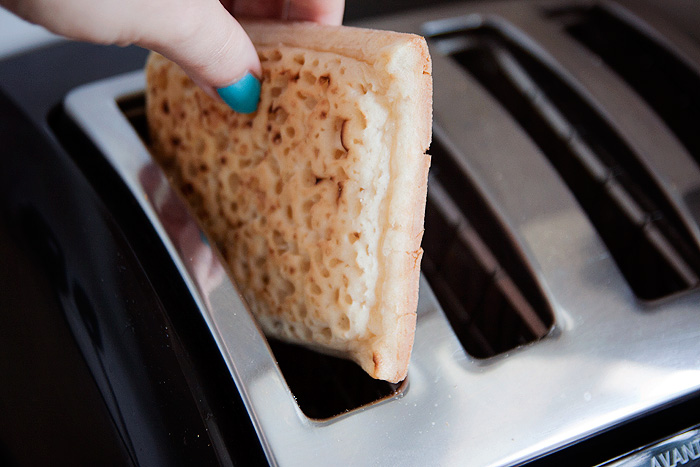
Meanwhile, toast your crumpet or muffin….

IMG_2184

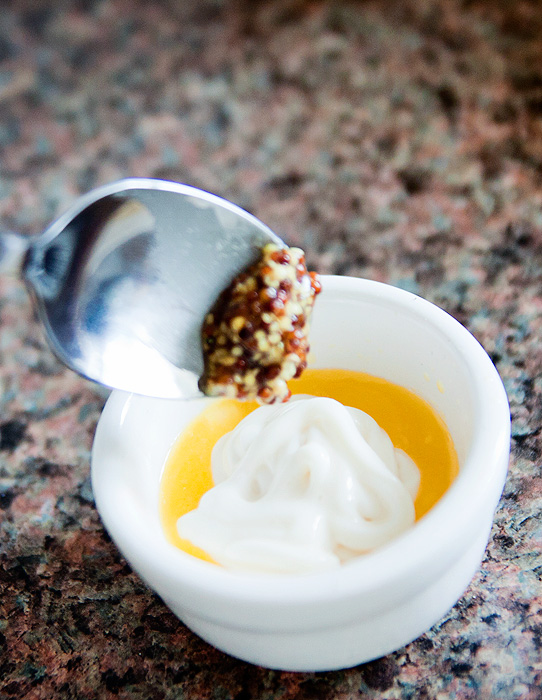
To make the “hollandaise”, melt the butter into a ramekin and add the mayonnaise, mustard (whichever types you’re using), and cayenne pepper. Mix well.

IMG_2187

IMG_2189

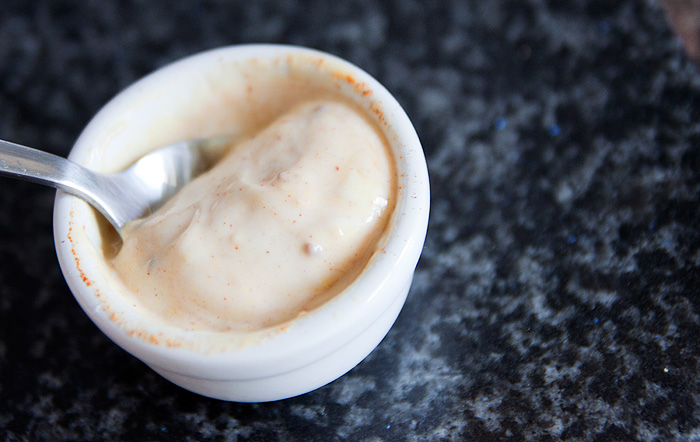
Add a little squirt of lemon juice (to taste). This helps to mimic the hollandaise tang nicely.

IMG_2191

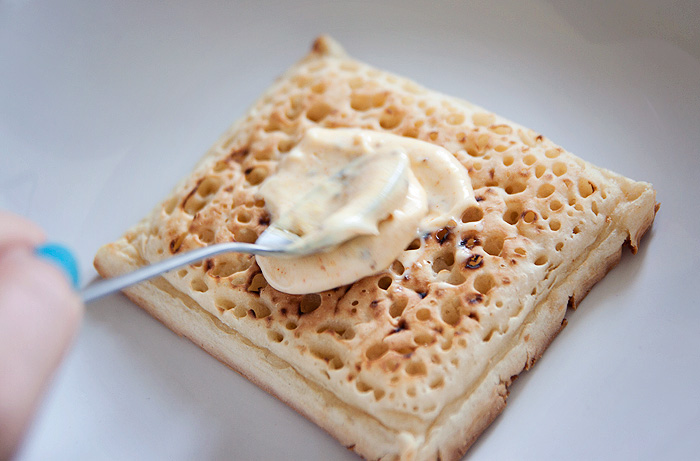
Because this is a “healthy” version, I don’t butter the crumpet but instead use a teaspoon of the “hollandaise” to coat the toasted muffin/crumpet…

IMG_2195

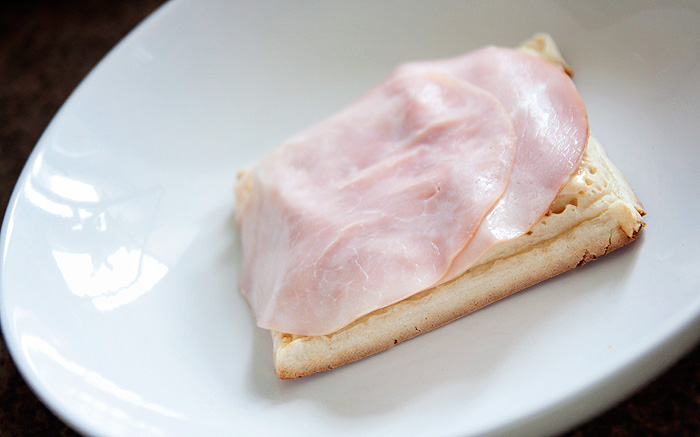
…before adding a couple of slices of wafer thin ham.

IMG_2206

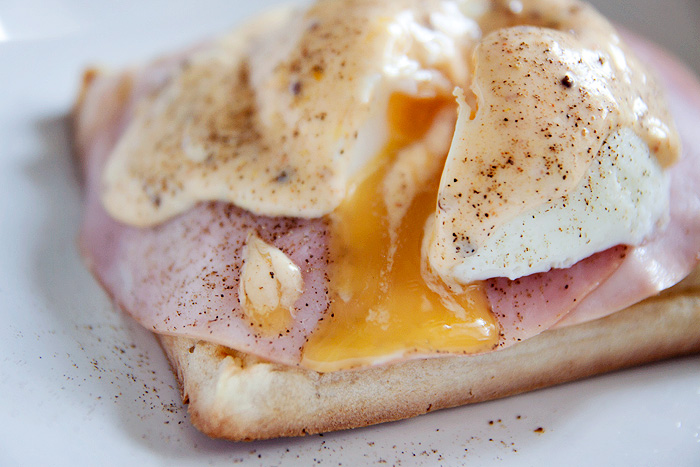
By now, your timer should be beeping! Add the poached egg and top with the remaining “hollandaise” and a shake of black pepper.

Enjoy!

What’s your favourite breakfast treat for the weekend? Will you give this one a go?


Pick your own!

Posted by Lipglossiping On August - 13 - 2013

I haven’t been strawberry picking since I was a small child, no doubt eating far more as I went along than ever made it into the basket.  In fact, I remember it being so much fun, I don’t know why it never occurred to me until now to take Leila, she’s an absolute fruit fiend (having hated vegetables from day one) and loves to feel “in control” of preparing her food.  A match made in heaven.

As far as I’m aware, there’s only really one major strawberry picking field left near us… we used to have one just down the road from my old house but it got carved up and used as a car boot field many years ago.  If you’ve never tasted pick-your-own strawberries, you’re truly missing out.  Sweeter, juicier, and far more tasty than the bland versions the supermarkets stock… they’re an absolute joy.

IMG_2006

There were marrows bigger than my bum!

IMG_2011

Strawberries as far as the eye could see

IMG_2014

IMG_2017

IMG_2022-2

The queen of strawberries

IMG_2024

IMG_2030

Incase you’re wondering, she’d made the crown that morning… wasn’t giving it up.

IMG_2025

“Leila! Don’t eat them, we’ve not paid yet!”

IMG_2032

“You took my stwabwees off meeeeee!” (hush you, dwarf bean!)

IMG_2036

IMG_2041

Winning!

There should be a couple more harvests left before the end of the month (and then it’s blackberry season!)… if you haven’t picked your own summer fruits yet this year, what are you waiting for?

A DIY Graze Box for less than half the cost!

Posted by Lipglossiping On July - 12 - 2013

I’m a massive Graze Box fan.  Like a child on Christmas morning, I skip toward the front door when I hear the postman coming every alternate Friday.  *Plop!* as the box hits the doormat, *Squee!* as I grab it in my hot little hands and run off to uncover my weekend treats!

What is it about cutely packaged boxes that suddenly makes the interior of Holland & Barrett look sexy.  There is nothing sexy about Holland & Barrett… or Julian Graves for that matter, probably why they went bust.

Are you one of the few remaining people on Earth who doesn’t know what a Graze box is?  Allow me to enlighten you…

A DIY Graze Box for less than half the cost!

A DIY Graze Box for less than half the cost!

Thai Crackers with Sweet Chilli Sauce | Biscuit with Compote | Florentine Mix | Popcorn

You pay a fee of £3.89 and for your monies, you receive a wee cardboard box delivered to your door, or office… you know, if you have one.  The box contains a selection of four tasty treats, supposedly healthy (usually somewhere inbetween healthy and fattening), definitely moreish.  You can log on to the website at Graze.com and tell them what you like/don’t like… even rating the previous box so that future selections are customised to your taste.  Back in the day, they used to include fresh fruit and other lovely bits in their boxes but what with Royal Mail being shit and letting the fruit ferment… they had to stop all that.

There are a billion offers around for you to try your first Graze box for free, mostly because subscribers get given codes to refer friends and earn themselves money off future boxes.  Here, have mine: 616XG25D for a free box*.

They’re also now doing Breakfast boxes containing four portions of suped-up porridge… usually with things like dried fruit and nuts added, plus a drizzle of honey.  Yum.  Again, ZXRP1YM will get you into the top-secret (not really) Breakfast Club and award you your first box for free*.

…BUT YOU’RE NOT GONNA WANT TO USE THEM!

Because look, I done did my very own Graze Box.  A DIY Graze Box!  And it cost not THREE POUNDS AND EIGHTY-NINE PENCE.  Oh no, it cost a mere £1.67** and contains lots more goodies!

A DIY Graze Box for less than half the cost!

A DIY Graze Box for less than half the cost!

A DIY Graze Box for less than half the cost!

Garibaldi Biscuits | Mini Flapjack | Breadsticks, Cheese & Chutney

Meringue and Yoghurt-coated Strawberries | Florentine Mix | Roasted Chickpeas & Wasabi Peanuts

My favourite thing from my delivered Graze boxes has always been the Florentine mix of pumpkin seeds, cranberries, and dark chocolate buttons so I knew that I wanted to replicate this in my own version (bottom middle).  Infact, this worked out as the most expensive pot (56p), which might have something to do with the fact that I used Montezuma’s Giant Dark Chocolate Buttons (om nom nom).

Garibaldi biscuits (top left) are a much-neglected biccie in my opinion!  On Weight Watchers, you can have three for 3PP… plus they’re pretty inedible without a cuppa but perfect for dunking, making them a brilliant mid-afternoon, tea-break snack.

I wanted an even spread of sweet vs. savoury, so also included a mini-flapjack bite from Asda bakery (top middle)… now I just need to resist the temptation not to polish the rest of them off!

Leila’s passion for breadsticks got me thinking about their potential for grazing on (geddit?), so I picked up some mini wholewheat breadsticks, a jar of tomato chutney, and a Babybel Light (top right).  It’s like a cheese and pickle sarnie in skinny form… um, sort of.

The bottom left selection is another for my sweet tooth.  It features a broken meringue nest and yoghurt-covered dried strawberry pieces!

Finally, I included a pot with a comination of dry-roasted chickpeas and wasabi peanuts (bottom right).  So spicy, so good!

Obviously the initial outlay to make your own Graze boxes is something to think about… but as an ongoing thing, this box worked out at £1.67 for the lot.  As far as quantities go… my Florentine mix weighs in 40g, only 1g less than the Graze version… but do you know the really cool thing?  Mine is 5PP… theirs is 6PP!

Would you make your own Graze box?  What would you put in it?

* both codes are affiliated, I get £1 off my next box if you use them (I think).  Please don’t use them because now I have a cupboard-full of seeds and dried fruit to use up!

** ignoring the £5845893 I spent on tiny, tiny boxes

Weight Watchers Friendly: Chipotle Chicken Wrap

Posted by Lipglossiping On July - 8 - 2013

“Ugh, it’s too hot to cook!” says me.

“Hungry!” says everyone in the flat who doesn’t have to contemplate entering the kitchen.

The thought of even putting the oven on makes me wanna stick my head in it whilst I’m there. I’ve got all the windows open (curtains closed of course) and this has afforded me a little insight into the UK’s problem with inbreeding. The mercury rises above 25 degrees and everyone outside feels the need to raise their voices because sound doesn’t travel well through heated airwaves?

I’ve had: “Does your MUVVER know you’re buying WEED?!” shouted down the road… not once, but four times (just in-case we didn’t all hear this revelation the first time round). Followed up with what sounded like the ice-cream van having a seizure over and over and over. It’s always the same around here when the sun comes out, Mr Marucci circles these lanes like a vulture, he just won’t stop until we’ve all got fucking ice-cream headaches. And that’s without consuming a single 99er. You know the tune? We’ve always told Leila that if they play the music, it means they’ve run out of ice-cream.

I’m grumpy. Can you tell? But I’m also hungry… and I need to go to the gym later (hardcore gym bunny now). Hence, I need to eat. Without much effort… here’s what I’m making tonight.

Weight Watchers Chipotle Chicken Wrap_1

The cast of characters include:

2 Warburtons Squareish Wraps
1 cooked chicken breast, shredded
1/2 an onion, sliced
handful of frozen peppers (I always buy frozen, who can afford fresh?)
2 mushrooms, sliced
1tbsp tomato puree
2tsp chipotle paste
1tbsp natural yoghurt
1tsp olive oil
salad-y stuff

Make up your side salad first, this cooks fiercely and quickly – you don’t wanna be mucking about trying to slice tomatoes while the pan behind you is on fire.

Weight Watchers Chipotle Chicken Wrap_2

Heat a tsp of olive oil in a frying pan and add the vegetables, stir-frying quickly over a high heat until well-softened.

Weight Watchers Chipotle Chicken Wrap_3

Add the tomato puree and chipotle paste, return to the heat and combine everything evenly before adding the ready-cooked shredded chicken to warm through.

Weight Watchers Chipotle Chicken Wrap_4

Remove from the heat and spoon over a tablespoonful of natural yoghurt for a touch of creaminess.

Weight Watchers Chipotle Chicken Wrap_5

Divide into two portions and spoon into your wrap. Serve with your side salad and enjoy!

Weight Watchers Chipotle Chicken Wrap_6

Weight Watchers Chipotle Chicken Wrap_7

How simple is that? Probably too bloody simple to bother with a blog post about it but it was either this or order something from Dominos, which we know wouldn’t be Weight Watchers friendly! As far as the points go, this came in at a truly wonderful 7 Pro Points. Leaving plenty of points for a refreshing gin and tonic (or seven) later.

If you like Mexican flavours, a jar of chipotle paste should be a permanent staple in your fridge…. you get all that wonderful smokey Mexican flavour without the heat… and let’s face it, who needs anymore of that today?

Let me know if you try this one out! What do you cook on days when you just wanna declare the kitchen a dead-zone?


Making vegetables tastier: Broccoli Tots

Posted by Lipglossiping On June - 27 - 2013

5 a day. Do you?

I don’t… although God loves a tryer.

The problem with vegetables is that they’re just alright.  I’m simply not gonna get excited over a carrot in the same way that I get excited over a slice of cheesecake.  Thems the breaks veg… you don’t make me want to eat you, it’s your fault, not mine.  Have you ever thought about that?

And so, in my endless quest of ways in which I can make vegetables tempt me… I wanted to make a slightly-more-healthy version of my much-loved courgette fritters… except, with broccoli, baked rather than fried.  ‘Cos that’s what I had.  Lots and lots of slightly-yellowing broccoli bought with the best of intentions.

Here’s what I did:

Broccoli Tots_01

The cast of characters included:

2 medium-sized heads of Broccoli (don’t de-stalk this too vigorously)

1.5 cups breadcrumbs (I used Weight Watchers Malted Bread – 3 slices, Panko would be great!)

30g grated parmesan (I love the Lidl one)

A generous squirt of English Mustard

1 medium egg

3 Tbsp egg whites (or just use another medium egg if you’re not points counting!)

1 tsp garlic paste

3/4 tsp smoked chilli flakes (you can substitute this for any seasoning you’d prefer)

Preheat the oven to 190 degrees celsius (180 fan)

Begin by chopping the broccoli into small, less than bite-size pieces and steam them for a couple of minutes until tender.  Once cooked, add all the ingredients one by one, mixing as you go to ensure you get everything evenly combined.

Broccoli Tots_02

Take a bun tray/muffin tray or similar (I use this 12-cup one from Asda) and give it a light spray with cooking oil.  Use your hands to gently shape the mixture into golf-ball sized balls and place into the hollows of your bun tray.

The mixture should feel quite wet, the broccoli tots will spread a little whilst cooking but retain their shape within the hollow.

Broccoli Tots_03

Bake on the middle shelf for 15-minutes then remove from the oven and flip each tot over.  Pop back in the oven for another 10-15 minutes.

Broccoli Tots_04

Broccoli-Tots_05

The beauty of these veggie tots is that I’m already thinking of all the other vegetables I could cook like this.  I would love to do bubble and squeak… something which I LOVE but can never get brown and crispy in a frying pan.

The parmesan was great but I think I might try it with a bit of reduced fat mozzarella next time… or even a sprinkle of my beloved blue cheese.

As far as the Pro Points go… these worked out at 2 Pro Points per three tots or nine points for the whole tray of twelve!  Not bad for a plate-filling side.  If you’re up for a bit of batch cooking, these will also freeze beautifully, just heat  them up from frozen in the oven at around 200 degrees for 15-minutes and they’re perfect.

What are your favourite ways of making vegetables more tempting?

A baking classic! Layered sponge with jam and buttercream

Posted by Lipglossiping On April - 29 - 2013

As much as I want to call this a Victoria Sponge, traditionally… it’s not. You see, a Vicky Sponge contains jam and it’s only heathens like me who would dare to add a layer of (not-even-fresh-cream) buttercream to the proceedings.

However, I made my brother some cupcakes for his birthday this weekend and as such, I had some leftover buttercream that I couldn’t allow to go to waste.

IMG_8924

The sponge is a classic, though not always the easiest to get right. In theory, the best results are obtained through a delicate balance of gradual ingredient adding and mixing… no good can surely come of lumping everything in the same bowl and turning on the mixer. Except, I am not a patient cook and always favour the one-step method.

The most failproof version of which, is one my Nan always referred to as an 8s and 4s. You should be able to see why when you read the ingredients list:

225 g (8 oz) butter (room temperature)
225 g (8 oz) caster sugar
225 g (8 oz) plain flour
4 large eggs
2 tsp baking powder
2 x 8″ greased and lined sandwich tins

IMG_8932

Preheat the oven to 180 degrees celsius and grease/line your two sandwich tins.  I usually either grease and flour or grease and add a disc of parchment paper to the base of each tin.  Place all the ingredients into a large mixing bowl and turn on your hand-mixer, slowly at first before building up the speed until everything is well-combined.  I beat the ingredients for no more than a few minutes.

Divide your mixture evenly between the two tins and lightly push the mixture out toward the edges of the tin with a spatula.  Bake in the oven for around 22-25 minutes but check regularly from around the 16 minute mark.

Allow the cakes to cool in their tins for 5 minutes before turning out onto a cooling rack and peeling off the parchment paper.  Leave well alone until thoroughly cooled.

IMG_8942

When your cakes have cooled, spread one layer with your buttercream (I won’t give you a recipe but I do have a soft spot for the Hummingbird bakery one) and the other with the jam of your choice.  I love the Lidl jams which are more like preserves, raspberry is traditional for this style of cake but I used blackcurrant which was honestly, a little too robust and tart in this instance.  Combine the layers and lightly dust the top of your cake with icing sugar.

What was the last cake you made?

Food Friday: Halloumi Kebabs

Posted by Lipglossiping On March - 29 - 2013

I’m a bit of a kebab monster.  Doner, Shish, Kofte… chicken, lamb, vegetable… I love them all.  It’s an illness.  Nowadays, I restrict the doner love for those times when copious amounts of alcohol have been consumed and I can’t taste the belly-buttons.

But how about cheese?  Cheese kebabs.  You’re salivating aren’t you?

Halloumi Kebabs_01

I’m not going to write out a recipe because it’s pretty obvious how to construct a cheese kebab.  Get some cheese, string it on a skewer and add some vegetables so that you don’t only have cheese on it.  Tempting though it is.

Halloumi is pretty brilliant for this, infact… I wouldn’t recommend using anything else.  Especially don’t use Dairylea triangles, nothing good will come of it.  My halloumi comes from Asda and has chilli in it for a little added kick.

Halloumi Kebabs_02

What other vegetables work well skewered?  I used: courgette, cherry tomatoes, red onion, and mushrooms.  I’m sure I missed something really obvious…

Halloumi Kebabs_03

Baste the kebabs with some kind of marinade (I used sweet chilli) before popping under the grill for around 10 minutes, turning ocassionally so they don’t catch fire.

I served my Halloumi Kebabs with a mini-tortilla and some salad.  If you’re following Weight Watchers, you’ll be interested to know that this meal (with half the pack of cheese and a mini-tortilla wrap) came out at 14PP.  Who says you can’t eat kebabs and lose weight?

Halloumi Kebabs_04

Do you like kebabs?  We probably can’t be friends if you don’t.

A Weight Watchers Easter Treat: White Chocolate & Lemon Biscotti

Posted by Lipglossiping On March - 25 - 2013

I first realised that I could make my own biscotti after reading Meg’s recipe for her Christmas DIY series, it simply hadn’t dawned on me that it would be anything other than horrendously complicated to make.  Moments before making it, I even tweeted again… just to double check that I wasn’t about to embark upon a biscuity (biscotti, gettit?) nightmare.  The responses were positive, biscotti is indeed, easy to make.

Which is why I’m sharing this diet-friendly version as part of this week’s Weight Watcher’s challenge.  The brief was simple: “Eggscellent Easter Treats – Rather than succumb to high ProPoint sweet treats that could derail your weight loss, why not use your knowledge of the Weight Watchers plan to whip up something plan-friendly instead?”

That’s fine.  I’m still going to eat my body weight in hot cross buns… no-one can stop me, I’m sorry.  Hot cross buns are my favouritest things in the whole world.  You can keep your easter eggs, your Cadbury’s Creme Eggs, your roast legs of lamb, and even your simnel cake… I’m not interested.  It’s all about the Hot Cross Buns.  Served at room temperature with cold, cold butter.  Oh god.

QUICK!  BUNS OUT, BISCOTTI IN…

Lemon and White Chocolate Biscotti

the cast of characters

My second favourite thing (after hot cross buns), is lemon cake.  Lemon anything really… the clean flavour really tickles my taste-buds.  Considering I’m going for an Easter-themed treat, my health(ier) alternative needed to pay hommage to the life-giving force otherwise known as chocolate.  So here we are, White Chocolate & Lemon Biscotti courtesy of www.cookinglight.com (but somewhat modified by yours truly).

You’ll need (makes approximately 32 biscotti at 2PP-a-piece):

3/4 (150g) cup sugar
3tsp grated lemon rind
1tsp vanilla extract
1tsp lemon extract
2 large eggs
1 2/3 (200g) cups all-purpose flour
1tsp bicarbonate of soda
1/4tsp salt
1 1/4 cups (170g) white chocolate, chopped
Cooking spray or a Silpat mat

1.  Preheat oven to 150° celsius and prepare your baking sheet by covering it with a silpat mat / spraying it with non-stick cooking spray (or grease and lightly dust with flour).

2.  Add the first five ingredients to a large bowl and mix until well blended.  Combine the flour, bicarbonate of soda, and salt and gradually add them to the sugar mixture, beating until well blended. Stir in the chocolate.

3.  Turn the (wet) dough out onto the baking sheet and shape it into two (12-inch-long) rolls; pat to 2-inch width.  You may need to flour your hands, it’s quite messy… just keep working the mixture into shape.  These will spread quite a lot as they cook, so beware that you’ll need to allow space on the sheet for this OR use two baking sheets on different shelves.

4.  Bake at 150° for 30/35 minutes. Remove the rolls from the baking sheet(s) and let them cool for 10-minutes on a wire rack.

5.  Cut the rolls diagonally into 1/2″ slices. Place them, cut sides down, back onto the baking sheet and bake at 150° for 10-minutes.  Turn the biscotti over and bake an additional 10-minutes on the other side.  Remove them from baking sheet and allow them to cool completely on wire rack.  The biscotti will harden as they cool.

Lemon and White Chocolate Biscotti

a hint of lemon with chunks of white chocolate

Lemon-and-White-Chocolate-Biscotti

I don’t like black coffee, this was purely for the photo. Someone needs to fix their nails.

Lemon and White Chocolate Biscotti

about 1/8th of the finished quantity. We’re gonna beeescotti sick of biscotti!

What’s your favourite Easter indulgence? Will you be attempting to side-step the chocolate treats for healthier alternatives this year?

* I am a Weight Watchers blog ambassador and my links to their website are affiliated.  I have received no payment for this post.

Courgette “spaghetti”. My new favourite thing!

Posted by Lipglossiping On March - 9 - 2013

I pre-warned you earlier in the week that I’d be blogging about my new favourite thing: courgette spaghetti, and here I am!  I’ve always liked courgettes but they’re one of those vegetables that don’t really serve a huge amount of purpose aren’t they?  I mean, sure… they’re alright skewered and barbecued and they make a mean fritter but they’re not the kind of vegetable I ever “add” to other meals as a bulking ingredient.  I have to specifically plan a meal around them, and that sometimes means that I have courgettes littering up my salad box at the end of the week.

A few months ago, I bought a spiraliser.  It was an impulse purchase that in honesty, I regretted almost immediately.  When it arrived and I saw how bulky it was, my regrets deepened and I resigned it to the back of the cupboard until I’d had a chance to get my head around what to do with it.

I knew that one of the most popular dishes to make with a spiraliser was courgette spaghetti… raw.  I didn’t fancy eating it raw but it did encourage me to substitute normal pasta for a trial.  Once tasted, I was hooked!

Courgette Spaghetti_01

The cast of characters. You’ll need (for two people): three courgettes, fresh basil, two onions, a few mushrooms (or one big flat!), 1/4 tsp of cayenne pepper, passata.  I also used frozen peppers and frozen garlic (not shown above).  You can add some ham or bacon… as you can see, I was going to, but Mr. L decided he wanted the last two rashers saved for a bacon sandwich on Sunday morning!

Courgette Spaghetti_02

Cut the ends off your courgettes and grab your spiraliser (this one is mine).  If you don’t have room for one of these beauties, you can also buy a julienne peeler which will help get the spaghetti shape.  I have to say though, the spiraliser is far too much fun!

Courgette Spaghetti_03

Look at it in action!

Courgette Spaghetti_04

You know you want a go.

Courgette Spaghetti_05

Courgette Spaghetti_06

Ta-da!

Courgette Spaghetti_07

Courgette Spaghetti_10

I sprinkle my courgette with a little salt and blast in the microwave on high for five minutes.  This softens the vegetable and encourages it to release some of its water content.  Once it comes out of the microwave, tip the courgette into a sieve and let it drain the excess water.  If you have a potato ricer, you could squeeze out the excess water using that.  Don’t worry too much though, if all else fails, you can cook the “spaghetti” a little longer on the hob until the excess water evaporates.

Courgette Spaghetti_08

Finely chop the onion…

Courgette Spaghetti_09

…and the mushroom…

Courgette Spaghetti_11

My freezer essentials include a bag of frozen peppers (how expensive are fresh?!), and frozen minced garlic that I can throw straight in the pan.  Convenience at its best.

Courgette Spaghetti_12

To a lightly oiled pan, add the: onions, garlic, frozen peppers, drained courgette and mushrooms.  Sprinkle over the cayenne pepper and allow to fry for five minutes.

Courgette Spaghetti_13

Pour over the pasatta and simmer gently until the liquid reduces.  Around 5-10 minutes.  Tear the fresh basil by hand and add to the pan a few minutes before serving.

Courgette Spaghetti_14

Serve with a sprinkle of parmesan.  So much fresh flavour and very filling.

It’s also a perfect dish to make on a work-night, even quicker if you buy a pot of marinara-esque sauce to throw over the top.  I’ve bought one of these to try with it next week.

But do you know perhaps my favourite thing about this dish?  The entire meal is 2 ProPoints on Weight Watchers (without the bacon), leaving plenty of points for a big chunk of garlic ciabatta or dough balls.

Have you ever made vegetable spaghetti?  If not, I dare you to try it!

Earl Grey Tea Cupcakes!

Posted by Lipglossiping On March - 2 - 2013

I may be steadfastly clawing my way back onto the healthy-eating wagon but in just the last couple of weeks, I’ve developed the most horrendous sweet tooth known to man.  My sneaky way around this intrusion into my angelic lifestyle *cough* is to fatten everyone else up instead.  Yes, I have become the ultimate feeder.

Don’t get me wrong… I’m not so saintly that I don’t taste my creations but the trick is to have one and then GET THEM THE HELL OUT OF THE FLAT.  It’s the only way I can do it, heaven forbid I still have cake in the house come night-time.  You can be sure that it wouldn’t still be there the next morning.

My latest dabble has been with cupcakes (again).  Leila has decided on the theme that she wants for her fourth birthday party in May (she’s a planner), and that theme is “ballerina”.  She wants ballerina cupcakes, which will thankfully save me a whole lot of stress because anything has got to be easier than last year’s “steam engine cake”.

And so with my raging sweet tooth in hand, I headed into the kitchen to reacquaint myself with a bit o’ cupcake nurturing.  The actual baking, I can do with my eyes closed… the icing?  Well, to be honest, I usually trowel it on with a spatula and I’m done.  I don’t enjoy the faffy bits in baking… which is probably why I’ve always preferred home-style cooking over anything more delicate.

earl grey cupcakes_01

These Earl Grey Tea cupcakes from the Hummingbird Bakery book caught my eye mostly because I’ve discovered a new-found love for Earl Grey.  I’ve been a tea-drinker for about 10-years, I used to hate it as a teenager and it was only through meeting my husband (ultimate tea drinker) that I developed a taste for it.  While he’s a simple PG Tips man, I have enjoyed dabbling in loose leafs and the clean-tasting, subtle Earl Grey has become a real pleasure.

I won’t print the recipe here for fear of getting my hands slapped, so instead, I shall link you to the lovely Laura Ashley website who are hosting a copy of the Earl Grey Tea Cupcakes recipe with permission of Hummingbird Bakery.  Incase you’re curious, it’s from their Cake Days book… the sweet-toothed girl’s bible.

The only change I made to the original recipe was to use loose leaf tea instead of teabags, which I steeped in a cup with a tea infuser.

earl grey cupcakes_02

You may have noticed that my icing didn’t go to plan.  I got a phonecall mid-bake and when I returned to the kitchen, my scales had reset themselves!  I don’t think I put quite enough icing sugar into the mix but seeing as these were going to my Mum and Dad, I knew they wouldn’t mind my collapsed swirls!

Actually, if anyone has a failproof frosting recipe, I’m all ears… I’m not a huge fan of the HB one (which generally makes too much for 12 cupcakes).

earl grey cupcakes_03

Either way, the flavour of the cake is beautiful with just a hint of bergamot to lift the sponge, it’s very spring-like and delicate without being perfume-y.

earl grey cupcakes_04

Are you planning on baking this weekend?  How would you make “ballerina” cupcakes? Throw all your cupcake/icing tips at me, I’m gonna need them!

Food Friday: Christmas Chutney!

Posted by Lipglossiping On October - 26 - 2012

Before I start, I want to give a big shout out to Franky for not only providing the recipe, but also for completely inspiring me to take a chance on something I’d never attempted before.  I can’t tell you how much fun I had making the chutney and filling the flat with the delicious scent of Christmas.  And let’s not forget the intense satisfaction I get from opening the cupboard to check on my little jars of slowly-maturing chutney… something that I find myself doing more often than is strictly necessary!

What can I say?  I am a smitten-kitten for chutney-making… a process which feels almost soulful in its approach.  Jars full of genuine goodness, a whole lot of instinctive-cooking (the best kind), and just a touch of the crafty bits that I usually suck so badly at employing.  Chutney needs a little while to mature, so if you’re thinking of giving it a go for Christmas presents… I’d say get on it this weekend!

Just reading Franky’s Christmas Chutney recipe got me in the mood for the holiday season.  The list of ingredients alone had me whistling Jingle Bells before I’d reached the end of her post.  So be warned, I accept no responsibility if you’ve got the Christmas tree up and decorated by the time you reach the bottom of this page.

First things first, you’re gonna need some jars.

You can beg/borrow or steal empty jars from friends and family or you can do what I did and head for the value ranges at the Supermarket.  It’s horribly wasteful and I did feel very guilty knowing that I was buying perfectly good food with the intention of wasting the contents but I don’t intend to make a habit of it now that I’ve caught the chutney-making bug.  I hereby promise to wash and save all my jars in the future.  However, if you’re like me… I don’t mind sharing that the Asda Smart Price Sweet Pickle jars are pretty good for the job – the labels soak off cleanly in a few hours (hot, soapy water a must), they’re not too big AND they’re only 24p each.

From Franky’s recipe below, I was able to fill 7 of them.

You will need:

~ 750g cooking apples, peeled, cored and chopped small (for me, that equated to around 1kg unpeeled apples)
~ 1 medium onion, peeled and roughly chopped (I used two small onions)
~ 500g fresh or frozen cranberries, thawed if frozen (I used 1x 350g pack of frozen because of the expense)
~ 250g soft pitted dates, each date cut into 3 (I soaked dried dates overnight in boiling water and used around 300g)
zest, pulp and juice of 2 clementines/satsumas (I got bored of “zesting” after 30 seconds, so I liquidized the bastards)
~ 400g caster sugar
~ 1/2 teaspoon ground cloves
~ 1 teaspoon ground ginger
~ 1/4 teaspoon cayenne pepper
~ 500ml white wine vinegar
~ 2 teaspoons Maldon salt or 1 teaspoon table salt

The jars.  You’ll need to wash and sterilise – this is less daunting than it sounds.  For sterilising, simply arrange the (still wet) jars on a baking tray like this and leave to dry in a 150 degree celsius oven for around 30 minutes.  Don’t do this until you’re almost ready to fill them, they should still be warm when you spoon in the chutney to avoid cracking.  Top tip:  If you have jars with safety (pop up) lids, you can get these to depress by filling the jar, screwing the lid on tightly and then inverting the jar once.  Tip the jar back up the correct way and as it cools, the “button” should slowly invert back to its “safe” position.  Neat huh?

Ok, enough about jars…

Make yourself a big cup of tea and start peeling/chopping.

1. Place the apples, onion, cranberries and dates into a large pan.

2. Zest the citrus fruit over the top, squeeze in the juice and then scrape in the pulp.

3. Add the sugar and all the spices before pouring over the vinegar and sprinkling in the salt.

4. All that remains to be done is to give it a good stir, turn on the heat, bring to a boil, then turn down the heat and let it bubble, uncovered, for about an hour or until it has become a pulpy mass.

5. Spoon into your warm, prepared jars and seal.

The chutney can be made up to 2 months before using {or giving}. Indeed, the longer it has to ‘mature’, the better. It should be stored in a cool, dark place for up to a year. Once opened, store in the fridge and consume within one month.

In terms of cost – each filled jar worked out at under £2 – including all decoration.  Not bad huh?  The more you make, the more cost-effective the process.  I wish I was crafty/savvy/clever enough to make all my own Christmas presents – it gives me so much pleasure… but for now, these are going to make great “topups” for the pressies that I’ve already squirreled away.

What do you think?  Will you give Franky’s recipe a go?

Food Friday: Broccoli & Blue Cheese Soup

Posted by Lipglossiping On October - 12 - 2012

If you’re looking for an Autumn-warmer that’s both versatile and nutritious, then you need look no further than good ol’ fashioned home-made soup.  It’s the kind of meal (yes, you CAN have soup for a main meal) that practically cooks itself and tastes even better the second time around.   I usually cook a batch of soup late at night, let it cool, then pop it in the fridge in the morning – we rarely have soup on the same day that I cook it, I generally feel that a good soup needs a day or two to mellow and intensify in flavour before it’s ready for serving.

I’m an advocate for simple, unfussy food.  I like cooking, no… I love cooking just so long as I don’t have to do anything that requires the patience of a saint.  The same with baking… as soon as I see any mention of meticulous decorating or sugarcraft, I close the cover on the book – the finesse of cooking, just doesn’t appeal to me.

With that in mind, today’s recipe is a hearty, if not meaty soup that has been really popular in our household lately.  Except with Leila.  It’s green you see, and Leila doesn’t trust anything that’s green.

One of the best things about this particular soup is that you only need a handful of ingredients to prepare it.  And trust me, despite the lack of content, there is a surfeit of flavour.

Broccoli & Blue Cheese Soup (makes around 3L, serves 8 – enough for freezing)

Olive Oil for frying
5/6 small onions (3 medium ones)
2 heads of broccoli (about 700g worth)
1 large potato (killer jacket sized)
2L of vegetable stock (I use a Bouillon)
100g blue cheese and a little more for crumbling (1 normal sized packet will do it)

1. Chop and fry the onions in a little olive oil (use a stockpot) for this.

2. Peel and dice the potatoes, make up the stock and add to the stockpot (I used 8tsp of bouillon to 2L of boiling water).  Simmer for around 10/15 minutes or until the potatoes are tender.

3. Roughly chop the broccoli (the smaller you chop, the easier it will be to blend later) and add it to the simmering mixture.  Allow to cook for a further ten minutes.

4. Crumble the blue cheese into the soup and stir gently until melted.

5. Grab your hand blender and whizz the mixture until smooth.

6. That’s it!  How unfathomably easy is that?

Some pictures of the process…

Sooooo good with fresh bread (homemade of course!).

Especially good with more fresh bread than you know is healthy for you and a little swirl of double cream – but that’s between you, me and the carbs.

What’s your favourite Autumn soup?

RANDOM

Eat it or apply it? Products that smell too good to wear!

If you’re looking for an Autumn-warmer that’s both versatile and nutritious, then you need look no further than good ol’ fashioned home-made soup.  It’s the …

Benefit Creaseless Cream in Flatter Me

If you’re looking for an Autumn-warmer that’s both versatile and nutritious, then you need look no further than good ol’ fashioned home-made soup.  It’s the …

Pink Week: OPI Pink of Hearts Pink Shatter Top Coat

If you’re looking for an Autumn-warmer that’s both versatile and nutritious, then you need look no further than good ol’ fashioned home-made soup.  It’s the …

Are you a collector?

If you’re looking for an Autumn-warmer that’s both versatile and nutritious, then you need look no further than good ol’ fashioned home-made soup.  It’s the …

Smashbox Cleansing Oil - Review

If you’re looking for an Autumn-warmer that’s both versatile and nutritious, then you need look no further than good ol’ fashioned home-made soup.  It’s the …

Deal Alert: 20% off Butter London, Ciate, Lilash and more at PowderRooms this weekend

If you’re looking for an Autumn-warmer that’s both versatile and nutritious, then you need look no further than good ol’ fashioned home-made soup.  It’s the …

Urban Decay Lush Lash - The trial...

If you’re looking for an Autumn-warmer that’s both versatile and nutritious, then you need look no further than good ol’ fashioned home-made soup.  It’s the …

Boots 17 Cosmetics Matte Top Coat Nail Polish

If you’re looking for an Autumn-warmer that’s both versatile and nutritious, then you need look no further than good ol’ fashioned home-made soup.  It’s the …

Inexpensive Beauty Find: BeautyUK Paint for Life pink nail trio

If you’re looking for an Autumn-warmer that’s both versatile and nutritious, then you need look no further than good ol’ fashioned home-made soup.  It’s the …

It's baaaack! Selfridges' Beauty Advent Calendar

If you’re looking for an Autumn-warmer that’s both versatile and nutritious, then you need look no further than good ol’ fashioned home-made soup.  It’s the …

POPULAR

CLOSED: Competition Time: Givenchy Very Irresistible L'eau en Rose Perfume!

If you’re looking for an Autumn-warmer that’s both versatile and nutritious, then you need look no further than good ol’ fashioned home-made soup.  It’s the …

CLOSED - Win it! The Body Shop Expert Brush Collection

If you’re looking for an Autumn-warmer that’s both versatile and nutritious, then you need look no further than good ol’ fashioned home-made soup.  It’s the …

Win a gorgeous "glow" trio with prizes from Urban Decay, New CID, & Arbonne!

If you’re looking for an Autumn-warmer that’s both versatile and nutritious, then you need look no further than good ol’ fashioned home-made soup.  It’s the …

Hello? Is this thing on?

If you’re looking for an Autumn-warmer that’s both versatile and nutritious, then you need look no further than good ol’ fashioned home-made soup.  It’s the …

Avoid the brush off with Oral-B Pro-Expert

If you’re looking for an Autumn-warmer that’s both versatile and nutritious, then you need look no further than good ol’ fashioned home-made soup.  It’s the …

Big savings on French Pharmacy brands, win my Escentual.com top picks!

If you’re looking for an Autumn-warmer that’s both versatile and nutritious, then you need look no further than good ol’ fashioned home-made soup.  It’s the …

Win it! 3 EcoTools Bamboo Bronzer Brushes to win!

If you’re looking for an Autumn-warmer that’s both versatile and nutritious, then you need look no further than good ol’ fashioned home-made soup.  It’s the …

FOTD Busting out of the comfort zone!

If you’re looking for an Autumn-warmer that’s both versatile and nutritious, then you need look no further than good ol’ fashioned home-made soup.  It’s the …

Dear Obesity...

If you’re looking for an Autumn-warmer that’s both versatile and nutritious, then you need look no further than good ol’ fashioned home-made soup.  It’s the …

Urban Decay The Black Palette - Photos & Swatches

If you’re looking for an Autumn-warmer that’s both versatile and nutritious, then you need look no further than good ol’ fashioned home-made soup.  It’s the …

COMMENTS

  • Categories

  • Archives

  • Admin

  • Ads