
You know what you really want to deal with when you’re coping with a session of glitter nail polish removal? Nothing. You want to deal with absolutely nothing other than an effortless removal process.
You know you’re unlikely to get it though right? I mean, glitter polish removal is well-known for trying the patience of even the most saintly among us. But what you don’t expect is to get cut to ribbons* in the process.
The NPW Nail Polish Remover Tub is one of those “dip and twist” removal jobbies with a sponge inside that scours off your nail polish in just a couple of twists. And remove it, it does. I have no qualms about the quality of the product or its efficacy at actually removing polish, but the packaging… OH GOD, the packaging!
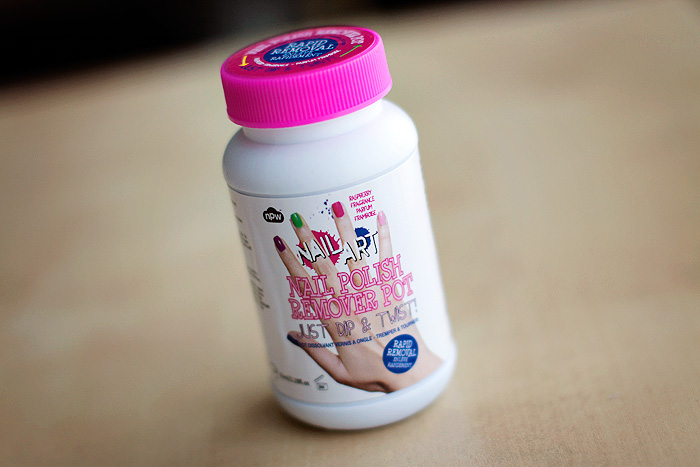
Now, I don’t have the slenderest of fingers but neither are they banana-esque. The NPW pot, however, has clearly been designed to accommodate the pinky fingers of 4-year olds.
You only need to glance at the stock image here to see how you might encounter a problem with this product. As you twist your finger in an attempt to remove the polish, do not, under any circumstances allow your finger to flex… should your knuckle bend, you’ll be treated to the kind of plastic cut that a sheet of razor-sharp paper would be proud of.
Having said that, it’s achievable to remove the polish from all eight of your fingers without needing a first aid kit. It’s the thumbs that you can kiss goodbye.
You see, by their very nature… thumbs are kinda stubby… they just don’t benefit from the same slender length that their brother’s and sister’s enjoy. To remove the polish from your thumbs, you need to get that sensitive bit of skin between the thumb and the index finger perilously close to the knife-like edge of the pot. You can see where this is going can’t you?
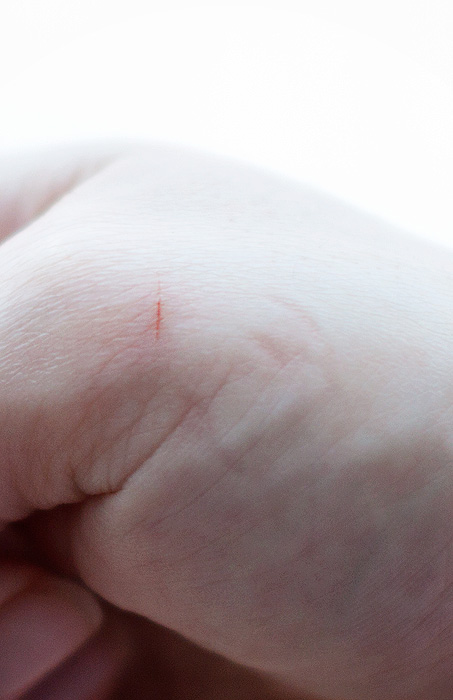
Now, just like a paper-cut… it may not look like much but this bastard stings.
It stings even more when you manage to replicate the damn thing on the other hand, because then… not only is your skin slashed, but your pride irreparably damaged as you marvel at your complete idiocy for managing to do it twice.
That is, until you give the pot to your Mum to remove her nail polish and she manages to cut herself too. Vindicated.
NPW, sort your shit out.
* minor exaggeration
** press sample


 Recommended to me by the lovely Jamilla from


)