A baking classic! Layered sponge with jam and buttercream

Posted by Lipglossiping On April - 29 - 2013

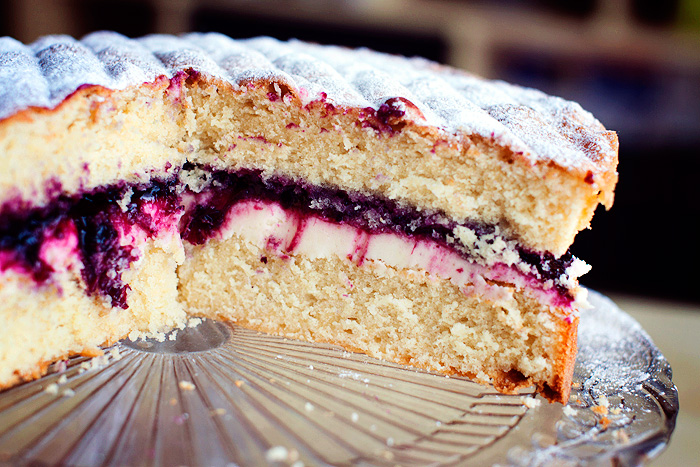
As much as I want to call this a Victoria Sponge, traditionally… it’s not. You see, a Vicky Sponge contains jam and it’s only heathens like me who would dare to add a layer of (not-even-fresh-cream) buttercream to the proceedings.

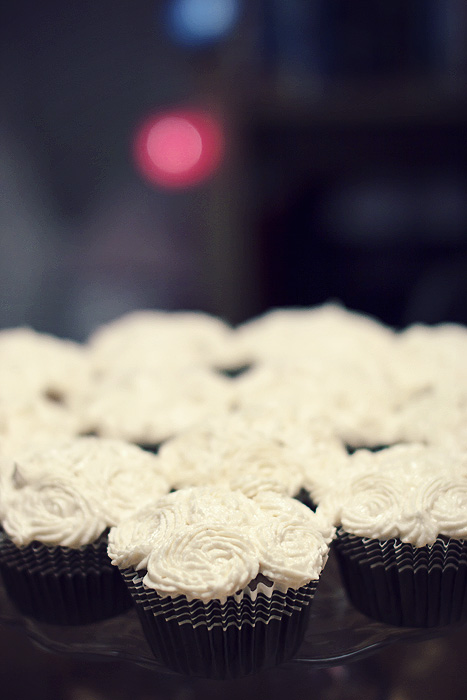
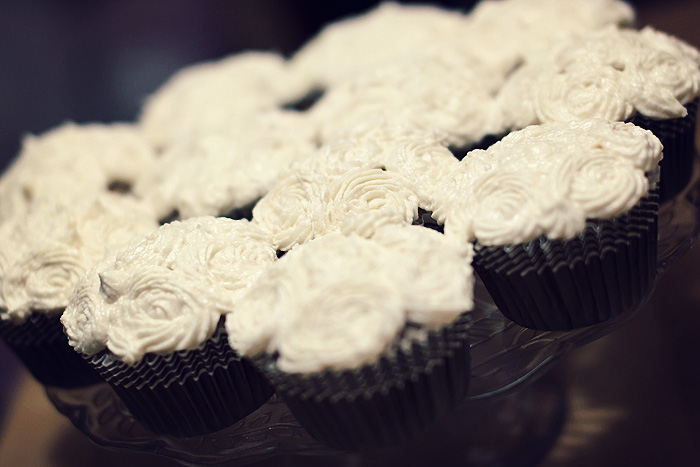
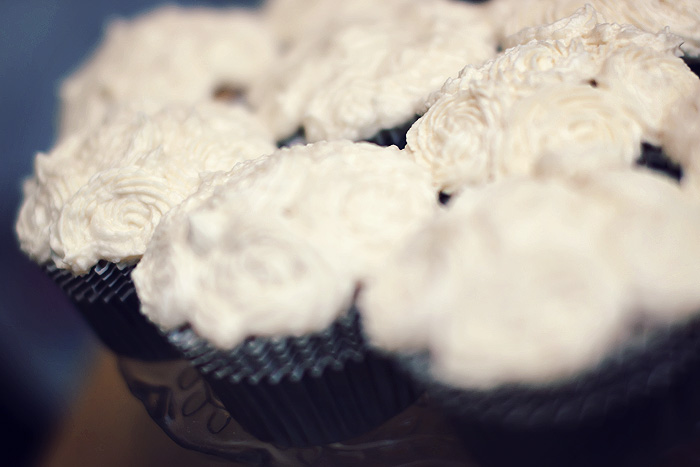
However, I made my brother some cupcakes for his birthday this weekend and as such, I had some leftover buttercream that I couldn’t allow to go to waste.

IMG_8924

The sponge is a classic, though not always the easiest to get right. In theory, the best results are obtained through a delicate balance of gradual ingredient adding and mixing… no good can surely come of lumping everything in the same bowl and turning on the mixer. Except, I am not a patient cook and always favour the one-step method.

The most failproof version of which, is one my Nan always referred to as an 8s and 4s. You should be able to see why when you read the ingredients list:

225 g (8 oz) butter (room temperature)
225 g (8 oz) caster sugar
225 g (8 oz) plain flour
4 large eggs
2 tsp baking powder
2 x 8″ greased and lined sandwich tins

IMG_8932

Preheat the oven to 180 degrees celsius and grease/line your two sandwich tins.  I usually either grease and flour or grease and add a disc of parchment paper to the base of each tin.  Place all the ingredients into a large mixing bowl and turn on your hand-mixer, slowly at first before building up the speed until everything is well-combined.  I beat the ingredients for no more than a few minutes.

Divide your mixture evenly between the two tins and lightly push the mixture out toward the edges of the tin with a spatula.  Bake in the oven for around 22-25 minutes but check regularly from around the 16 minute mark.

Allow the cakes to cool in their tins for 5 minutes before turning out onto a cooling rack and peeling off the parchment paper.  Leave well alone until thoroughly cooled.

IMG_8942

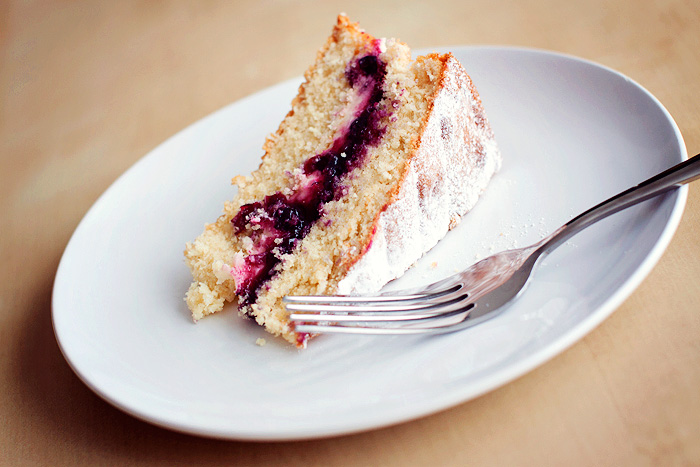
When your cakes have cooled, spread one layer with your buttercream (I won’t give you a recipe but I do have a soft spot for the Hummingbird bakery one) and the other with the jam of your choice.  I love the Lidl jams which are more like preserves, raspberry is traditional for this style of cake but I used blackcurrant which was honestly, a little too robust and tart in this instance.  Combine the layers and lightly dust the top of your cake with icing sugar.

What was the last cake you made?


Food Friday: Halloumi Kebabs

Posted by Lipglossiping On March - 29 - 2013

I’m a bit of a kebab monster.  Doner, Shish, Kofte… chicken, lamb, vegetable… I love them all.  It’s an illness.  Nowadays, I restrict the doner love for those times when copious amounts of alcohol have been consumed and I can’t taste the belly-buttons.

But how about cheese?  Cheese kebabs.  You’re salivating aren’t you?

Halloumi Kebabs_01

I’m not going to write out a recipe because it’s pretty obvious how to construct a cheese kebab.  Get some cheese, string it on a skewer and add some vegetables so that you don’t only have cheese on it.  Tempting though it is.

Halloumi is pretty brilliant for this, infact… I wouldn’t recommend using anything else.  Especially don’t use Dairylea triangles, nothing good will come of it.  My halloumi comes from Asda and has chilli in it for a little added kick.

Halloumi Kebabs_02

What other vegetables work well skewered?  I used: courgette, cherry tomatoes, red onion, and mushrooms.  I’m sure I missed something really obvious…

Halloumi Kebabs_03

Baste the kebabs with some kind of marinade (I used sweet chilli) before popping under the grill for around 10 minutes, turning ocassionally so they don’t catch fire.

I served my Halloumi Kebabs with a mini-tortilla and some salad.  If you’re following Weight Watchers, you’ll be interested to know that this meal (with half the pack of cheese and a mini-tortilla wrap) came out at 14PP.  Who says you can’t eat kebabs and lose weight?

Halloumi Kebabs_04

Do you like kebabs?  We probably can’t be friends if you don’t.

A Weight Watchers Easter Treat: White Chocolate & Lemon Biscotti

Posted by Lipglossiping On March - 25 - 2013

I first realised that I could make my own biscotti after reading Meg’s recipe for her Christmas DIY series, it simply hadn’t dawned on me that it would be anything other than horrendously complicated to make.  Moments before making it, I even tweeted again… just to double check that I wasn’t about to embark upon a biscuity (biscotti, gettit?) nightmare.  The responses were positive, biscotti is indeed, easy to make.

Which is why I’m sharing this diet-friendly version as part of this week’s Weight Watcher’s challenge.  The brief was simple: “Eggscellent Easter Treats – Rather than succumb to high ProPoint sweet treats that could derail your weight loss, why not use your knowledge of the Weight Watchers plan to whip up something plan-friendly instead?”

That’s fine.  I’m still going to eat my body weight in hot cross buns… no-one can stop me, I’m sorry.  Hot cross buns are my favouritest things in the whole world.  You can keep your easter eggs, your Cadbury’s Creme Eggs, your roast legs of lamb, and even your simnel cake… I’m not interested.  It’s all about the Hot Cross Buns.  Served at room temperature with cold, cold butter.  Oh god.

QUICK!  BUNS OUT, BISCOTTI IN…

Lemon and White Chocolate Biscotti

the cast of characters

My second favourite thing (after hot cross buns), is lemon cake.  Lemon anything really… the clean flavour really tickles my taste-buds.  Considering I’m going for an Easter-themed treat, my health(ier) alternative needed to pay hommage to the life-giving force otherwise known as chocolate.  So here we are, White Chocolate & Lemon Biscotti courtesy of www.cookinglight.com (but somewhat modified by yours truly).

You’ll need (makes approximately 32 biscotti at 2PP-a-piece):

3/4 (150g) cup sugar
3tsp grated lemon rind
1tsp vanilla extract
1tsp lemon extract
2 large eggs
1 2/3 (200g) cups all-purpose flour
1tsp bicarbonate of soda
1/4tsp salt
1 1/4 cups (170g) white chocolate, chopped
Cooking spray or a Silpat mat

1.  Preheat oven to 150° celsius and prepare your baking sheet by covering it with a silpat mat / spraying it with non-stick cooking spray (or grease and lightly dust with flour).

2.  Add the first five ingredients to a large bowl and mix until well blended.  Combine the flour, bicarbonate of soda, and salt and gradually add them to the sugar mixture, beating until well blended. Stir in the chocolate.

3.  Turn the (wet) dough out onto the baking sheet and shape it into two (12-inch-long) rolls; pat to 2-inch width.  You may need to flour your hands, it’s quite messy… just keep working the mixture into shape.  These will spread quite a lot as they cook, so beware that you’ll need to allow space on the sheet for this OR use two baking sheets on different shelves.

4.  Bake at 150° for 30/35 minutes. Remove the rolls from the baking sheet(s) and let them cool for 10-minutes on a wire rack.

5.  Cut the rolls diagonally into 1/2″ slices. Place them, cut sides down, back onto the baking sheet and bake at 150° for 10-minutes.  Turn the biscotti over and bake an additional 10-minutes on the other side.  Remove them from baking sheet and allow them to cool completely on wire rack.  The biscotti will harden as they cool.

Lemon and White Chocolate Biscotti

a hint of lemon with chunks of white chocolate

Lemon-and-White-Chocolate-Biscotti

I don’t like black coffee, this was purely for the photo. Someone needs to fix their nails.

Lemon and White Chocolate Biscotti

about 1/8th of the finished quantity. We’re gonna beeescotti sick of biscotti!

What’s your favourite Easter indulgence? Will you be attempting to side-step the chocolate treats for healthier alternatives this year?

* I am a Weight Watchers blog ambassador and my links to their website are affiliated.  I have received no payment for this post.

Courgette “spaghetti”. My new favourite thing!

Posted by Lipglossiping On March - 9 - 2013

I pre-warned you earlier in the week that I’d be blogging about my new favourite thing: courgette spaghetti, and here I am!  I’ve always liked courgettes but they’re one of those vegetables that don’t really serve a huge amount of purpose aren’t they?  I mean, sure… they’re alright skewered and barbecued and they make a mean fritter but they’re not the kind of vegetable I ever “add” to other meals as a bulking ingredient.  I have to specifically plan a meal around them, and that sometimes means that I have courgettes littering up my salad box at the end of the week.

A few months ago, I bought a spiraliser.  It was an impulse purchase that in honesty, I regretted almost immediately.  When it arrived and I saw how bulky it was, my regrets deepened and I resigned it to the back of the cupboard until I’d had a chance to get my head around what to do with it.

I knew that one of the most popular dishes to make with a spiraliser was courgette spaghetti… raw.  I didn’t fancy eating it raw but it did encourage me to substitute normal pasta for a trial.  Once tasted, I was hooked!

Courgette Spaghetti_01

The cast of characters. You’ll need (for two people): three courgettes, fresh basil, two onions, a few mushrooms (or one big flat!), 1/4 tsp of cayenne pepper, passata.  I also used frozen peppers and frozen garlic (not shown above).  You can add some ham or bacon… as you can see, I was going to, but Mr. L decided he wanted the last two rashers saved for a bacon sandwich on Sunday morning!

Courgette Spaghetti_02

Cut the ends off your courgettes and grab your spiraliser (this one is mine).  If you don’t have room for one of these beauties, you can also buy a julienne peeler which will help get the spaghetti shape.  I have to say though, the spiraliser is far too much fun!

Courgette Spaghetti_03

Look at it in action!

Courgette Spaghetti_04

You know you want a go.

Courgette Spaghetti_05

Courgette Spaghetti_06

Ta-da!

Courgette Spaghetti_07

Courgette Spaghetti_10

I sprinkle my courgette with a little salt and blast in the microwave on high for five minutes.  This softens the vegetable and encourages it to release some of its water content.  Once it comes out of the microwave, tip the courgette into a sieve and let it drain the excess water.  If you have a potato ricer, you could squeeze out the excess water using that.  Don’t worry too much though, if all else fails, you can cook the “spaghetti” a little longer on the hob until the excess water evaporates.

Courgette Spaghetti_08

Finely chop the onion…

Courgette Spaghetti_09

…and the mushroom…

Courgette Spaghetti_11

My freezer essentials include a bag of frozen peppers (how expensive are fresh?!), and frozen minced garlic that I can throw straight in the pan.  Convenience at its best.

Courgette Spaghetti_12

To a lightly oiled pan, add the: onions, garlic, frozen peppers, drained courgette and mushrooms.  Sprinkle over the cayenne pepper and allow to fry for five minutes.

Courgette Spaghetti_13

Pour over the pasatta and simmer gently until the liquid reduces.  Around 5-10 minutes.  Tear the fresh basil by hand and add to the pan a few minutes before serving.

Courgette Spaghetti_14

Serve with a sprinkle of parmesan.  So much fresh flavour and very filling.

It’s also a perfect dish to make on a work-night, even quicker if you buy a pot of marinara-esque sauce to throw over the top.  I’ve bought one of these to try with it next week.

But do you know perhaps my favourite thing about this dish?  The entire meal is 2 ProPoints on Weight Watchers (without the bacon), leaving plenty of points for a big chunk of garlic ciabatta or dough balls.

Have you ever made vegetable spaghetti?  If not, I dare you to try it!

Earl Grey Tea Cupcakes!

Posted by Lipglossiping On March - 2 - 2013

I may be steadfastly clawing my way back onto the healthy-eating wagon but in just the last couple of weeks, I’ve developed the most horrendous sweet tooth known to man.  My sneaky way around this intrusion into my angelic lifestyle *cough* is to fatten everyone else up instead.  Yes, I have become the ultimate feeder.

Don’t get me wrong… I’m not so saintly that I don’t taste my creations but the trick is to have one and then GET THEM THE HELL OUT OF THE FLAT.  It’s the only way I can do it, heaven forbid I still have cake in the house come night-time.  You can be sure that it wouldn’t still be there the next morning.

My latest dabble has been with cupcakes (again).  Leila has decided on the theme that she wants for her fourth birthday party in May (she’s a planner), and that theme is “ballerina”.  She wants ballerina cupcakes, which will thankfully save me a whole lot of stress because anything has got to be easier than last year’s “steam engine cake”.

And so with my raging sweet tooth in hand, I headed into the kitchen to reacquaint myself with a bit o’ cupcake nurturing.  The actual baking, I can do with my eyes closed… the icing?  Well, to be honest, I usually trowel it on with a spatula and I’m done.  I don’t enjoy the faffy bits in baking… which is probably why I’ve always preferred home-style cooking over anything more delicate.

earl grey cupcakes_01

These Earl Grey Tea cupcakes from the Hummingbird Bakery book caught my eye mostly because I’ve discovered a new-found love for Earl Grey.  I’ve been a tea-drinker for about 10-years, I used to hate it as a teenager and it was only through meeting my husband (ultimate tea drinker) that I developed a taste for it.  While he’s a simple PG Tips man, I have enjoyed dabbling in loose leafs and the clean-tasting, subtle Earl Grey has become a real pleasure.

I won’t print the recipe here for fear of getting my hands slapped, so instead, I shall link you to the lovely Laura Ashley website who are hosting a copy of the Earl Grey Tea Cupcakes recipe with permission of Hummingbird Bakery.  Incase you’re curious, it’s from their Cake Days book… the sweet-toothed girl’s bible.

The only change I made to the original recipe was to use loose leaf tea instead of teabags, which I steeped in a cup with a tea infuser.

earl grey cupcakes_02

You may have noticed that my icing didn’t go to plan.  I got a phonecall mid-bake and when I returned to the kitchen, my scales had reset themselves!  I don’t think I put quite enough icing sugar into the mix but seeing as these were going to my Mum and Dad, I knew they wouldn’t mind my collapsed swirls!

Actually, if anyone has a failproof frosting recipe, I’m all ears… I’m not a huge fan of the HB one (which generally makes too much for 12 cupcakes).

earl grey cupcakes_03

Either way, the flavour of the cake is beautiful with just a hint of bergamot to lift the sponge, it’s very spring-like and delicate without being perfume-y.

earl grey cupcakes_04

Are you planning on baking this weekend?  How would you make “ballerina” cupcakes? Throw all your cupcake/icing tips at me, I’m gonna need them!

What’s in my fridge? No, really….

Posted by Lipglossiping On January - 7 - 2013

When bloggers do a “what’s in my bag”, or a “what’s on my bedside table” post.  We all know that this stuff isn’t really in their bag right?  Their bedside table doesn’t actually look like a Sense and Sensibility set at any other time than when the photo was taken for the blogpost.  I mean, I love candles but I don’t feel the need to sleep with one inches from my face or keep a collection of classic books to rival the British Library’s back catalogue adjacent to my elbow.  “Look how messy it is!” they proclaim.  Hahhahaha.  No.

Where’s the clicker? (remote controls to you normal people) the snotrags, the scrunchies that you wouldn’t be seen dead in outside of 1992?  It’s an illusion.

Which is why I was a little bit nervy when my first Weight Watchers challenge turned out to be photographing the contents of my fridge post-Christmas.  Of course, I did what any normal person would do and took out the two Quarterpounder Feasters (microwaveable burgers), and the Pepperami.  But what you see in the photos below is not an illusion.  It was also quite bare considering the Big Day had not long passed, I guess that accounts for the 6lbs I managed to put on over the festive period.

What's in my fridge?  No, really....

What's in my fridge?  No, really....

What's in my fridge?  No, really....

I swear those yogurts were not planted there by a Weight Watchers crack team

What's in my fridge?  No, really....

So, what have we got here then?  A crap-ton of garlic, coriander, ginger, madras etc. type pastes… because they can turn nothing into everything.  Some tired looking vegetables, many yogurts, leftover coleslaw, a tin of corned beef (it’s easier to slice cold!), mattesons sausage, the chocolate/treat container (shh), butter-esque spreads, and a bottle of mini champagne in-case something nice happens one day.

The thing that surprised me looking back at the photos, is this… considering how little there is in the fridge, there’s an awful lot of cheese in there.  We’ve got: cheddar, parmesan, dairylea, lowlow grated, blue, edam slices, and babybel.  Just how much cheese does one poorly-stocked fridge need?

So why am I showing you the contents of my fridge anyway?  Ladies, the challenge from Weight Watchers HQ was simple

This week we want you to sort your fridge by hiding all your high PPV foods.

Store that Stilton, move that muffin and put all these temptations into containers or drawers that are hidden away.

Turn all the leftovers  you can into tasty low ProPoints values meals and share one recipe you’ve made.

I’m not storing my Stilton!  Stilton is a bleedin’ lifesaver when you’re trying to create tasty-but-virtuous meals thanks to its potency.  The reality is, you only need to use a little bit to really lift the flavour of something… and that’s what I’m going to show you in my “leftovers” recipe below.  In-case you were wondering, the mattesons sausage totally got stored.  I also went through my freezer and gave my stash of beef mince to my Mum who picked me up a few packets of turkey mince on her next food shop.

Anyway, the recipe…

Cauliflower, Turkey, and Blue Cheese Bake – 10 ProPoints Values

62940da054fa11e2890a22000a1fbc9a_7

Now, I know it looks a bit like baby vom and at the very least needed a sprig of parsley artistically placed somewhere but believe me when I tell you that it tasted better than it looked.  I’m no Smitten Kitchen when it comes to cooking but this was pretty yum for a weight loss friendly, fridge-rescue mission.  I do have one confession to make though… I stole the turkey to make it from my Mum’s fridge, hers was (and still is) heaving!

1 head of cauliflower, broken into florets
15g butter
15g plain flour
140ml semi-skimmed milk
50g blue cheese
200g roast turkey meat, pulled into pieces
black pepper to taste

1.  Steam the cauliflower until tender and transfer into a baking dish.

2.  Make the roux by melting the butter in a saucepan on medium/low heat.  Once melted, quickly stir in the flour before adding the milk – a little at a time until you have a creamy sauce.

3.  Crumble and add the blue cheese to the sauce, keep stirring until it melts and then remove from the heat.  Grind a little black pepper into the sauce if you wish.

4.  Add the turkey pieces to the baking dish and pour over the blue cheese sauce.

5.  Pop under a hot grill until the top begins to darken.

The rich flavour of the blue cheese and the unadulterated creaminess of the sauce makes this meal seem far naughtier than it is and I felt no guilt when I logged on to the Weight Watchers website later in the evening to track my day’s progress.

How’s your fridge looking in the gloom of January’s dull presence?  My first food shop since Chrimbo came on Friday and I must say, it’s looking a lot healthier this week!

* I am a Weight Watchers blog ambassador and my links to their website are affiliated.  I have received no payment for this post.

Food Friday: Christmas Chutney!

Posted by Lipglossiping On October - 26 - 2012

Before I start, I want to give a big shout out to Franky for not only providing the recipe, but also for completely inspiring me to take a chance on something I’d never attempted before.  I can’t tell you how much fun I had making the chutney and filling the flat with the delicious scent of Christmas.  And let’s not forget the intense satisfaction I get from opening the cupboard to check on my little jars of slowly-maturing chutney… something that I find myself doing more often than is strictly necessary!

What can I say?  I am a smitten-kitten for chutney-making… a process which feels almost soulful in its approach.  Jars full of genuine goodness, a whole lot of instinctive-cooking (the best kind), and just a touch of the crafty bits that I usually suck so badly at employing.  Chutney needs a little while to mature, so if you’re thinking of giving it a go for Christmas presents… I’d say get on it this weekend!

Just reading Franky’s Christmas Chutney recipe got me in the mood for the holiday season.  The list of ingredients alone had me whistling Jingle Bells before I’d reached the end of her post.  So be warned, I accept no responsibility if you’ve got the Christmas tree up and decorated by the time you reach the bottom of this page.

First things first, you’re gonna need some jars.

You can beg/borrow or steal empty jars from friends and family or you can do what I did and head for the value ranges at the Supermarket.  It’s horribly wasteful and I did feel very guilty knowing that I was buying perfectly good food with the intention of wasting the contents but I don’t intend to make a habit of it now that I’ve caught the chutney-making bug.  I hereby promise to wash and save all my jars in the future.  However, if you’re like me… I don’t mind sharing that the Asda Smart Price Sweet Pickle jars are pretty good for the job – the labels soak off cleanly in a few hours (hot, soapy water a must), they’re not too big AND they’re only 24p each.

From Franky’s recipe below, I was able to fill 7 of them.

You will need:

~ 750g cooking apples, peeled, cored and chopped small (for me, that equated to around 1kg unpeeled apples)
~ 1 medium onion, peeled and roughly chopped (I used two small onions)
~ 500g fresh or frozen cranberries, thawed if frozen (I used 1x 350g pack of frozen because of the expense)
~ 250g soft pitted dates, each date cut into 3 (I soaked dried dates overnight in boiling water and used around 300g)
zest, pulp and juice of 2 clementines/satsumas (I got bored of “zesting” after 30 seconds, so I liquidized the bastards)
~ 400g caster sugar
~ 1/2 teaspoon ground cloves
~ 1 teaspoon ground ginger
~ 1/4 teaspoon cayenne pepper
~ 500ml white wine vinegar
~ 2 teaspoons Maldon salt or 1 teaspoon table salt

The jars.  You’ll need to wash and sterilise – this is less daunting than it sounds.  For sterilising, simply arrange the (still wet) jars on a baking tray like this and leave to dry in a 150 degree celsius oven for around 30 minutes.  Don’t do this until you’re almost ready to fill them, they should still be warm when you spoon in the chutney to avoid cracking.  Top tip:  If you have jars with safety (pop up) lids, you can get these to depress by filling the jar, screwing the lid on tightly and then inverting the jar once.  Tip the jar back up the correct way and as it cools, the “button” should slowly invert back to its “safe” position.  Neat huh?

Ok, enough about jars…

Make yourself a big cup of tea and start peeling/chopping.

1. Place the apples, onion, cranberries and dates into a large pan.

2. Zest the citrus fruit over the top, squeeze in the juice and then scrape in the pulp.

3. Add the sugar and all the spices before pouring over the vinegar and sprinkling in the salt.

4. All that remains to be done is to give it a good stir, turn on the heat, bring to a boil, then turn down the heat and let it bubble, uncovered, for about an hour or until it has become a pulpy mass.

5. Spoon into your warm, prepared jars and seal.

The chutney can be made up to 2 months before using {or giving}. Indeed, the longer it has to ‘mature’, the better. It should be stored in a cool, dark place for up to a year. Once opened, store in the fridge and consume within one month.

In terms of cost – each filled jar worked out at under £2 – including all decoration.  Not bad huh?  The more you make, the more cost-effective the process.  I wish I was crafty/savvy/clever enough to make all my own Christmas presents – it gives me so much pleasure… but for now, these are going to make great “topups” for the pressies that I’ve already squirreled away.

What do you think?  Will you give Franky’s recipe a go?

Food Friday: Broccoli & Blue Cheese Soup

Posted by Lipglossiping On October - 12 - 2012

If you’re looking for an Autumn-warmer that’s both versatile and nutritious, then you need look no further than good ol’ fashioned home-made soup.  It’s the kind of meal (yes, you CAN have soup for a main meal) that practically cooks itself and tastes even better the second time around.   I usually cook a batch of soup late at night, let it cool, then pop it in the fridge in the morning – we rarely have soup on the same day that I cook it, I generally feel that a good soup needs a day or two to mellow and intensify in flavour before it’s ready for serving.

I’m an advocate for simple, unfussy food.  I like cooking, no… I love cooking just so long as I don’t have to do anything that requires the patience of a saint.  The same with baking… as soon as I see any mention of meticulous decorating or sugarcraft, I close the cover on the book – the finesse of cooking, just doesn’t appeal to me.

With that in mind, today’s recipe is a hearty, if not meaty soup that has been really popular in our household lately.  Except with Leila.  It’s green you see, and Leila doesn’t trust anything that’s green.

One of the best things about this particular soup is that you only need a handful of ingredients to prepare it.  And trust me, despite the lack of content, there is a surfeit of flavour.

Broccoli & Blue Cheese Soup (makes around 3L, serves 8 – enough for freezing)

Olive Oil for frying
5/6 small onions (3 medium ones)
2 heads of broccoli (about 700g worth)
1 large potato (killer jacket sized)
2L of vegetable stock (I use a Bouillon)
100g blue cheese and a little more for crumbling (1 normal sized packet will do it)

1. Chop and fry the onions in a little olive oil (use a stockpot) for this.

2. Peel and dice the potatoes, make up the stock and add to the stockpot (I used 8tsp of bouillon to 2L of boiling water).  Simmer for around 10/15 minutes or until the potatoes are tender.

3. Roughly chop the broccoli (the smaller you chop, the easier it will be to blend later) and add it to the simmering mixture.  Allow to cook for a further ten minutes.

4. Crumble the blue cheese into the soup and stir gently until melted.

5. Grab your hand blender and whizz the mixture until smooth.

6. That’s it!  How unfathomably easy is that?

Some pictures of the process…

Sooooo good with fresh bread (homemade of course!).

Especially good with more fresh bread than you know is healthy for you and a little swirl of double cream – but that’s between you, me and the carbs.

What’s your favourite Autumn soup?

Food Friday: Bread & Butter Pudding!

Posted by Lipglossiping On October - 5 - 2012

As a nation, we’re not particularly renowned for our cuisine… often finding ourselves the butt of many a culinary-related joke, but I don’t care.  I think that we cook without prejudice and, as a result, have no qualms about creating some of the best fusions and adaptations from around the globe.

Take the classically British Bread & Butter pudding, great it might be – but we haven’t gotten prissy about trying it with croissant, panettone, or brioche… we’re happy to smear the slices with jam, marmalade and even nutella! (hmmm, peanut butter idea forming as I type…) – we’re not stuck in our ways and we’re not overly precious about our food traditions, and what good is cooking if you don’t get experimental?

Well, it’s still pretty good actually because I really couldn’t be arsed today.

I went for the classic variety of bread and butter pudding and it puffed up so bloody beautifully in the oven that I thought I’d share the recipe I used with you.  The perfect bread and butter pudding should be crunchy on the outside and fluffy in the middle, custardy, full of plump, juicy raisins (none of those burnt ones!) and perhaps just a little kick of nutmeg.

Here’s how mine went…

Classic Bread & Butter Pudding (like wot Mum makes!)

10/11 slices of stale bread (use fresh at your peril, it will taste like soggy weetabix)
Butter (to grease and spread)
Sultanas
1 pint milk
4 Tbsp caster sugar
2 eggs and 2 egg yolks
1.5 tsp nutmeg

Grab an ovenproof dish suitable for layering the bread inside (I usually use the same kind of dish you would for a lasagne – not too deep) and grease it well with a knob of butter.  Get your butter knife (the one that doesn’t tear the bread to pieces) and start buttering your bread!  Some people leave the crusts on, but once buttered, I usually chop mine off and then half each slice diagonally.  Keep the crusts to make into breadcrumbs for freezing, cube and fry them for croutons, or fatten up our already obese bird population!

Sprinkle a handful of sultanas over the base of your greased dish and place your first layer of bread, butter-side down, in the dish.  Don’t worry if the bread doesn’t fit exactly, this isn’t an experiment in tessellation just plug as many big holes as you can before grabbing one of those Tbsp of sugar and sprinkling it over the first layer.  Chuck another handful of sultanas over the top and arrange your 2nd layer of bread, butter-side up.  Repeat the bread, sugar, sultana layering until you run out but DON’T sprinkle any sultanas on the top layer – they will just burn.

In a saucepan over a gentle heat, combine the milk, sugar, eggs and nutmeg.  Whisk gently, the goal is to warm the mixture and dissolve the sugar – not cook the eggs, keep the heat very low and if in doubt, just stop cooking the mixture, I’d rather have slightly undissolved sugar than scrambled eggs!

Pour the liquid over the bread and squish each slice down to ensure that it soaks up a substantial amount of the liquid.  Leave the whole dish alone for a good hour to let the flavours intensify.

One hour later, come back to the kitchen and preheat your oven to 200 degrees C (180 degrees fan).  Cook the bread & butter pudding for around 40 minutes and marvel at how the custard has puffed the bread up a treat.  Hopefully, you’ll have a crispy, dark-golden crust and a fluffy middle.  Best enjoyed warm, perfect for the colder weather!

How easy is that?!  Do you have a favourite Bread & Butter pudding variation?

Food Friday: Strawberry Muffins

Posted by Lipglossiping On September - 28 - 2012

Having moved out of a hoarder’s paradise, it’s been interesting to discover just how many of my mother’s ways I’ve managed to pick up over the years.

The one trait that I can’t afford to have inherited is wastefulness. I don’t mean the big things (how harsh am I sounding on my Mum?). I just mean that over the years, the number of things that were bought and never used/eaten up made an impression on me.

Every week, I make it my mission to clear the fridge of anything lurking at the back. Frittatas are great for leftovers, slow-cooked soups are also brilliant. The latter being easily freezable for another day, important criteria when your meal plans are pretty tight.

So, this week… it was a whole punnet of strawberries that I’d completely forgotten about. Leila adores fruit… but is a fickle little madam, her tastes change weekly – and this had obviously been a don’t-like-strawberries-anymore week.

Fine.

I made muffins.  They’re quick, easy, taste amazing, and freeze beautifully. Sorted. Here’s the recipe incase you ever find yourself with a strawbs glut. Perish the thought.

Strawberry Muffins – makes 12

375g plain flour
2tsp baking powder
150g caster sugar
170g chopped strawberries
2 medium eggs
150ml milk
150ml oil (I usually substitute half for apple sauce)

Heat the oven to 190 degrees celsius (170 degrees for a fan oven) and prepare your muffin cases/tin ready for baking.

Add the flour, baking powder and sugar to a large bowl.  Drop the chopped strawberries ontop.

In a separate bowl, lightly whisk the milk, eggs and oil (apple sauce) before pouring over the dry mixture.

With a large spoon, mix until *just* combined.  It doesn’t matter if you still see a few specks of flour, the secret to good muffins (cough) is to never overmix them!

Spoon the mixture into your muffin cases/tin and bake in the oven for around 20 minutes.  Check on them regularly, yours may need longer – mine took nearly 30 minutes on the middle shelf before Leila oddly decided that, she did, infact, like strawberries again.

Enjoy!

“Fluffy” Chocolate Brownies anyone?

Posted by Lipglossiping On September - 10 - 2012

I know many people think that chocolate brownies are one of the most over-hyped cake(y) substances known to man.  That and macarons.  And cupcakes.  Probably also whoopie pies.

Killjoys.

Although in fairness, I’m inclined to agree on the macaron front, I mean wtf are they all about anyway?  They’re like suped-up communion wafers that weld themselves to the backs of your teeth while simultaneously scouring your soft palette so fiercly, you can’t consume a hot drink for a month without whimpering.  Sure, they look pretty but I ain’t shallow.  Much.

But brownies… A good chocolate brownie is heavenly, and if you think they’re overrated, I’d hazard a guess that you’ve been buying yours from Costa Coffee for too long.

I’d also like it to be known that I’m squarely in the fudgy-is-best camp when it comes to brownies.  If I wanted a “cakey” brownie, I’d go buy a fucking cake.

Anyway, I found a jar of slightly-out-of-date Marshmallow Fluff that I’d bought purely for the novelty factor and promptly forgot to use, so I googled for some recipes but didn’t like the sound of anything that was coming up on the search.

Instead, I decided to make a batch of my favourite brownies, omit my usual chocolate/fudge pieces and marble some swirly Fluff into the baking tin instead.

For the Brownies (makes 12 – use a smaller tin or double the quantities for a 30cm long tin)

140g  butter, softened
190g caster sugar
3 medium eggs
50g cocoa powder
50g self-raising flour
1/2tsp baking powder

Chuck all of the ingredients (yes, all at once – another reason I love this recipe), into a bowl and mix until combined and smooth.  Don’t overmix, you just want to get everything together and looking glossy.

Spoon the mixture into a greased tin and use a spatula to spread it across the surface.

For the Fluff topping

50g Marshmallow Fluff
20g butter, softened
1/2 tsp vanilla essence

Add the topping ingredients into a bowl and beat with a whisk until combined, you can add a tsp of water to thin the consistency if needed.  It should be smooth, silky but not “runny”.

Spoon the topping over the (uncooked) brownie mixture in tsp-sized “blobs” and use a skewer (I only had a straw to hand) to “marble” the topping.

Bake in a pre-heated oven (180 degrees/160 fan) for around20/25 minutes.  Test with a knife to check if it’s done and if you’ve got any leftover “topping” mixture, you know what you need to do – don’t you?

Overall, they’re not my best experiment to be honest.  The brownie is definitely more fudgy than cakey and the Marshmallow Fluff, whilst it adds a teeny bit of chew to the topping… doesn’t add much else.  I’d suggest adding a crap-ton more than I did and to hell with whether it marbles or not.  Also, don’t leave out the chocolate and/or fudgy pieces… these are definitely more cakey than fudgy.  Bother.

Having said all that, they’re still nice.  They’re just not better than my usual recipe which I’ll post here sometime closer to Halloween.

Did you get your “bake” on last weekend?

I like to pretend that I’m not really a cupcake person.  I mean, we all know what cupcake ‘people’ are like right?  They have TONS of hair, usually swept horizontally across their foreheads in a faux-bo style (hair jewellery optional).  They giggle.  A lot.  And they wear far too many layers.

I’m not a giggly person (lies – it’s a nervous thing rather than an affectual thing though) and I don’t have much hair.  As for layers, I find it a struggle to co-ordinate my top with my bottoms let alone style an outfit akin to a fucking onion.

But cupcakes, well… I can’t help it – as much as I want to hate them (and everything they stand for), they taste too good.  I’d like to make them all muffin-sized though.

Look what I made last night.

OHMYGODSOGOODITHURTSMYTEETH.

The touch of Fleur de Sel makes the whole cupcake affair slightly less twatty don’t you think?  I like salted sweet things.  Have I ever told you about my favourite chocs?  These are them (you can find them in Selfridges) and when I was a kid, I could only have dreamt about paying out £13 for some chocolates.  Mr. L looks equally disappointed and elated whenever I bring a box home, which to be fair, is only about twice a year.  But still…

These cupcakes present a cheaper way of getting my salted chocolate fix, read on for the recipe – which isn’t mine by the way but is my absolute favouritest no-fail chocolate cupcake recipe – courtesy of Hummingbird Bakery

yields 12 chocolate cupcakes

100g plain flour
20g cocoa powder
140g caster sugar
1½tsp baking powder
a pinch of salt
40g unsalted butter (I use clover, don’t shout at me)
120ml whole milk
1 egg
¼tsp vanilla extract

Pre-heat the oven to 170 degrees celsius.

Add the flour, cocoa powder, sugar, baking powder, salt and butter to a bowl and using the lowest setting on your hand-mixer, whisk until the mixture begins to look ‘sandy’.  Watch out for flour clouds.

In another bowl, whisk the egg, milk and vanilla extract together before adding it to the dry mixture, a little at a time, whisking all the while until you get a smooth consistency, don’t overmix.

Fill 12 cupcake cases around 2/3 full and bake for 20-25 minutes.  Mine were nicely done by the 20-minute mark.  The surface should spring back when pressed.  Allow to cool completely on a wire rack before icing.

Now, as for the buttercream… I may be in a minority here, but there is definitely such a thing as TOO MUCH OF A GOOD THING.  I simply don’t like towers of icing that drown my cupcake, I want the icing to complement, not invade and conquer the cake below.  What say you?

That’s not to say I’m a joyless spoil-sport… *wipes buttercream from mouth* I just generally find that when making buttercream, I can usually half the recommended quantities listed in the recipe book and still get my chocolate, sugary, gooey fix.

Here’s how I made it:

for the Buttercream

150g icing sugar
50g unsalted butter, at room temperature (again, Clover for me)
20g cocoa powder, sifted
20ml milk

Whisk everything except the milk… then add the milk a spoonful at a time.  Continue whisking until you get bored.  The longer you whisk, the lighter/fluffier the buttercream.

And the magic ingredient?  Just a little sprinkle of Fleur de Sel ontop of each one does the job… you can leave the salt off some of them if you like, it’s not everyone’s cup of tea now is it?

These are SO light and airy, with just the right amount of buttercream and that little salty tingle on the tongue that reminds you just how incredibly bad these actually are for your health.  Stunning.

In other news, not-cake related.  I’m off on holiday tomorrow for a week in Liverpool/Manchester – thank god the diet is starting the week after eh?  All those curry cafes are making extra portions in preparation for my arrival.  As always, any insider tips/places to visit/things to do/goodies to eat – I’m all ears, you made my last holiday earlier this year in Torquay, absolutely blinding with a little local knowledge!

I’m probably not going to be posting much, if at all, next week – I just haven’t built up any reserves in my draft folder to see me through the drought.  Hope you all have a fabulous week, and long may this warm spell continue – though if it could stop by bedtime, that would be great, thanks.

x

RANDOM

Afternoon Tea at The Vineyard Hotel, Berkshire

I like to pretend that I’m not really a cupcake person.  I mean, we all know what cupcake ‘people’ are like right?  They have TONS …

H&M Spending Cash With Carl Nail Polish NOTD

I like to pretend that I’m not really a cupcake person.  I mean, we all know what cupcake ‘people’ are like right?  They have TONS …

Brand Exclusivity...

I like to pretend that I’m not really a cupcake person.  I mean, we all know what cupcake ‘people’ are like right?  They have TONS …

Illamasqua Nail Polish in Prism NOTD

I like to pretend that I’m not really a cupcake person.  I mean, we all know what cupcake ‘people’ are like right?  They have TONS …

Handbag Hero: Pixi Succulent Lip Twin in Poppy Red

I like to pretend that I’m not really a cupcake person.  I mean, we all know what cupcake ‘people’ are like right?  They have TONS …

Lancome Fall 2011 - Le Vernis Nail Polish: Noir 29 & Rouge Saint Honore

I like to pretend that I’m not really a cupcake person.  I mean, we all know what cupcake ‘people’ are like right?  They have TONS …

More London fever with limited edition boxes at Jo Malone

I like to pretend that I’m not really a cupcake person.  I mean, we all know what cupcake ‘people’ are like right?  They have TONS …

OPI It's My Year (Miss Universe Collection) NOTD

I like to pretend that I’m not really a cupcake person.  I mean, we all know what cupcake ‘people’ are like right?  They have TONS …

New Brand Alert: Carolyn K London Nail Paint exclusively at Powder Rooms!

I like to pretend that I’m not really a cupcake person.  I mean, we all know what cupcake ‘people’ are like right?  They have TONS …

Depotting Urban Decay's Eyeshadow Primer Potion

I like to pretend that I’m not really a cupcake person.  I mean, we all know what cupcake ‘people’ are like right?  They have TONS …

POPULAR

CLOSED: Competition Time: Givenchy Very Irresistible L'eau en Rose Perfume!

I like to pretend that I’m not really a cupcake person.  I mean, we all know what cupcake ‘people’ are like right?  They have TONS …

CLOSED - Win it! The Body Shop Expert Brush Collection

I like to pretend that I’m not really a cupcake person.  I mean, we all know what cupcake ‘people’ are like right?  They have TONS …

Win a gorgeous "glow" trio with prizes from Urban Decay, New CID, & Arbonne!

I like to pretend that I’m not really a cupcake person.  I mean, we all know what cupcake ‘people’ are like right?  They have TONS …

Hello? Is this thing on?

I like to pretend that I’m not really a cupcake person.  I mean, we all know what cupcake ‘people’ are like right?  They have TONS …

Avoid the brush off with Oral-B Pro-Expert

I like to pretend that I’m not really a cupcake person.  I mean, we all know what cupcake ‘people’ are like right?  They have TONS …

Big savings on French Pharmacy brands, win my Escentual.com top picks!

I like to pretend that I’m not really a cupcake person.  I mean, we all know what cupcake ‘people’ are like right?  They have TONS …

Win it! 3 EcoTools Bamboo Bronzer Brushes to win!

I like to pretend that I’m not really a cupcake person.  I mean, we all know what cupcake ‘people’ are like right?  They have TONS …

FOTD Busting out of the comfort zone!

I like to pretend that I’m not really a cupcake person.  I mean, we all know what cupcake ‘people’ are like right?  They have TONS …

Dear Obesity...

I like to pretend that I’m not really a cupcake person.  I mean, we all know what cupcake ‘people’ are like right?  They have TONS …

Urban Decay The Black Palette - Photos & Swatches

I like to pretend that I’m not really a cupcake person.  I mean, we all know what cupcake ‘people’ are like right?  They have TONS …

COMMENTS

  • Categories

  • Archives

  • Admin

  • Ads