Food Friday: Luxury Bread & Butter Pudding with Cherries

Posted by Lipglossiping On September - 30 - 2011

There’s something so comforting about a hefty pudding.  Treacle sponges, chocolate mud cakes and bread & butter pudding all carry a certain amount of stodge with them and quite frankly, they beat the living crap out of anything light and wispy.  Except meringues, but let’s be honest… meringues are in a league of their own.
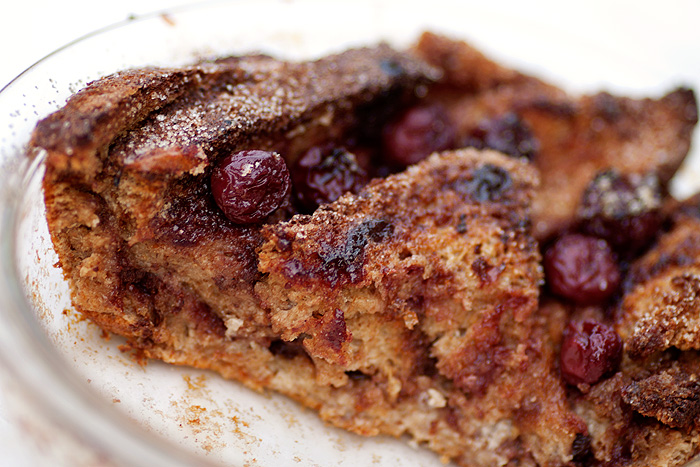
I use wholemeal bread in my Bread & Butter Pudding for no other reason than because that’s what I buy anyway.  The addition of jam and a few cherries turns this home-cooked favourite into a slightly more extravagant pud.

Luxury Bread & Butter Pudding

8 slices of bread (any kind with crusts left on)
Morello Cherry Jam (or whatever you’ve got if you’re not fussy!)
Butter

2 eggs, beaten
425ml milk
Large handful of cherries (I buy mine in a big jar from Lidl)

1 tbsp brown sugar for sprinkling

1. Butter the bread before spreading a layer of jam over each piece and cutting into triangles.

2. Grease your cooking dish well and build up the layers of bread, interspersing with cherries as you go.

3. Repeat until you run out of bread and cherries!

4. Combine the beaten egg and milk before pouring over the bread and allow to soak for a couple of minutes.

5. Sprinkle the top with brown sugar and pop in a preheated oven at 180c and bake until golden brown (around 30/35 minutes)

.

Such a simple and inexpensive pudding with a billion possible variations.  Try spreading the bread with Nutella instead of jam or throw in a handful of raisins alongside a generous glug of rum!  Adjust the quantities of egg and milk depending on how much custard you like or change up the bread to substitute plain old loaves with Brioche, Croissants or Panetone!  The possibilities are really quite limitless.
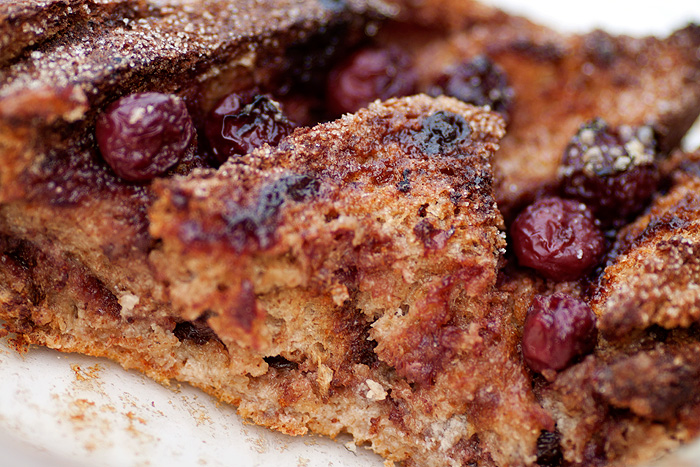
Do you have a favourite Bread & Butter Pudding recipe?  I foresee more of these on the menu as Winter draws nearer.


Cauliflower Cheese with Bacon, the lazy girl’s way

Posted by Lipglossiping On September - 2 - 2011

Poor cauliflower, the most misunderstood vegetable of all.  I think they’re amazing and I’m not just saying that because today’s recipe features them heavily.  I hated cauliflower when I was growing up.  My Mum used to serve it as an after-thought, anaemic and boiled to death.

It’s actually pretty versatile and makes a great base for many dishes.  As a frequent low-carber, it’s saved my backside numerous times, making a fairly convincing substitute for fried rice (grated) and pizza dough!

But in more regular, daily use, the cauliflower is at its best when combined with cheese and bacon.  Mmmm, bacon.  When I make Cauliflower Cheese, I make a big’un as it keeps very well in the fridge, you may want to half the quantities or just live off it for a week like we usually do.

Cauliflower Cheese

1 large head of Cauliflower
3 Carrots, sliced
1 Onion, diced
350g mature English Cheddar, cut into chunks (go on, use the whole packet – I won’t tell anyone)
1 pack of Bacon Lardons/Mis-shapes/Leftover Ham (whatever you’ve got, this dish will take it nicely)

2 tins of Evaporated Milk
1 tsp Mustard
1 tsp Nutmeg (freshly grated if you can be arsed)

2 slices of Bread, made into breadcrumbs (or you can use crackers for a different kind of crunch)
50g mature English Cheddar, grated
2 Tomatoes for decoration

Preheat the oven to 180 degrees Celsius

1).  Break the cauliflower into florets trying to keep them reasonably large in size and place them in glass bowl with a few tbsp of water in the bottom.  Cover with a vented lid (clingfilm with holes poked through or microwave cover) and pop in the microwave for around 6 minutes until just tender (test with a fork).  You could of course boil or steam in a traditional steamer… but I’m being lazy remember.

2).  Cook the carrots with the same method and just check occasionally with a fork until they’re *just* tender.

3).  Fry the onion and bacon until crispy and set aside.

4).  Using a food processor, blitz the cheese, mustard, nutmeg and evaporated milk together.

5).  Grab a large ovenware dish (no need to grease it), and add the cauli, carrots, fried onion and bacon.

6).  Pour over the faux cheese sauce.

7).  Scatter the breadcrumbs and grated cheese before layering the sliced tomatoes ‘prettily’ on top.

8).  Bake in the oven at 180 degrees Celsius for around 25 minutes, or forget about it and remember after 35 minutes to get it a bit burnt around the edges like mine.

Personally, I slightly prefer my Cauliflower Cheese with a proper roux base.  Mr. L prefers it this way.  L doesn’t care as-long as she gets more bacon bits than anyone else.

Lazy Cauliflower Cheese without the efforts of a homemade cheese sauce.  Bliss.

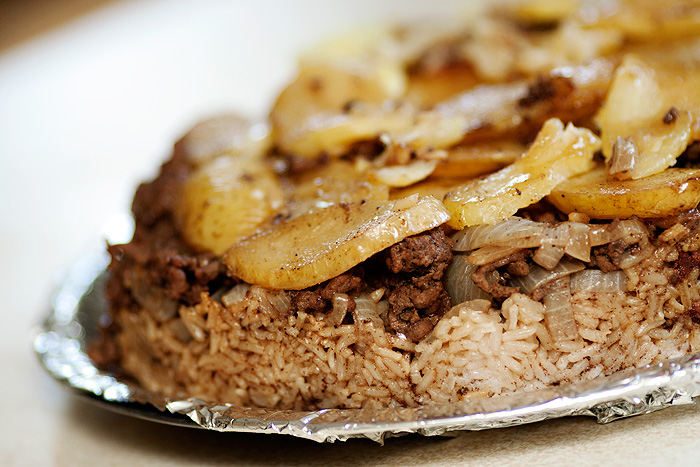
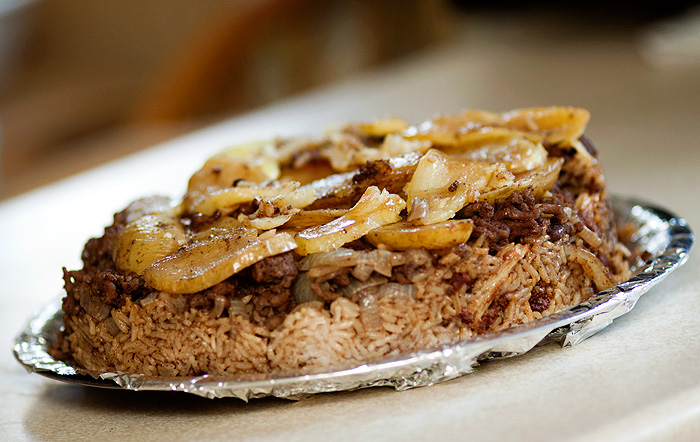
Recipe: Makloubeh / Maqluba (Upside Down)

Posted by Lipglossiping On August - 18 - 2011

I know that when it comes to recipes on the blog, I’m all about the puddings.  But did you know, I like dinners too?

This is one of my favourite dinners in the entire world.  Did I mention that I like dinner, do you like dinner?  I like dinners A LOT so to have this one elevated to my top… *thinks*… TEN all time dinners is nothing to be sniffed at!

I might even like dinners more than I like makeup.  It’s THAT serious people.

Makloubeh (literally meaning Upside Down) is a family dish cooked in a large pot, originating from the Middle East.  My uncle was Jordanian (he passed away in 1996) and the entire family would pile over his house on New Years Day to feast on Makloubeh.  Then we’d all go play Boggle or Battleships or something else that makes me feel old whenever I remember it.

The traditional recipes online call for eggplant (my uncle never included it).  I add potato for no other reason than to protect the meat/rice from catching on the bottom of the pan.  Well, that and the fact that my family are potato fiends.

This dish is not very healthy.  Don’t be fooled by the inclusion of cauliflower.  YOU DEEP FRY IT.

A quick note about the meat.  My uncle always used lamb shoulder, which is expensive in the UK.  I use mince (ground beef or lamb) or chicken thigh.  We only have lamb in this dish if it’s a special occasion and I apparently never put enough in the pot.  My horrible brother has christened my version of Lamb Makloubeh, “McNoMeat”.

Makloubeh – serves 4 greedy ones:

Vegetable oil for frying
1 1/2 cups of rice (I use long-grain to keep better form when cooking)
500g Beef/Lamb Mince (you could use chicken thighs or lamb)
1 large head of cauliflower, broken into large florets
3 large potatoes, sliced about a cm thick
2 large onions, sliced
3 cloves of garlic – thinly sliced

2 Beef Oxo/Stock Cubes
1 tsp. cinnamon
1 1/2 tsp. allspice
1 tsp. nutmeg
1 tsp. ground pepper
1 tsp. ground ginger
1 tsp. ground cumin

3-4 tsp. salt

Unspecified amount of water!

1).  Salt the cauliflower and fry until dark brown (yes, really).  I use a deep fryer.  Cover a plate in kitchen towel and allow cooked cauliflower to rest on the plate once cooked.

2).  Pat sliced potatoes dry and deep fry until golden, transfer onto more kitchen towel to soak up the excess oil.

3).  Brown the meat and onions in a frying pan before adding all the spices and crumbling the stock cube over the mixture.

4).  Add about an inch of hot water to the pan, drop in the garlic and allow the meat to gently simmer for around 5 minutes.

5).  Take a large pot (something like this), add 2tbsp of oil and layer the potatoes on the bottom of the pan.  Spoon the (sloppy) meat and onion mixture over this before adding the cooked cauliflower.

6). 
Add the uncooked rice and pour over enough hot water to barely cover the rice.

7).  Cover with a lid and cook on a medium heat (you want a gentle simmer) until the rice is cooked (20-30 minutes).  Don’t stir!

8).  Once the rice is cooked, all the water should have been absorbed.  If not, simmer for a little longer with the lid off.

9).
  Grab a tray and line it with foil.  Tip the pot upside down (hence the name!) onto the tray and sprinkle with pine nuts.

10).  Stick it in the middle of the table and let people serve themselves, preferably with lots of natural yoghurt.

11).  Undo top button.

p.s. If you want to make your version a little healthier (and clearly less fun), you could probably roast the cauliflower and potatoes before adding them to the pot… probably.

.

Do you have any favourite Middle Eastern dishes?

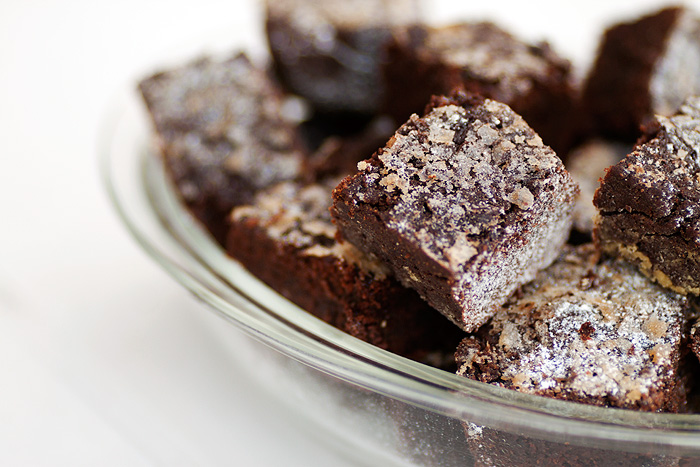
Recipe: Chocolate Concrete

Posted by Lipglossiping On August - 10 - 2011

A traditionally British school-dinner pudding from the 70s.

I’m too young to remember this and I suspect that Mr. L is too but when I found the recipe and asked him if he remembered it from his school days, he swore blind he did.  I don’t believe him… I think he just heard the words chocolate, sugar and butter and decided to play a bit of a blinder in the bluffing stakes.

I made it anyway…

It’s definitely authentic, it tastes a lot like 1970s Britain.  Particularly if you take the dryness from the Summer of 1976 and mix it up with some bleakness from ’79.

160g/5 1/2 oz Butter
1 Egg
25g/1 oz Cocoa powder
225g/8 oz Self Raising flour
175g/6 oz Granulated sugar

1.  Pre heat oven to 170ºC (160ºC fan)

2.  Gently melt the butter in a pan

3.  In a large bowl mix all the dry ingredients together before making a well in the centre.

4.  Pour in the melted butter and beat well to combine.

5.  Add a well beaten egg to the flour mixture.

6.  Place the mixture into a greased square tin and gently flatten and press into the corners.

7.  Brush with water and sprinkle with sugar.

8.  Place in the top half of the oven for 45 minutes.

9.  Remove from the oven and allow to cool for 5 mins before cutting into pieces and placing on a wire rack to cool.

I’m so pleased I was born in 1981.

Do you remember Chocolate Concrete?

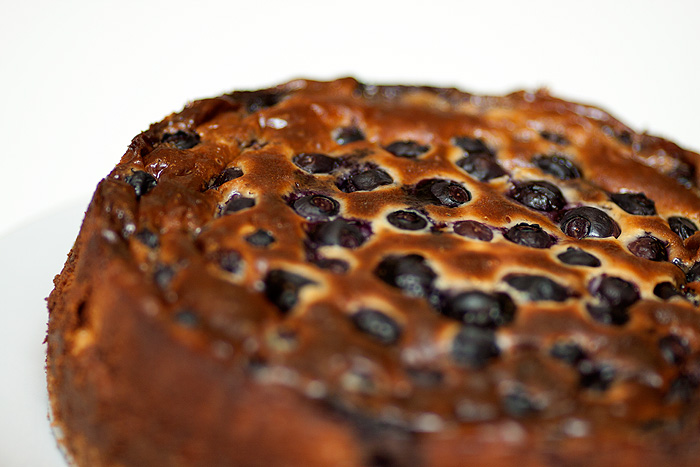
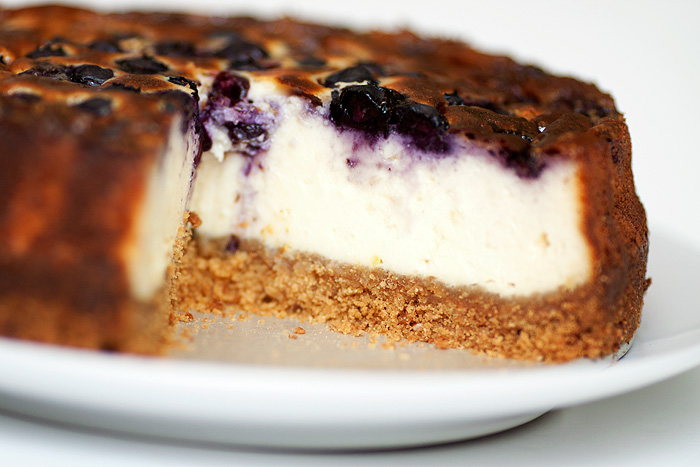
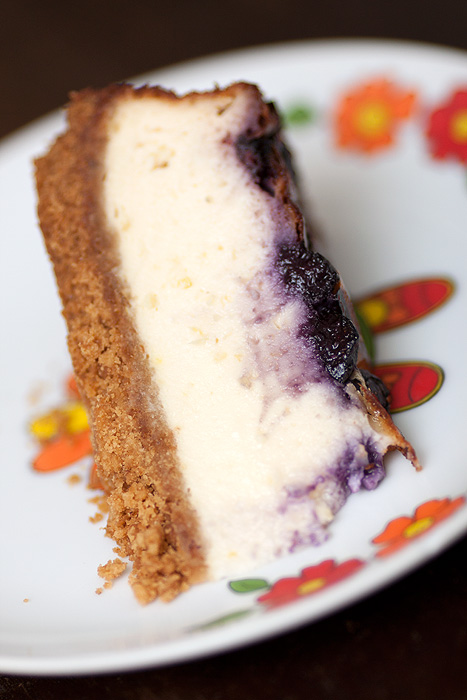
Baked Blueberry Cheesecake, the nom to end all noms.

Posted by Lipglossiping On July - 21 - 2011

Who knew cheesecake was so easy to make?  It’s one of those desserts where the overall impression defies the skill needed to create it.  Honestly, if you need to make something that looks super yummo and you have enough space in your fridge (move the chocolate and wine) to chill it… do it.  Do it now.

I like my cheesecake a little ‘well done’… don’t judge.  It’s meant to look like that.  IT IS!  I like the Channel4 recipe with a couple of modifications as seen below.

75g butter
200g digestive biscuits, crushed with a sprinkle of ground cinnamon
500g soft cheese
1 x 397g can condensed milk
1 tsp vanilla extract
3 eggs, beaten
1 tbsp lemon juice
150g blueberries

1.  Melt the butter in a large saucepan before removing from the heat and stirring in the biscuit crumbs.  Tip the mixture into the base of a 23cm (9 inch) loose-bottomed cake tin, pressing them down with your fist (or the back of a spoon) to make a firm base.  Chill in the fridge for about 20 minutes.

2.  Preheat the oven to 170°C / fan oven 150°C / gas mark 3.

3.  Beat the soft cheese in a large mixing bowl until softened, then whisk in the condensed milk, vanilla extract, eggs and lemon juice.

4. Pour the filling over the biscuit crumb base, then sprinkle the blueberries ontop.  Place on the middle shelf of the oven to bake for 1 hour.  I leave mine to cool in the oven with the door wide open before chilling in the fridge.  Don’t panic if the cheesecake is still ‘wobbly’ in the centre after an hour’s cooking, that’s normal!

Get ready for a velvety-taste sensation!  You can serve with additional fruit… me?  I just serve it with a very big fork.

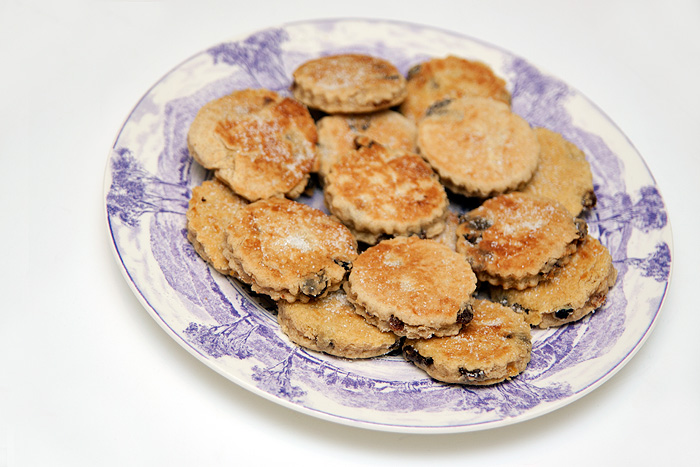
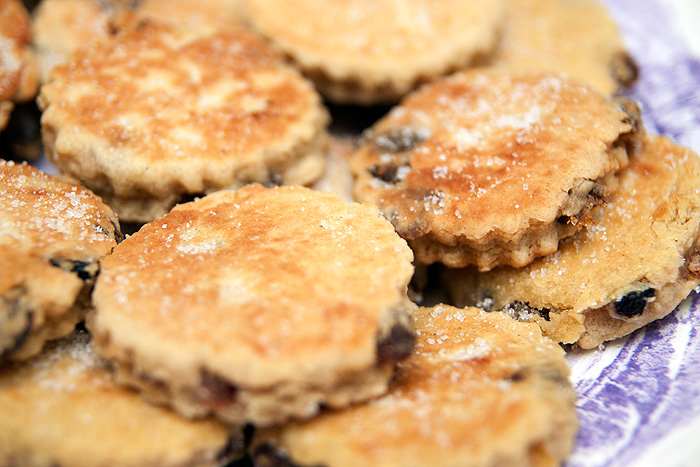
Welsh Cakes, a long-held love and a first attempt!

Posted by Lipglossiping On July - 12 - 2011

My Nan was born and raised just outside Pontypool and I have family who still live in the area, they know when I’m coming to visit and bring out the welsh cakes.  My addiction to these little drop scones of Godliness knows no limits.  I can polish off 6 in one go.  Hell, if I didn’t get the food guilts, I could polish off double that.

They’re traditionally made on a Bakestone, a cast-iron griddle.  It’s important that the heat distribution is even which is why a well-seasoned griddle is best.  I don’t have one so made do with a very heavy-bottomed (cough) frying pan.  My Nan’s Bakestone is somewhere in the family and I might just have to start hunting it down.

They’re exceptionally easy to knock together… if you do attempt it, you may aswell double the recipe RIGHT NOW because I can assure you that although these will keep for a week in a tin.  Most of them will be long-gone by teatime.

8oz / 225g self-raising flour (or use plain with the addition of 1tsp baking powder)
1 fully loaded tsp mixed spice
115g chilled and cubed butter
75g caster sugar
75g sultanas
1 egg

1.  Sift the dry ingredients (not the sultanas) into a bowl before rubbing the butter into the mixture until it resembles fine breadcrumbs.

2.  Break the egg into the mixture and combine.

3.  Stir in the sultanas and use your hands to bring the mixture into a dough.  If it needs it, add a dash of milk (just a drop) to bring it all together.

4.  On a floured surface, roll the dough out to around a CM thick and use a glass or (large) cookie cutter to cut into rounds.  Any leftovers can be re-rolled and cut until all the dough is used up.

5.  Heat your griddle/pan until hot and drop a little butter onto it to grease the surface.  You’re not shallow frying!  Just a little will do.

6.  Cook the welsh cakes for around 3/4 minutes on each side.  They can catch very quickly so lift them to check they’re not burning occasionally.  Once browned on each side, they’re done!  Sprinkle with sugar and eat!

Just. one. more.

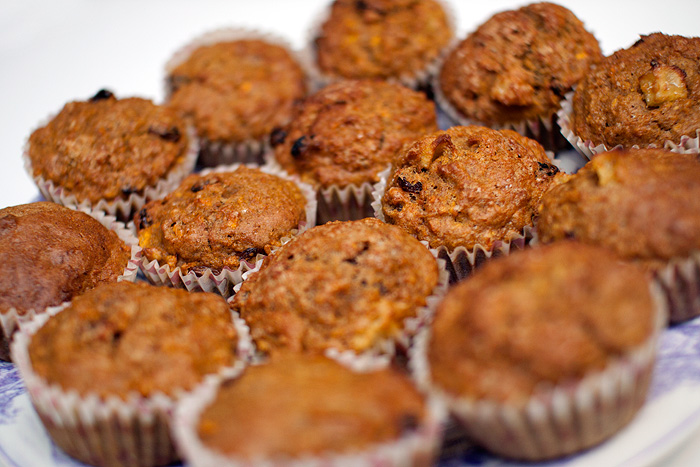
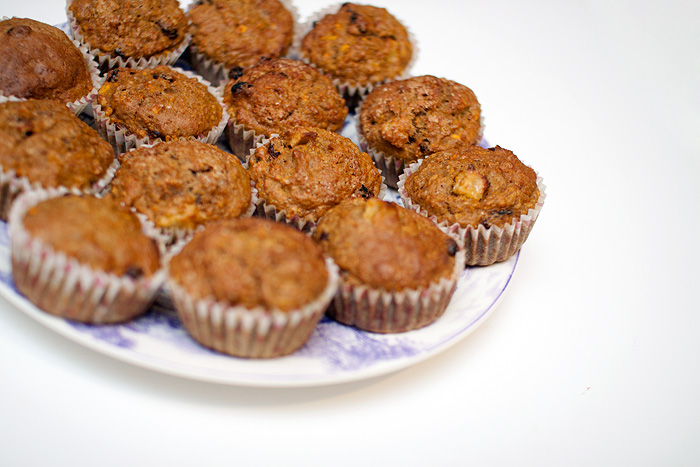
Carrot Cake Muffins, they’re very nearly healthy!

Posted by Lipglossiping On June - 28 - 2011

I made these because Leila refuses all vegetables… I don’t see them as a viable, long-term way of increasing her veg count… I just get sick pleasures from knowing that she’s eating quarter of a carrot per muffin.  And loving it.

Because I *was* trying to make them a little healthier… my recipe goes something like this (sorry it’s in cups but I wouldn’t be without my trusty measuring cups nowadays – I hate weighing things!):

1 cup sultanas (they stay juicier than raisins)
2 cups plain flour (if you want to be healthier, substitute 1 cup for wholewheat)
1 1/2 tsp baking powder
1 tsp bicarbonate of soda
tiny pinch of salt
2 tsps ground cinnamon
1 tsp mixed spice
4 eggs
1/4 cup vegetable oil
3/4 cup apple sauce (the normal kind you get in a jar for pork roasts!)
3/4 cup brown sugar (next time I’m gonna try Agave Nectar)
3 cups shredded carrots (about 6 medium whole carrots)

1.  Preheat oven to 170 degrees celsius and line a tin with paper muffin liners.

2.  In a large bowl, sift together flour, baking powder, baking soda, salt and cinnamon.

3.  In a separate bowl, combine the eggs, oil and brown sugar; beat well.  Combine both wet and dry mixtures and mix briefly just to combine, don’t overmix.

4.  Fold in the carrots (I had previously pulverised them in the food processor) and sultanas before spooning the mixture into the muffin cases.

5.  Bake in a preheated oven for 20 to 30 minutes.

You can ice/frost them if you want but this will obviously KILL the healthy stance!  They’re not the sweetest treat but they’re filling and taste pretty much like carrot cake without the frosting.  Leila eats one along with her yoghurt in the morning.

Once cooled, I pop them in a tupperware box and store in the freezer.  To defrost, I just take one out and zap it in the microwave for 30 seconds.  Perfect!  These would be great to take out of the freezer and pop in your work lunchbox too… defrosted by lunchtime and not horribly unhealthy – whoop!

Sweet Tooth? How about homemade fudge in minutes?

Posted by Lipglossiping On June - 20 - 2011

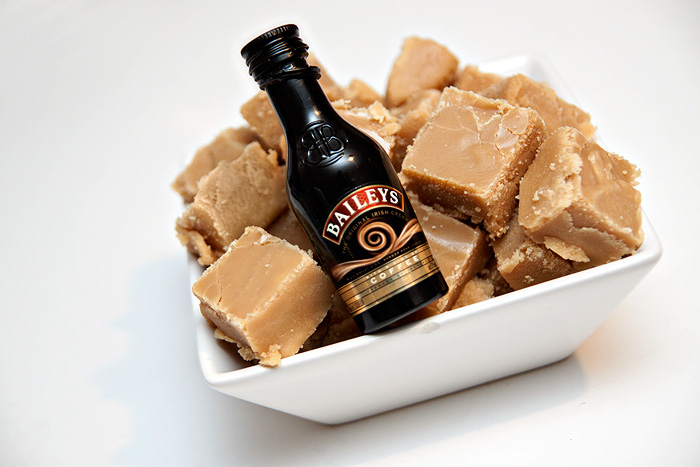
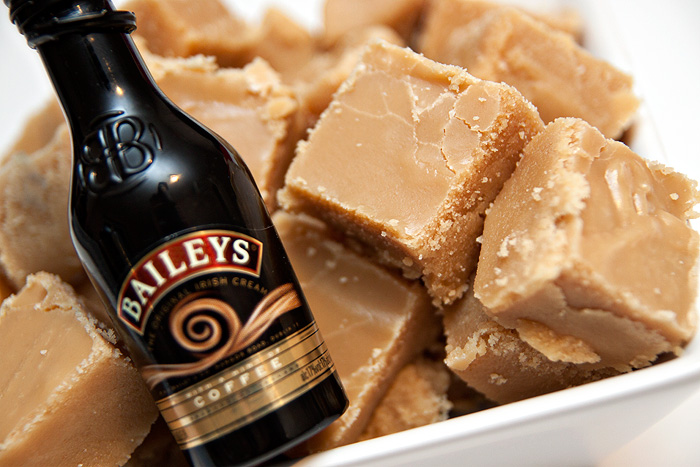
No, you’re not dreaming… I’m talking sensuously sweet, toothache-inducing crumbly fudge flavoured just how you like it in under 10 minutes!

Here’s some I made earlier…

You don’t need a sugar thermometer or skills that Fanny Cradock would be proud of you just need a microwave and a handful of ingredients.

Homemade Microwave Baileys Fudge!

397g Tin of Condensed Milk
125g Butter
250g Caster Sugar
250g Soft Brown Sugar

1 1/2tsp Vanilla extract
2 tbsp Baileys

1. Grab the largest microwaveable bowl in the kitchen and add the condensed milk, butter and sugars.  No need to mix just ensure that the container is LARGE because the contents are going to bubble up furiously and splattered fudge mix is way not cool to clean off.

2. For a 900W microwave, cook the mixture on full power for 9 minutes, removing the bowl for stirring every 3 minutes.  If your microwave has a lower wattage you’ll need to cook the mixture for longer.  Add 1 minute of cooking time for every 50W less power.

3. Once the cooking time has finished, add in the vanilla extract and Baileys and beat the mixture until it begins to look smooth and glossy.

4. Transfer the fudge mixture into a 9″ square tin to cool.  You can be smart and line the tin with greaseproof paper to prevent sticking or just hook it out crumbled bits and all like I do.  Once the mixture has cooled to room temperature, you can pop it in the fridge for a firmer set if required.

One of the charms (there are many) of homemade fudge is the limitless scope for wonderful flavours… I’m thinking chocolate & mint for my next batch, or maybe peanut butter or mmmmm honey and walnut?!
.
If you were to whip up a batch of fudge… what would be your flavour of choice?

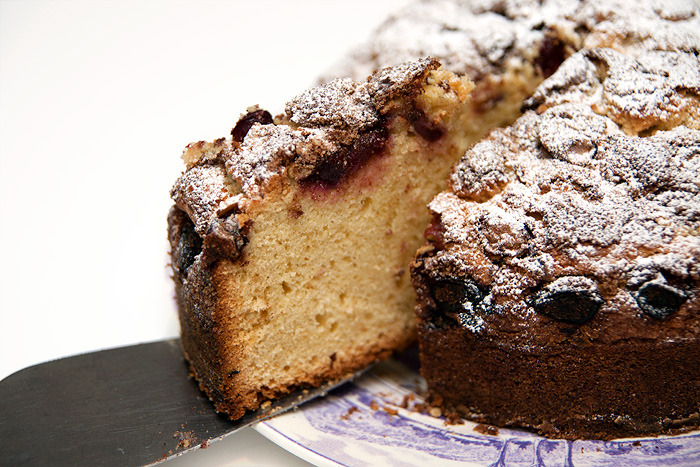
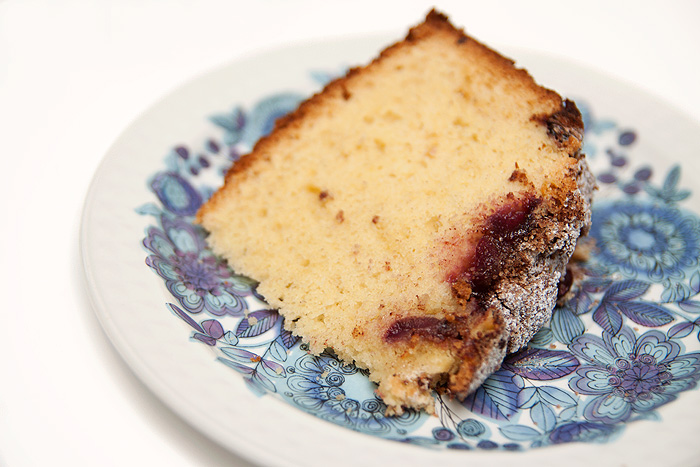
Hungarian Sour Cherry Cake

Posted by Lipglossiping On June - 5 - 2011

It’s Sunday, which in my world means Cake day… I haven’t decided what I’m making this week but seeing as I haven’t yet become bored of my new found love for the kitchen, I know I’m gonna enjoy making it.

Last week we had loads of leftover cherries thanks to Leila deciding that she wasn’t going to like cherries anymore.  Those things are expensive and I couldn’t take watching them slowly grow fur in the fridge.  I googled for some recipes and came across one for a tasty sounding Hungarian Sour Cherry Cake.

Now, I have no idea if my cherries were sour or not, they tasted pretty ropey so I thought they’d probably do.

1 8″ cake tin (greased and floured)

225g unsalted butter (please do use proper butter, I risked it with baking type butter and it had a distinct marg taste)
1⅓ cup caster sugar
3 eggs
1 teaspoon vanilla extract or 1 tablespoon rum
2½ cups sifted plain flour
2 teaspoons baking powder
2 tablespoons sifted icing sugar to decorate

2 cups fresh cherries (take the stones out)
1 teaspoon cinnamon
1 tablespoon granulated sugar

1. Cream the butter and caster sugar together until pale and fluffy.  Add the eggs and combine well.

2. Add the vanilla or rum.

3. Fold the flour and baking powder into the wet mixture.

4. Pour the thick batter into the prepared cake tin and smooth the surface.

5. Press the cherries into the batter evenly.  Just keep pushing the cherries further into the mixture until you’ve used them all up.

6. Combine the cinnamon and granulated sugar and sprinkle evenly over the cherries.

7. Place the tin in the lower middle of a preheated 170C oven (fan oven) and bake for 1hr, or until a cake tester inserted in the middle comes out clean.

It needed more cherries… I only had 1 cup.  I ended up spreading the slices with cherry jam.  Decadent!

Have a lovely, restful Sunday!

Anti-Ageing Muffins… For Reals.

Posted by Lipglossiping On May - 31 - 2011

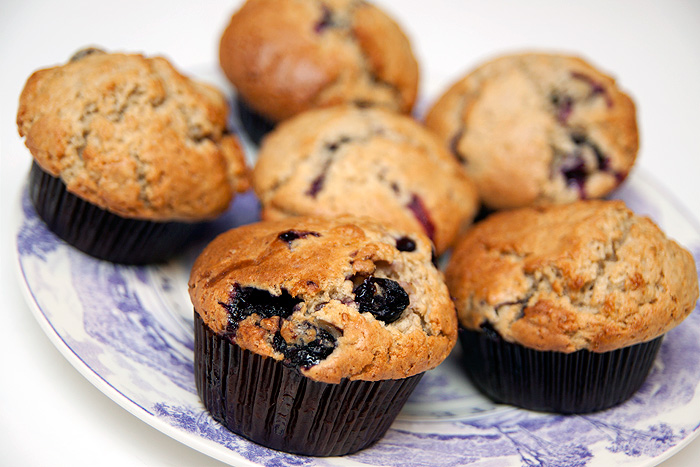
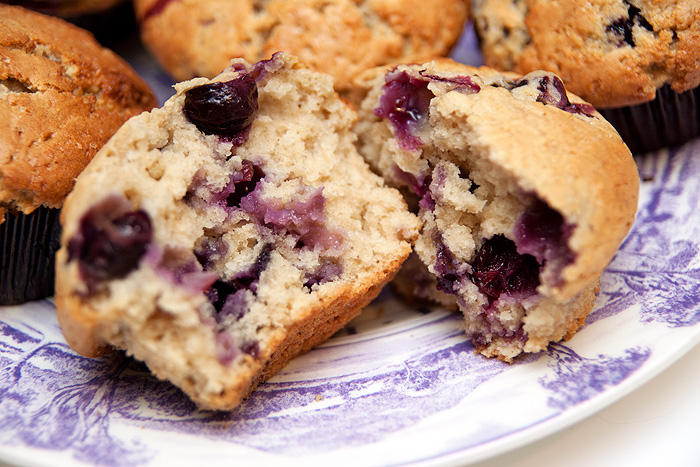
Blueberries.

Not only are they Leila’s favourite fruit but they make amazing muffins and considering that of ALL fresh fruits, the humble Blueberry has the highest antioxidant capacity. You’d be doing yourself a massive favour by devouring as many as you can get away with before you run out of ways to kid yourself.

image source

For the sake of our skins, I thought I’d share the blueberry muffin recipe I went overboard on last weekend.  It’s quick, easy and very, very moreish.  Oh yeah, and healthy.  Honest.

This recipe makes 6 GIANT (coffee shop style) muffins… because I don’t do things by halves.  If you want a great silicone muffin tin, I really recommend these.  If you want one of those mini-muffin tins, get. off. my. blog.

250g (2 cups) plain flour
150g (3/4 cup) sugar
2 1/2 teaspoons baking powder
1/2 teaspoon salt
2 large eggs (beaten)
180ml (3/4 cup) milk
115g (1/2 cup) melted butter
150g (1 cup) blueberries, fresh or frozen

1. Pop your muffin liners in your tin and pre-set your oven to 150 degrees celsius (fan oven).

2. Place the flour, sugar, baking powder and salt in a mixing bowl and combine the dry ingredients well.

3. In another bowl, combine the eggs, milk and melted butter.

4. Pour the combined wet ingredients into the combined dry ingredients, stirring only until all flour is combined.  Do not over-mix.

5. Add the blueberries, again, stirring just until incorporated.

6. Divide the batter between the prepared muffin cups and bake the muffins for 35 minutes or until golden.  Test that they’re done by inserting a toothpick or similar into the center (it should come out clean).

7. Nom.

Cheaper than face cream.

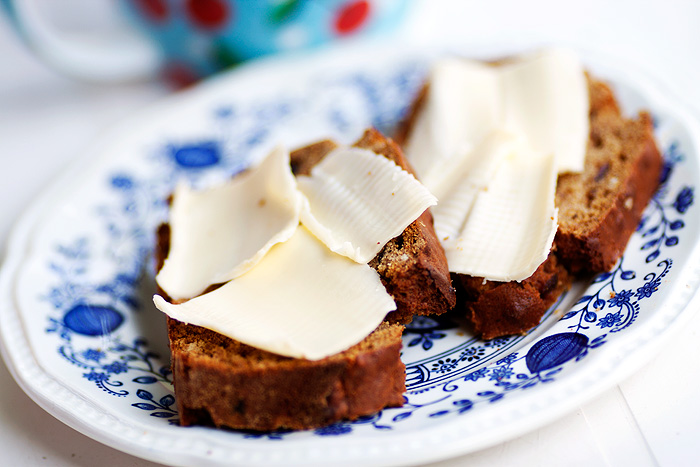
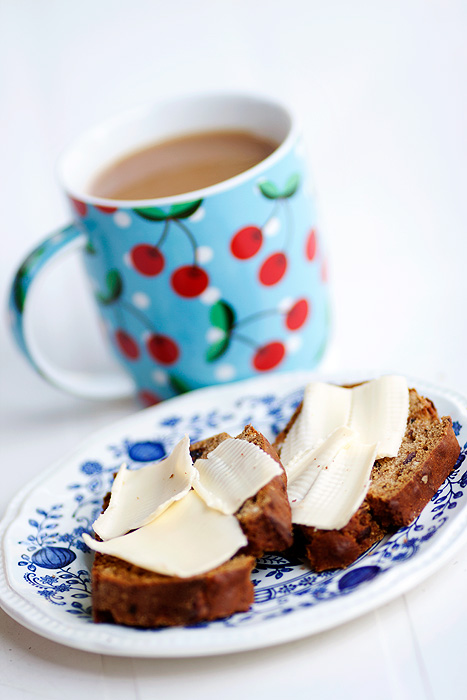
Make like Shirley Bassey and bake a Bara Brith!

Posted by Lipglossiping On May - 10 - 2011

I was gonna pack this post with as many random references to Wales as possible but decided in the end that I couldn’t be bothered… boyo.

With the majority of my family hailing from Cwmbran and its surrounding valleys, I know a thing or two about eating Welsh delicacies (and the Pontypool Front Row) and with that being said, I thought it was high time I had a go at concocting a Bara Brith.

I love it because it’s such a store cupboard recipe… I didn’t have to go shopping for any of the ingredients and it was in the oven within 20 minutes.

1 cup of sugar
1 cup of mixed, dried fruit (I use dates too)
1 cup of strong tea
2tsp of mixed spice
1oz of butter/margarine
2 cups of self-raising flour
1 medium/large egg

Place the sugar, dried fruit, tea, mixed spice and margarine into a pan and slowly bring to the boil, stirring all the time.

Once the mixture has cooled, add the flour and egg whilst beating the mixture together before pouring it into a loaf tin (greased and floured) and baking at around 170 degrees celsius (fan oven) for an hour.  At this point, insert a knife or skewer… if it comes out clear, you’re done.  If not, leave for another 10 minutes before checking again.

Let it cool on a wire rack and cut into slices, served with thick butter!

Then kiss goodbye to your diet…

I may not be the best pastry chef in the world…

Posted by Lipglossiping On April - 28 - 2011

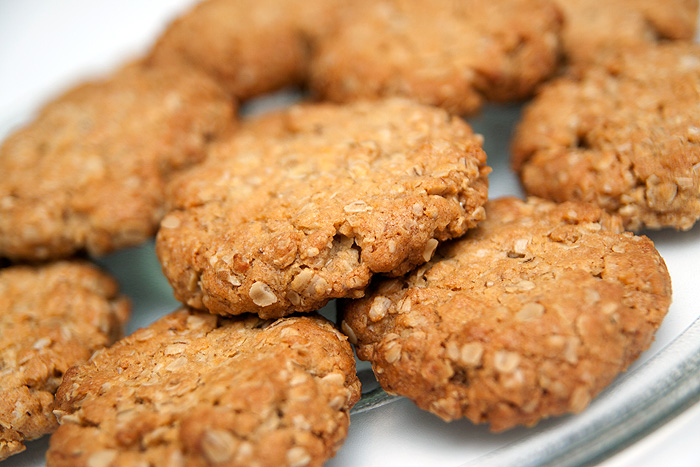
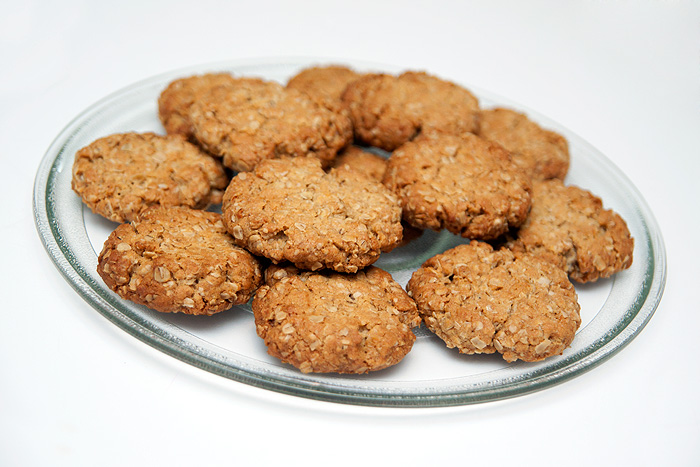
…but damn I can make a decent Hob Nob.

And now that I’ve blown my own trumpet so voraciously, it’s time to admit that these aren’t made from any recipe plucked from my brain.

These are what are known as Twinks Hob Nobs.  Twinks is a poster on MoneySavingExpert who one day, innocently unleashed her Hob Nob recipe on the world.  You can read her post and the resulting thread here.

The absolute trick to these is to not overcook them.  Take them out from the oven when they’re *just* golden and looking barely cooked.  They’ll be soft but will harden as they cool.  I usually half the original recipe and get around 15 chunky biscuits.  I turn into a total Gannet around these biccies so halving the quantity saves me from myself (sometimes).

4oz Self Raising Flour (113g)
4oz Sugar (113g)
4oz Porridge Oats (113g)
4oz Margarine/Butter (113g)
1/2 tbsp Golden Syrup
1/2 tbsp Hot Water
1/4 tsp Bicarbonate of Soda

Mix the flour, oats and sugar together in a bowl.  Melt the marg/butter, syrup and water in a pan.  Stir in the bicarbonate of soda and add it to dry mix.

Mix well and mould/press into smallish balls (ping pong size!) which you then put on a greased tray and flatten slightly with a fork.  Put in the oven at 170 degrees C for 12/13 mins… and leave to cool on the tray.  The aim is to get them golden in the oven and not brown.

Do give them a go if you get a minute, they taste 100x better than shop bought Hob Nobs, there’s barely any washing up and they’re done and dusted in under 30 minutes!

Back to the makeup tomorrow!  What have you been cooking up this week?

RANDOM

Advent Giveaway - Day 1

…but damn I can make a decent Hob Nob. And now that I’ve blown my own trumpet so voraciously, it’s time to admit that these …

An Introduction to Beauty Blog Link Love

…but damn I can make a decent Hob Nob. And now that I’ve blown my own trumpet so voraciously, it’s time to admit that these …

Red Lip Series: Clarins Rouge Prodige Dark Cherry Lipstick

…but damn I can make a decent Hob Nob. And now that I’ve blown my own trumpet so voraciously, it’s time to admit that these …

Relaunched: Shu Uemura Rouge Unlimited Lipstick Range

…but damn I can make a decent Hob Nob. And now that I’ve blown my own trumpet so voraciously, it’s time to admit that these …

Beauty most... torturous?

…but damn I can make a decent Hob Nob. And now that I’ve blown my own trumpet so voraciously, it’s time to admit that these …

NOTD - Courtesy of LionLovingTiger...

…but damn I can make a decent Hob Nob. And now that I’ve blown my own trumpet so voraciously, it’s time to admit that these …

Are you bothered by hyperpigmentation?

…but damn I can make a decent Hob Nob. And now that I’ve blown my own trumpet so voraciously, it’s time to admit that these …

5 of the best... Moody Blue Nail Polishes!

…but damn I can make a decent Hob Nob. And now that I’ve blown my own trumpet so voraciously, it’s time to admit that these …

Wordless Wednesday

…but damn I can make a decent Hob Nob. And now that I’ve blown my own trumpet so voraciously, it’s time to admit that these …

Deal Alert: Mark Hill Hairdryer LESS than half price at BOOTS!

…but damn I can make a decent Hob Nob. And now that I’ve blown my own trumpet so voraciously, it’s time to admit that these …

POPULAR

CLOSED: Competition Time: Givenchy Very Irresistible L'eau en Rose Perfume!

…but damn I can make a decent Hob Nob. And now that I’ve blown my own trumpet so voraciously, it’s time to admit that these …

CLOSED - Win it! The Body Shop Expert Brush Collection

…but damn I can make a decent Hob Nob. And now that I’ve blown my own trumpet so voraciously, it’s time to admit that these …

Win a gorgeous "glow" trio with prizes from Urban Decay, New CID, & Arbonne!

…but damn I can make a decent Hob Nob. And now that I’ve blown my own trumpet so voraciously, it’s time to admit that these …

Hello? Is this thing on?

…but damn I can make a decent Hob Nob. And now that I’ve blown my own trumpet so voraciously, it’s time to admit that these …

Avoid the brush off with Oral-B Pro-Expert

…but damn I can make a decent Hob Nob. And now that I’ve blown my own trumpet so voraciously, it’s time to admit that these …

Big savings on French Pharmacy brands, win my Escentual.com top picks!

…but damn I can make a decent Hob Nob. And now that I’ve blown my own trumpet so voraciously, it’s time to admit that these …

Win it! 3 EcoTools Bamboo Bronzer Brushes to win!

…but damn I can make a decent Hob Nob. And now that I’ve blown my own trumpet so voraciously, it’s time to admit that these …

FOTD Busting out of the comfort zone!

…but damn I can make a decent Hob Nob. And now that I’ve blown my own trumpet so voraciously, it’s time to admit that these …

Dear Obesity...

…but damn I can make a decent Hob Nob. And now that I’ve blown my own trumpet so voraciously, it’s time to admit that these …

Urban Decay The Black Palette - Photos & Swatches

…but damn I can make a decent Hob Nob. And now that I’ve blown my own trumpet so voraciously, it’s time to admit that these …

COMMENTS

  • Categories

  • Archives

  • Admin

  • Ads