More than just mineral? NATOrigin Loose Powder Foundation

Posted by Lipglossiping On December - 12 - 2012

If I concentrate hard enough, I can hear my Nan speaking to me in her sing-song valleys accent.  She’s saying: “There was a little girl, who had a little curl right in the middle of her forehead.  And when she was good, she was very, very good.  And when she was bad, she was horrid.”  Which is precisely how my skin feels about mineral makeup – on a good day, nothing comes close to looking better and more naturally flawless on my skin.  At other times though, it can look like I’ve dipped my face in a vat of semolina flour… which then slowly cooks in situ, as the day progresses.

I tried NATOrigin Loose Powder Foundation, after it was recommended to me as a cross between a mineral foundation and a setting powder. This is good news for me as I often use my mineral foundation as a setting powder… albeit with a very light hand.
NATOrigin Loose Powder Foundation

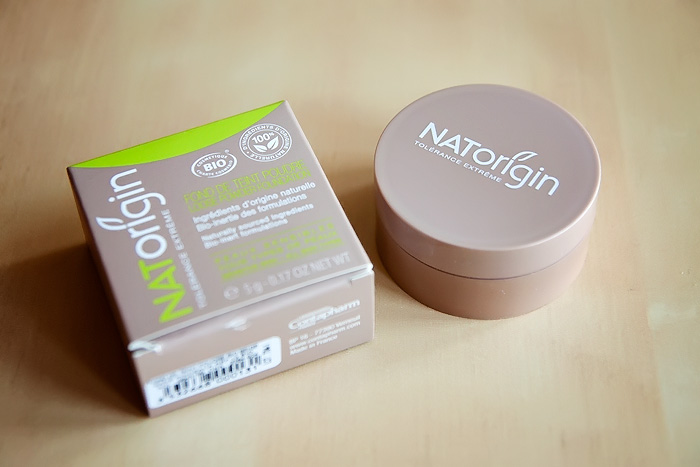
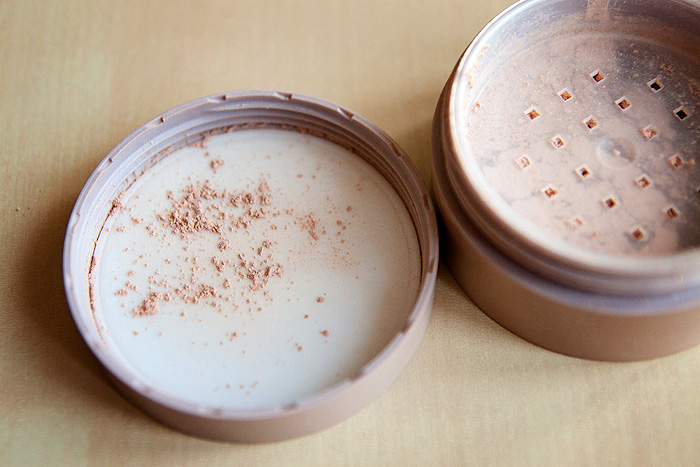
Compared to most mineral foundations I’ve tried, I found this to be sheerer… more finely milled, and lighter in texture.  The unglamourous but practical packaging features enough space to hold a sponge between the lid and the sifter should you need a way to avoid spillage during travel.  This extra roominess also means that you’re more likely to keep the powder in the pot whilst picking up product on your brush, and not allover your dressing table.

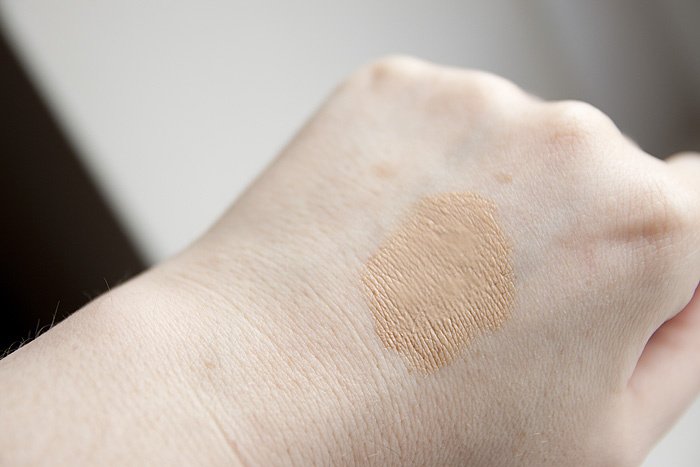
The foundation is available in four shades, and I was sent the second lightest – which as you can imagine, is a touch too dark for my skintone but thanks to its sheerness, doesn’t cause me much concern.  The foundation is about as genuinely organic as you can get, certified so by the prestigious ECOCERT and promises a hypoallergenic, paraben-free formula which has been approved by AllergyUK as an allergy-friendly product.  Quite interesting when you consider that the label states that the product may contain Bismuth Oxychloride, a known potential irritant and something that many of you have grumbled about in the past.
NATOrigin Loose Powder Foundation

The quantity shown in the lid is roughly the amount I’ve been using for a full face after applying a light tinted moisturiser as a base.  It’s my favourite way to apply this foundation and both sets my makeup and gives me a little extra coverage in the areas where my base is letting me down.  The combination of the two products as a single base gives me great medium/full coverage with none of the heaviness that I’d get were I using liquid/cream foundation alone.  It’s a real time saver as I don’t have to worry about the finish looking at all caked-on or artificial.

The NATOrigin Loose Powder Foundation lacks the pretty sheen that I enjoy from other brands such as Bare Minerals, infact I’d consider this one as fairly mattifying, obviously a bonus for half the population but I prefer my finishing powder to have a little luminosity in these darker months.  I’ve been mixing a liquid luminizer into my moisturiser to solve this problem.
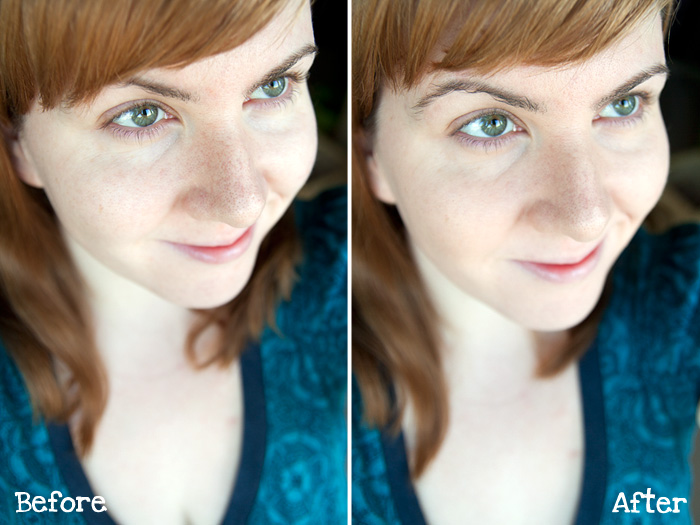
NATOrigin Loose Powder Foundation

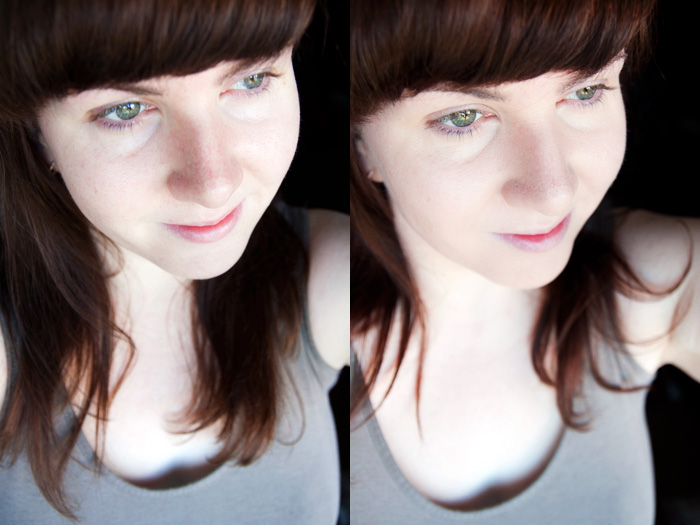
Hopefully the above photo will let you deduce the amount of coverage you can expect from using NATOrigin Loose Powder Foundation on bare skin, it’s a sheer-medium finish and as I’ve already mentioned, a matte one.  I’ve been enjoying using a flat top kabuki brush which works the product into the skin and ensures that you get maximum coverage with the least effort.

NATOrigin Loose Powder Foundation is priced at £17.75 for 5g and available to buy online from www.natorigin.co.uk

* press sample


Liz Earle Signature Foundation Review

Posted by Lipglossiping On November - 20 - 2012

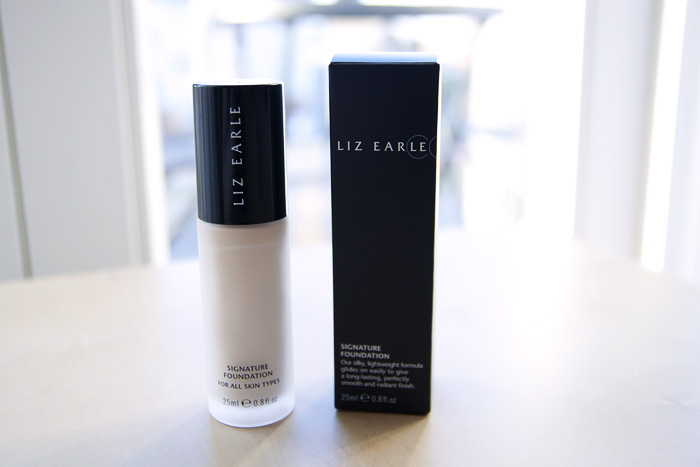
When it comes to makeup, things can get pretty personal. One person’s dream product is another person’s nightmare and nowhere is this more keenly felt than when trialling a new foundation. Liz Earle’s long-awaited venture into the world of “proper” foundation comes in the form of the Liz Earle Signature Foundation. I’m glad that it wasn’t rushed out with the initial launch, the brand have obviously taken the time to create something that they’re happy represents their approach to cosmetics.

Liz Earle Signature Foundation

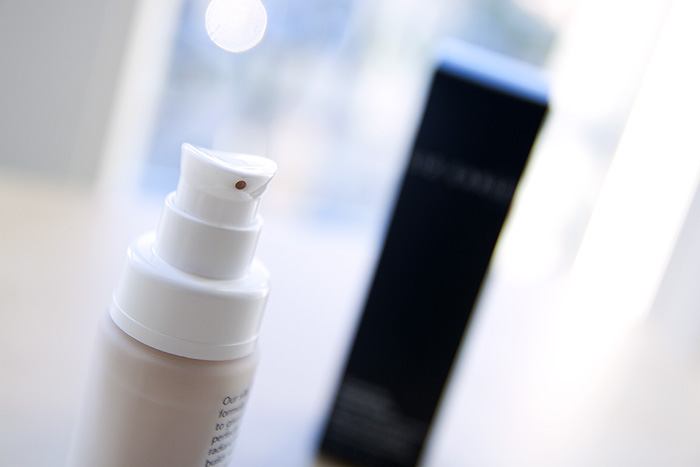
The classically-packaged foundation offers a heavyweight glass bottle with a well-designed pump, allowing complete control over how much product dispenses from the bottle. You only want half a pump? You got it. This obviously ensures no product wastage, and so it should because unlike most foundations, the Liz Earle Signature Foundation comes in a little under the average volume count at 25ml.

The silicone-rich formula offers a lightweight texture that skims over pores and primes the skin as it goes. As with similar formulas, I feel that a primer underneath makes wear a lot heavier and less comfortable than it should be. Having said that, the little pamphlet that comes in the box recommends using their Perfect Canvas primer underneath… but then, it would… wouldn’t it? It’s also worth noting that the Liz Earle Signature Foundation provides no sun-protection as part of its formula – and I don’t know about you but I’m not a massive fan of: moisturiser, sun protection, primer, foundation, makeup. That’s TOO much product for an everyday face. Personally, I’d skip the primer unless you have a real problem with your makeup sliding off by lunchtime.

Liz Earle Signature Foundation

The foundation comes in nine shades, ranging from Porcelain (which I have), through to Mocha (which promises to suit medium-dark Asian skintones). It’s obviously not the full spectrum, so hopefully the brand are working on increasing the palette next year. I usually opt for the 2nd lightest shade in a range because I favour a hint of warmth to counteract the redness in my skintone but in this case, the 2nd lightest (Ivory) would definitely prove too dark for me. Something to think about as I know that some of you consider yourselves to be paler than me.

I’m not a huge fan of the scent in this foundation, it reminds me a little of my old Dior foundations but thankfully, it doesn’t linger once it’s on the skin. I know that other reviewers have commented that they like the scent, so again, this is just another example of how personal an experience choosing a new foundation can be.

Liz Earle Signature Foundation

Liz Earle Signature Foundation applies well with both fingers and a brush. I’ve never been able to use paddle-style foundation brushes with much success, so you’ll have to make do with my experience at using a buffing-style brush, which I think provides a lighter, more natural, coverage. I’d agree with the brand that the texture is lightweight, it also strikes a nice balance between dewy and matte, though it becomes more matte as it sets on the skin. Ideally, you’d have a normal/combination skintype for this one – very dry skins may find it a little too matte to be completely comfortable in this weather. I’m dry/combination and I can just about get away with it…

Liz Earle Signature Foundation

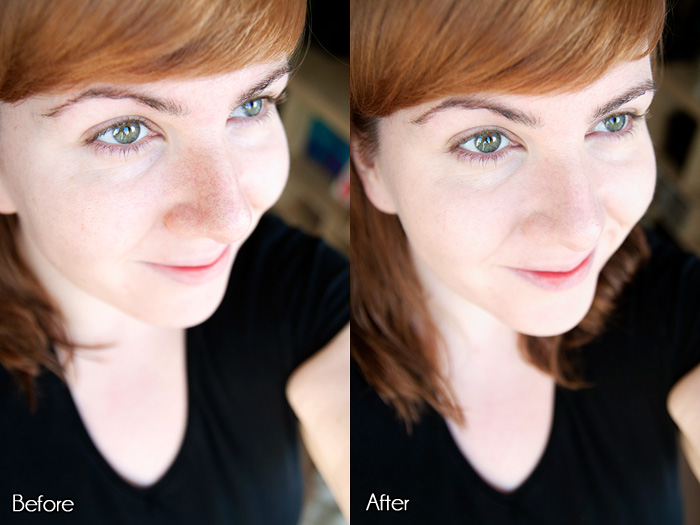
You can see that coverage is pretty good, I’d describe it as a solid medium, leaning toward the full but without the weightiness that full-coverage provides. If anyone tries to tell you that this is a sheer/medium formula – you need to ask yourself what brand of polyfilla they usually use on their faces because this is about as full as I’d want to go without classing it as a “night out” foundation.

I didn’t find the foundation getting pernickity about being layered either, it let me go back for another pass around the centre of my face (with half a pump) and didn’t start clumping or creating any skin dramas but at the same time, I wouldn’t call it a “buildable” foundation either.

Liz Earle Signature Foundation

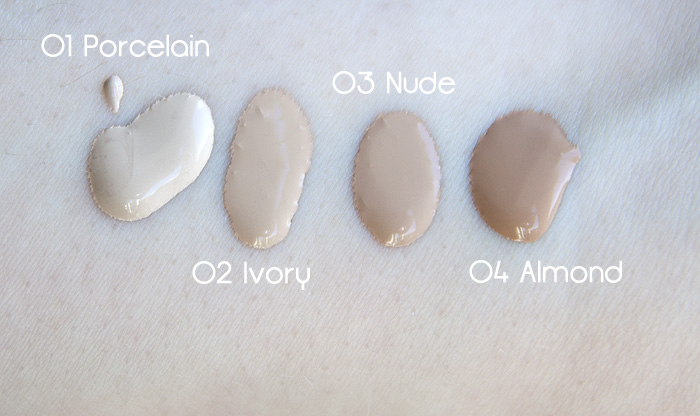
Some skin swatches on the inside of my wrist… look how blue I am! I think the shade variation between 01 and 02 is quite a jump… especially when compared to the variation between 02 and 03 – definitely try and get colour matched on counter for this one because I have a feeling that you’ll suffer from oxidisation and potential patchiness if you go too dark.

Liz Earle Signature Foundation

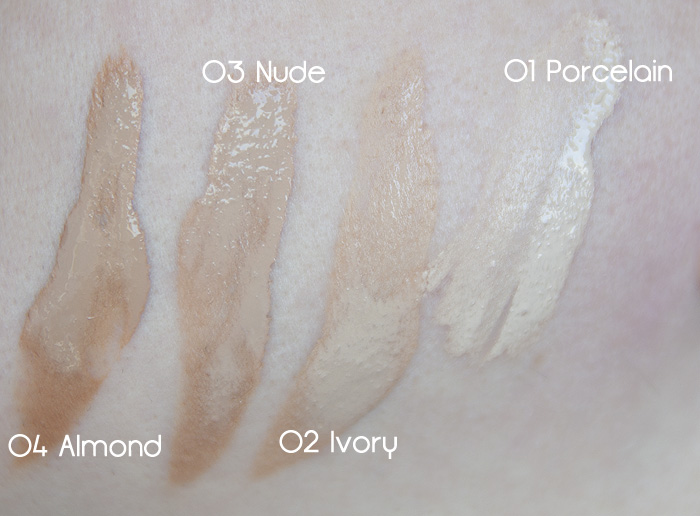
The picture above is a jawline swatch, stupidly in reverse order – sorry about that. You see the big leap between 01 and 02?

Longevity on my skin was fine, even without a primer it felt as though it held up admirably throughout the day and kept my redness toned down until the middle of the evening. Ultimately, I’ve been pretty happy with Liz Earle’s new Signature Foundation but I think I would have been a tiny bit happier with a little less matte-ness (totally a word). But then again, if you’re oilier than me – you should be chomping at the bit to get yourselves colour-matched on counter.

Liz Earle Signature Foundation is available to buy on counter, and online, priced at £21 for 25ml

* press sample
M&S Limited Collection – That Owl-Inspired Eye Shadow Set!

Posted by Lipglossiping On September - 4 - 2012

I don’t have quite the owl fascination that I know many people share but I can’t fail to appreciate a pretty design when I see one and this owl-inspired eyeshadow set is sure to get many of you hooting (groan – sorry).

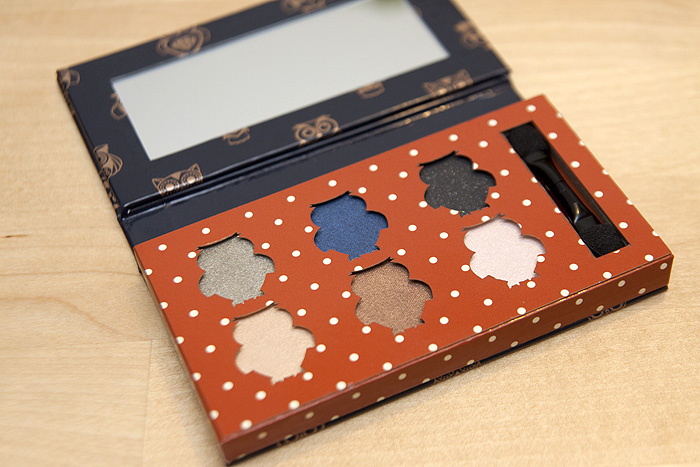
The eyeshadow palette from the M&S Limited Collection features five neutral shades, and one flash of bold colour in the form of a jewel-toned blue.  All shades are shimmery, but is it a case of style over content when it comes to usability and value for money?  Or should you be owl over it before it flies from the shelves? (sorry, SORRY!)

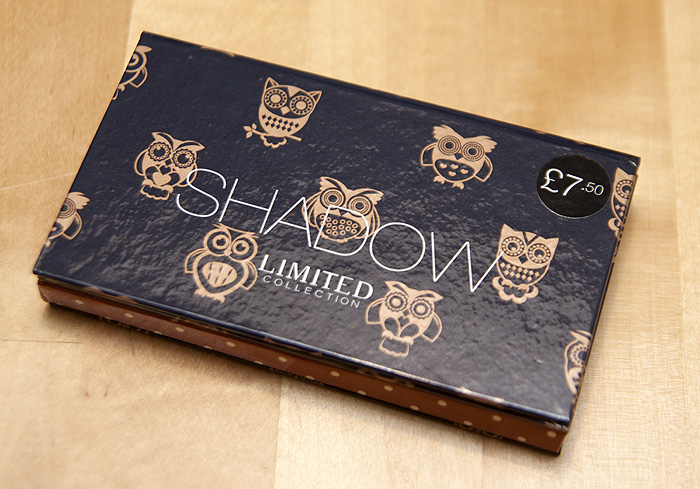
The packaging is lovely, a substantial cardboard design reminiscent of many popular palettes featuring some extremely cute owl motifs on the front.  There’s no obvious mention of M&S as a brand, the packaging alludes simply to the Limited Collection rather than the shop where you buy your comfiest knickers.

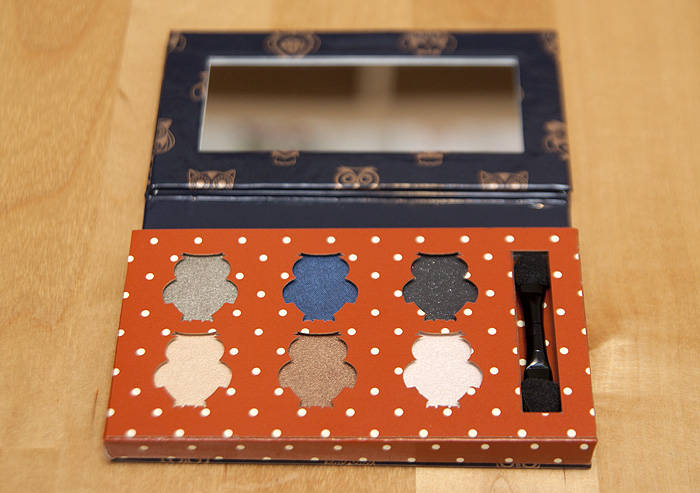
Under the lid sits a generous, distortion-free mirror and six eyeshadow pans, each featuring a cut-out owl design.  These cutouts prove to be a little tricky when it comes to accessing the eyeshadow and I imagine that the sharp edges will begin to look fairly worn shortly after the initial use.  The palette comes complete with a sponge applicator… an actual brush wouldn’t have gone amiss when you have six shades to work from.

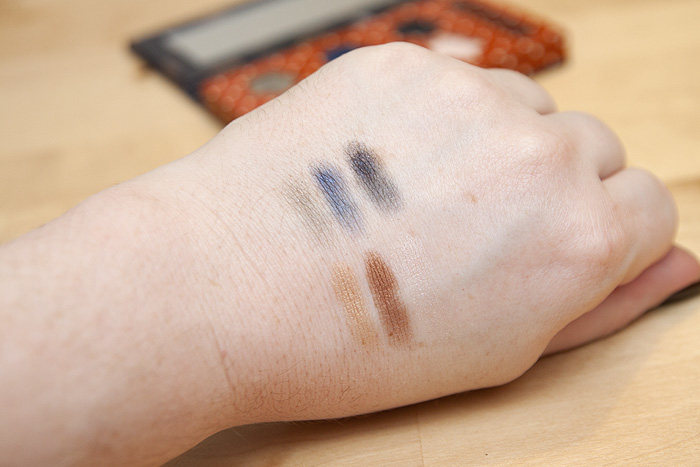
The textures are quite hard and sadly, I achieved little to no pigment from the top left shade, which on paper, was easily my favourite.  Taupe anyone?  The other shades deliver better results, some only marginally.  Swatches coming right up…

As previously stated, the top left shade is no bueno – don’t buy the palette because you think you’ve fallen in love with a new pretty taupe, you’ll be disappointed.  The remaining two shades on the top row are also a bit of a let-down.  They’re patchy and unpigmented for such strong colours (the swatch shows two swipes for each) – workable, but they make you graft to get a result.

The bottom row, however, tells a different tale.  All three shadows sitting across the lower half of the palette are quite delightful.  Rich in colour, smooth to apply and softly shimmering without any chunks of glitter.  The highlighter on the bottom right in particular is a very pretty warm champagne which will open up the eye area beautifully.

Ultimately?  Unless you absolutely must have it because you’re batshit crazy about owls, you don’t need this palette.  The shades are infinitely dupable in better formulas on the high street and because of the underwhelming performance of those top three shades, it just doesn’t offer value for money.

If you are a bit of an owl-obsessive, who cares what the shadows are like because let’s face it – you’re probably just going to stroke the box anyway.

M&S Limited Collection Shadow is available to buy instore and online at M&S, priced at £7.50

* press sample

Contrary to popular belief (bloody blog name), I don’t much like lipgloss – I tolerate it because it’s so damn easy to apply and wear without any maintenance but I only wear it when I’ve got my hair tied back and even then, only in nude shades.  I’d like to tell you that this is the lipgloss that changed my entire opinion on the product genre, I mean… if any brand could do it, it would be a gloss that comes from the Kevyn Aucoin line right?

Wrong.  I still don’t like lipgloss, but don’t let that put me off telling you lipgloss lovers about a very pretty one from the U.S brand that has recently returned to our shores.

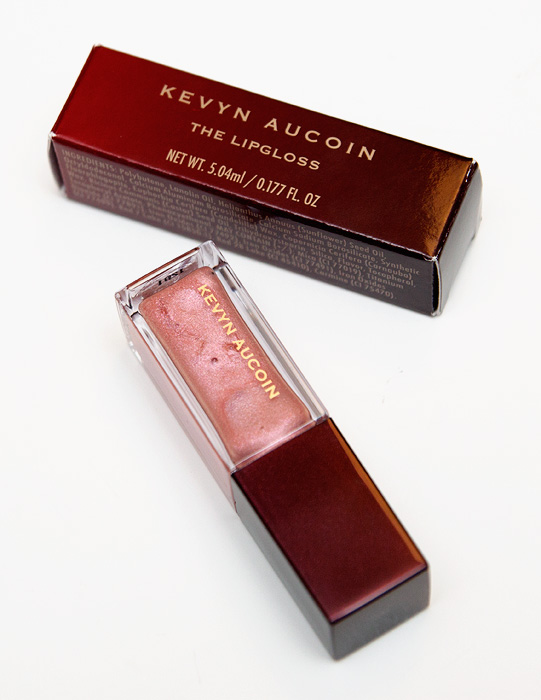
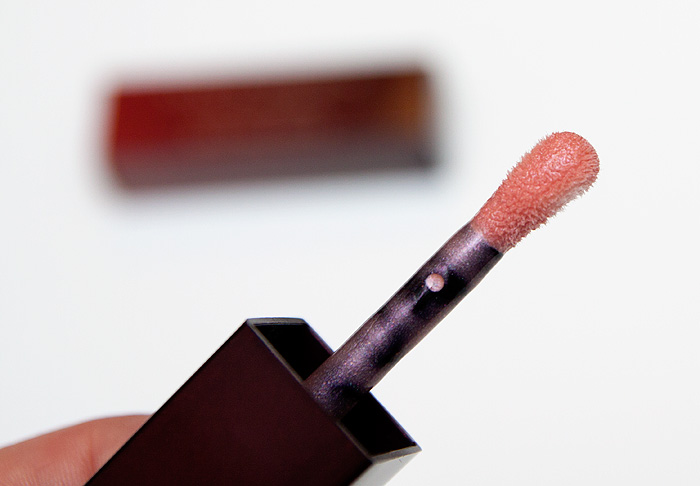
Lilium is a sparkle-packed nude pink which flashes silver reflects on the lips.  It’s packaged in a nicely-weighted, square tube with a wider-than-usual doefoot applicator and would look sleek in any makeup bag.  The formula is tacky but not super-sticky, though I still wouldn’t recommend you go out on a windy day without a pair of tweezers to pick off all the leaves/grit/small children that may become stuck to your face, it is still lipgloss afterall.

There’s no discernible scent and the product applies nicely without doing that jizz-lips thing.  Sorry, but you totally know what I’m talking about, lipgloss can look pretty rank when badly formulated or over-applied.  This one won’t leave you shame-faced.

It’s actually pretty hard-wearing for a gloss formula, the colour fades after a couple of hours but the pale reflects linger on to give some natural shine and depth to your lips in an illusory lip-plumping way.  My only caveat with this particular shade is that the sparkle does feel the tiniest bit gritty on the lips… it’s not uncomfortable, but I can feel something there if that makes sense.

Kevyn Aucoin The Lipgloss in Lilium is priced at £23 and available to buy instore and online at SpaceNK*

* who need their butts kicked for such an awful swatch on the shade – can you remember when there weren’t beauty blogs and all our online purchases had to be based on those little damn circles?!

** press sample
*** I bought the Sensual Skin Enhancer in another shade before my no-buy, I’m gonna make it love me.

Highlighter Series: St. Tropez Skin Illuminator in Rose

Posted by Lipglossiping On May - 25 - 2012

Whilst my inbox is currently being inundated with bronzing solutions for the current heatwave, I’m slathering on the SPF (broad spectrum of course) and shading myself courtesy of the nearest tree.  Whilst bronzed skin is undoubtedly beautiful, it always makes me feel rather conspicuous.  I simply don’t tan naturally… not at all, my family enjoy a long-running joke that focuses on the fact that I went to Australia to live for a while and returned home paler.

I’d like to say that I’m one of those porcelain-skinned types, milky white with a lit-from-within glow… but I’m best described as blotchy pink/white with more than my fair share of orange freckles.  Throw in a few thread veins and Kate Winslet, I ain’t.  Praise the lord for foundation and highlighter.

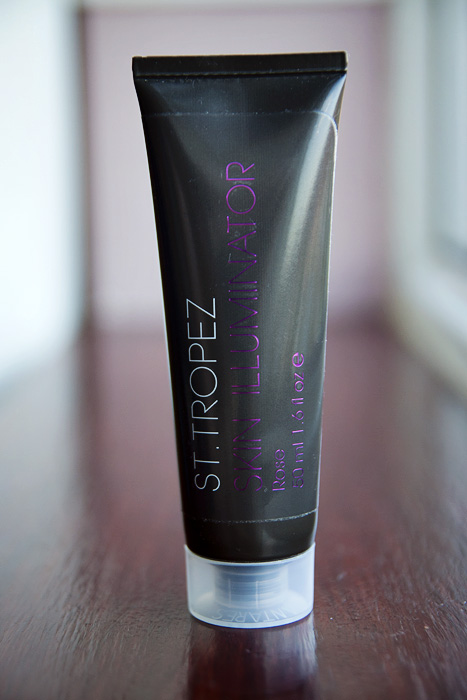
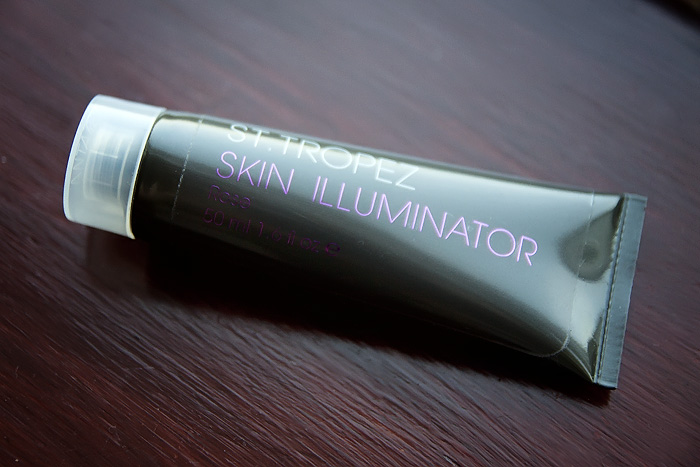
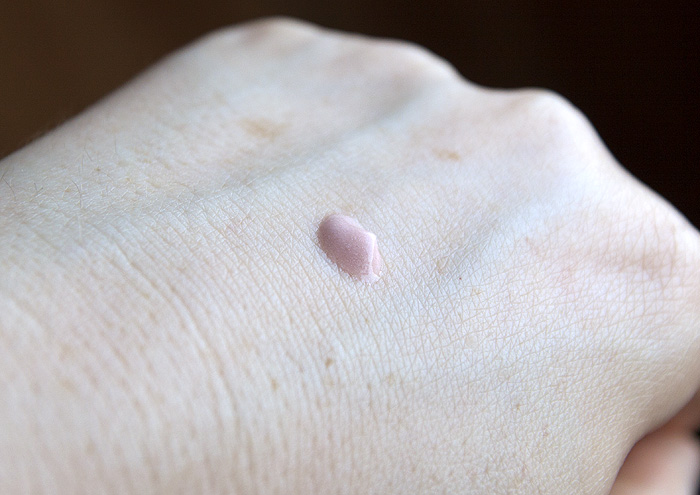
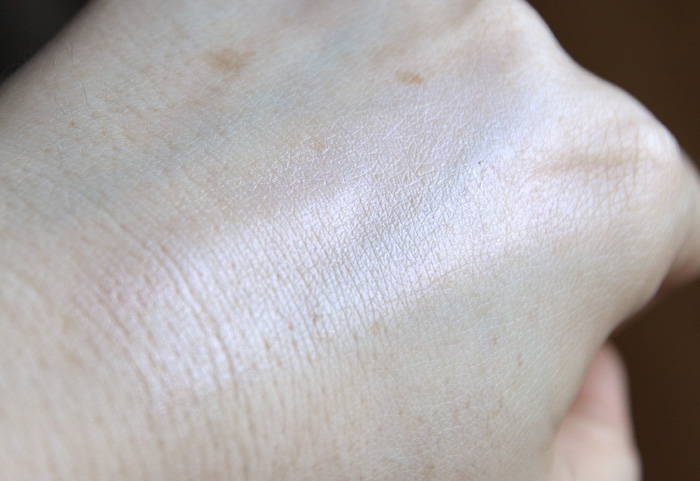
St. Tropez Skin Illuminator in Rose* is a highlighter that is perfect for us blue-veined types.  Generously packaged in a 50ml tube, it’s a great solution for holiday packing… you know, those rare times (unless you live in Essex) when it’s practically illegal to have a greater clothes to bare skin ratio.  It effortlessly dispenses a pink-toned sheen to emphasise sharp collarbones, chiselled cheekbones and shapely shins!

Non-greasy and buildable, the St. Tropez Skin Illuminator in Rose has a slight fruity scent which dissipates quickly once on the skin.  The packaging is simplistic but hygenic and reflects what I consider to be a very reasonable price point.  For a full 50ml of product, you’ll pay only £12.26.

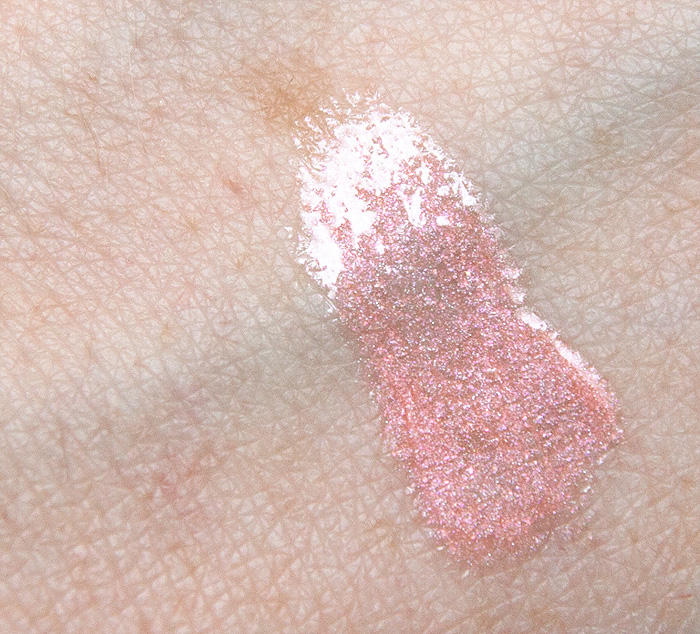
You can see that the sheen it imparts is definitely cool-toned, which is what makes it far more natural-looking for us cool-skinned paleys than the more usual summer offers from cosmetic companies.  The above photo shows two layers of product to ensure that the camera picked up on the swatch.  It feels light-weight on the skin but I wouldn’t recommend it as a luminizing all-over type highlighter, this is definitely more for spot-highlighting.  I’ve also found that the formula is happy to be applied over foundation, important to me because it’s nearly always something I forget to do until AFTER I’ve applied my blush!

St. Tropez Skin Illuminator in Rose is available to buy online from st-tropez.com and Boots.com (where it’s currently only £12 AND on a 3for2 across selected ‘summer products’).

* press sample
Sensationail, gel nails at home – 14 days later…

Posted by Lipglossiping On May - 10 - 2012

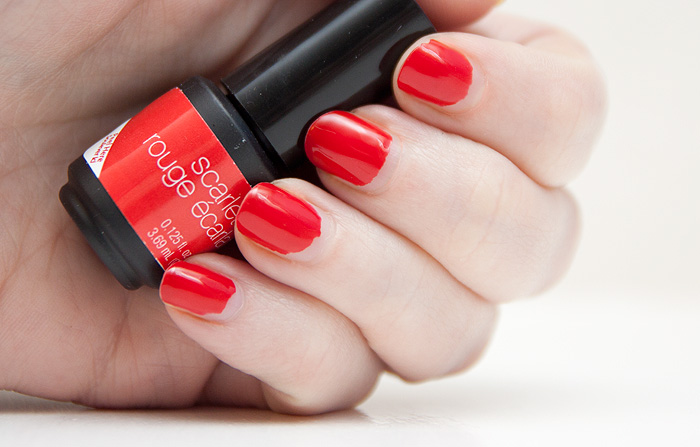
Fourteen days, that’s approximately 336 hours, or 20,160 minutes.  In other words, a fair amount of time.  In the world of long-lasting manicures, just what you do with that time is almost as important as the duration spent doing it.  For me, that time was spent typing, packing, cooking, swimming, running, playing at Butlins, and chasing ants in the dark.  I like to think that this manicure has been put through its paces over the last fortnight.  The question is, did it survive?

See for yourself…

I think that it’s coped fairly admirably no?  There is a small chip on my index finger but that was it for the tips… across the entire manicure – spending that extra time to ensure that I had capped all my nails really paid off in this instance.  Infact, you can see that most of the ‘damage’ actually comes from the other end of the nail bed where I’ll happily admit that I didn’t do quite so well at applying with the kind of precision one needs.

I suffered some pooling in the cuticles with the base coat and on a couple of nails this led to a small amount being cured over the cuticle so I wasn’t particularly surprised when I experienced a little bit of lifting after a few days in those areas.  What I was surprised at though is that despite the lifting, I was able to gently clip those areas off without causing any further damage to the manicure.  Most of what you see in the photo above is actually new growth at the base of the colour.

Now, whilst this is a glowing report so far, I do have one issue that I’d like to talk about… removal.

Damn, this stuff is a bitch to remove without damaging your nails.  I lightly buffed the surface of my nails firstly to remove the shine and create a penetrable layer for the remover to do its work before soaking pre-cut cotton pads in acetone remover (where acetone is the primary ingredient) and laying them down over the nails.  Wrapping the tips in foil, I gave it a full 10-12 minutes before sliding the foil tips off my fingers, expecting to see the gel slide off with them.  Uh, not a chance.  The surface had bubbled and warped and the edges had further lifted but it wasn’t giving up without a fight.  I ended up using an orange stick to (as gently as I could) scrape off the gel polish before buffing the surface of the nail to remove the residue.

My nails are definitely in worse condition post Sensationail but seemingly nothing that a hefty dose of almond oil (thanks Squarrell) can’t sort out – I’d say that they’re halfway back to feeling “normal” within a day of diligent oiling.

Hopefully that’s provided an indepth (enough) review for you from application, to pricing, to wear and finally removal.  I’d be really interested to find out what you think about the product in terms of value, I’m confident that it provides the kind of long-lasting, salon-quality manicure that we pay £20+ a time for – but despite knowing that, I’m curious if the initial price tag would still put you off?  I think that this is probably a great bit of kit for a group of friends to pool together and purchase, otherwise – you’ve got to be a very dedicated nailista – know any of those?

The Sensationail starter kit is available to buy online from Boots, priced at £85, additional shades are available at £15 each.  You can get more tips and tricks from the brand’s facebook and twitter pages.

Stila In the Light Eyeshadow Palette review, swatches and a FOTD!

Posted by Lipglossiping On May - 9 - 2012

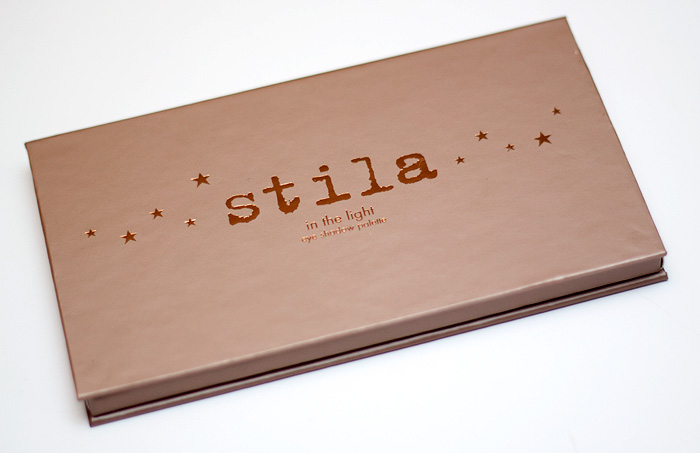
All-in-one neutral palettes have never been more popular, they’re a quick solution to the eternal morning dilemma of eyeshadow selection when all you really want is an extra five-minutes in bed.  Stepping firmly on the bandwagon with their latest palette release is U.S. brand, Stila in the form of their In the Light eye shadow palette*.

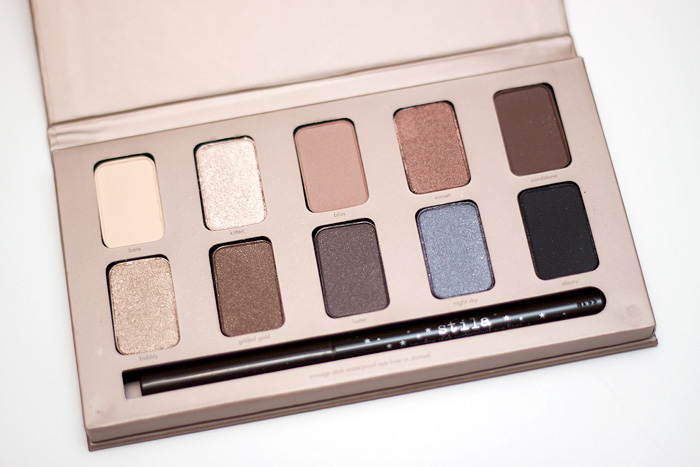
A cardboard palette, lightweight and without a mirror makes this a slightly more portable (if flimsy) choice than the Urban Decay Naked franchise.  The palette contains 10 pans of colour, both a mix of shimmer and matte shades.  Each pan provides 1.4g of product, around the same quantity per pan as the Urban Decay offering, but two less pans in total.  The stock images that you will see online of the palette don’t reflect the true shades within, both bliss and sunset do not swatch pink as described in the official colours and shown in the stock photo.  All shades can be used both wet and dry.

The ten shades vary in pigmentation and texture, some feel quite soft and creamy whilst others are more firmly-textured and require building up to achieve rich colour.  None feel chalky and they all share excellent blendability.  There are four matte shades in total: Bare, Bliss, Sandstone and Ebony allowing you to create a fully matte look with a range of neutral shades if you so wish.

I like this option a lot… it allows me to create a fully matte eye look as my base before adding in a ‘pop’ of something more shimmery without going into disco territory.


The shades are mostly warm-toned with the exception of Night Sky and Luster.  Also included in the palette is a 0.28g black, retractable eye pencil (smudge stick) which provides rich colour with a smudgable but long-lasting formula.

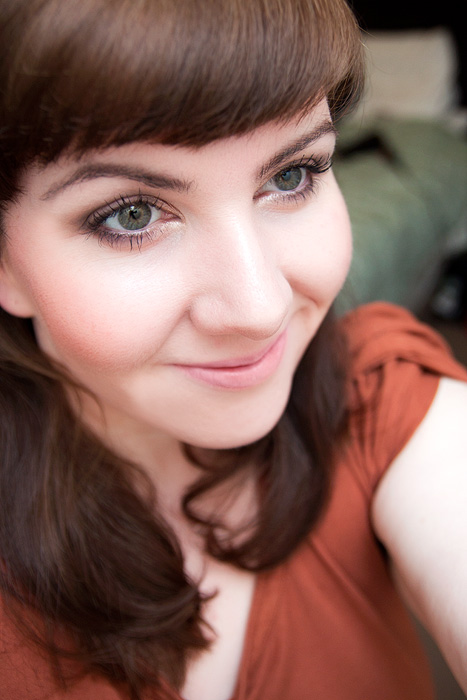
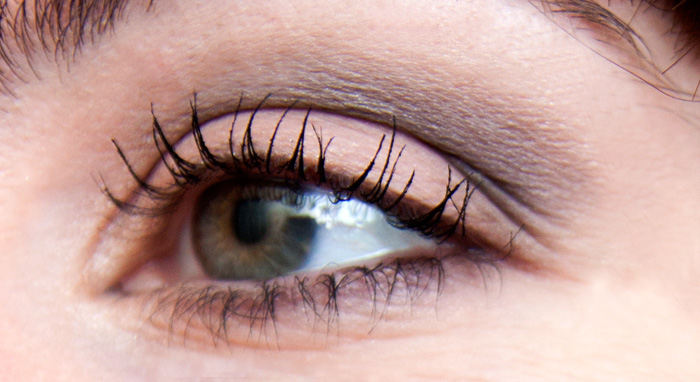
A quick FOTD showing Bare, Bliss and Sandstone with a pop of the inimitable Kitten on the inner corner to brighten the eye area.  Kitten has long been one of Stila’s most cult shades, and I can see why, it’s a very pretty champagne highlight that opens up and lifts the eye area when used as a highlight.

The Stila In the Light eyeshadow palette is available to buy instore at SpaceNK, online at BeautyBay and Escentual.  It’s also available at Stila’s freshly-launched website: stila.co.uk – priced at £25.00

* press sample
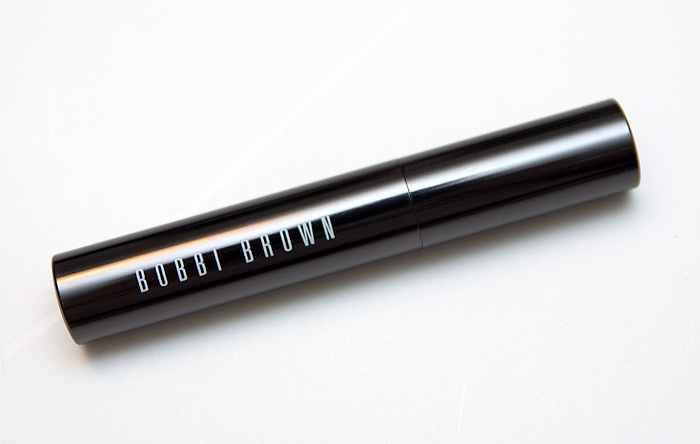
Bobbi Brown Intensifying Long-Wear Mascara

Posted by Lipglossiping On May - 8 - 2012

In addition to the new long-wear cream shadows, and eye pencils which I talked about here, the Bobbi Brown Intensifying Long-Wear Mascara* is putting in an appearance and promising to deliver results that last for up to 16 hours.

It’s probably fair to say that when I think of long-lasting makeup, I’m not sure that I’ve ever cursed any of my mascaras for not lasting the course of a day?  Sure, some are more smudgy than others and then you have the ones that flake a little as the day goes on but I can’t remember ever looking in the mirror and thinking “awww crap, where’s me mascara gone?”.  Or maybe they just mean that it won’t flake or smudge… but then again, don’t they all promise that?

If you experience this kind of problem on a daily basis, then perhaps the Bobbi Brown Intensifying Long-Wear Mascara is your next dream come true?

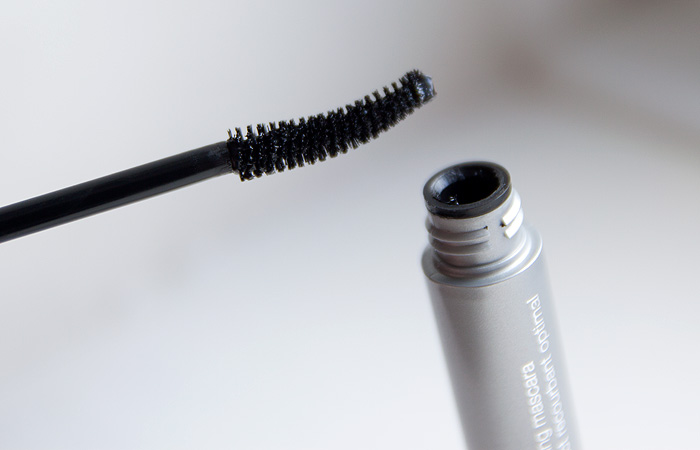
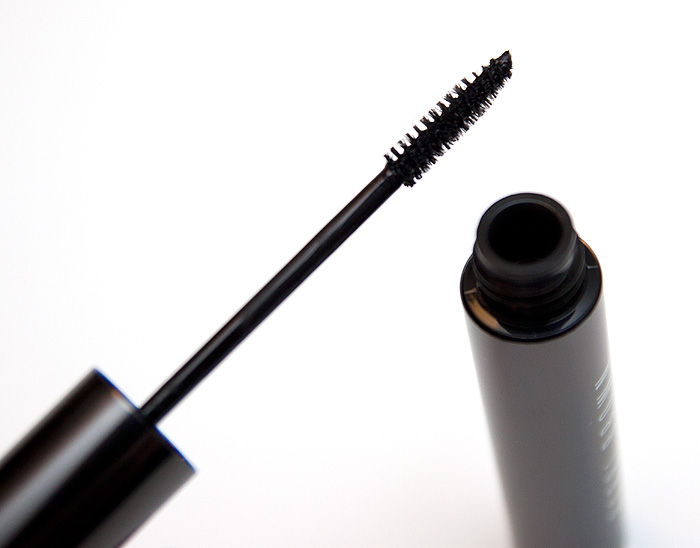
The packaging is particularly sexy with a metallic-chocolate finish and sleek lines whilst the brush inside is teeny, tiny… and for me, its main USP.  This fabulous brush reaches every lash from the longest to the shortest.  The brush consistently pulls out the perfect amount of product and you can feel the packaging doing its job at sucking back in the excess as you pull the brush from the neck of the tube.  As a result, I can’t see this one drying out too quickly either.

You can see how narrow the brush is in the above photo, a really great shape for women with shorter, sparser lashes to define from root to tip.  I particularly like this mascara for my lower lashes, it separates nicely, fanning each one out without leaving clumps or excess product in its wake.  As for the top lashes, well… it’s not quite volumising, nor lengthening enough for me.  My lashes can take a hefty dose of product before they begin to look worse for wear and this doesn’t provide the lash-drama that I’m forever craving.

It does, however, provide a better-than-natural finish that you can build without too much protest.  As for longevity?  Yes, it lasts the day without smudging – well done.  I do see a couple of flakes if I apply more than two coats but nothing that I’d worry myself over.  Removal is easy with just warm water, though my cream cleanser (waterless cleansing) didn’t experience any issues with sweeping it away at the end of the day either.

Overall, I really recommend this mascara if you’re looking for a good, solid formula with a fabulous brush that helps create precision definition without missing a single lash.

Bobbi Brown Intensifying Long-Wear Mascara is available to buy on counter and online, priced at £18.00

* press sample
As the summer approaches, my thoughts turn to bullet-proofing my makeup to last the course of a hot, tiring day.  I don’t know about you but despite my dry skin, the first to make a dash for freedom is any and all makeup down the bridge of my nose.  Then my eyeliner melts into my tear ducts, developing into hugely attractive eye bogies before the last of my foundation gives up the ghost and literally puddles in the area where my nose meets my face (hello face).  If it’s really hot, my eyeliner will also strive for symmetry and create matching lines across my upper eyelid where the “hoods” rest gently on the lash-line.  It’s a beautiful sight to behold.

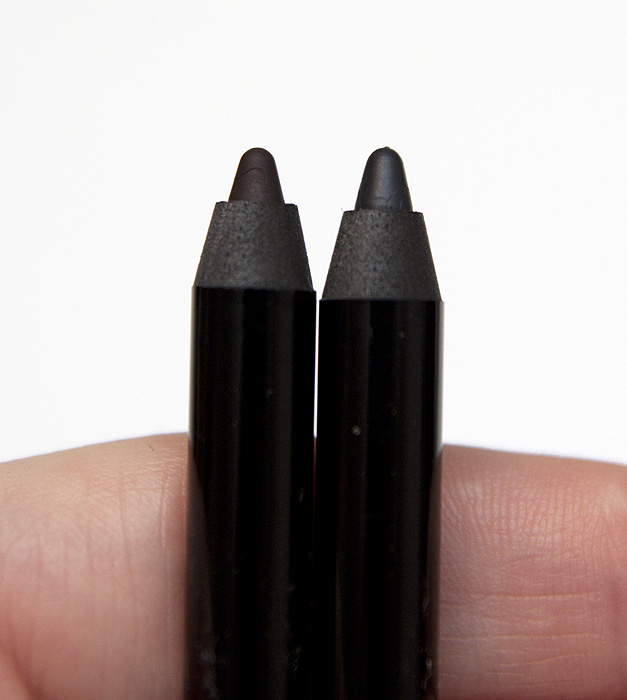
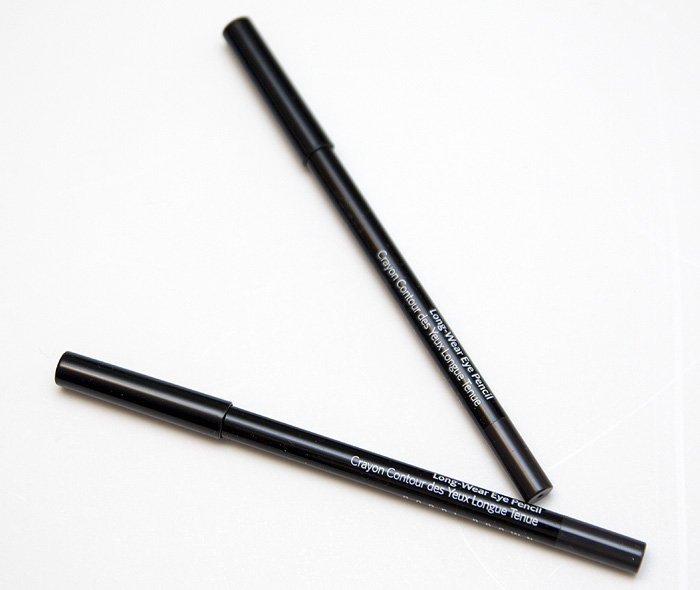
Bobbi Brown’s new Long-Wear Eye Collection promises to stay the distance without letting you down or showing you up.  The eye pencils from the new collection are richly-coloured and deeply-pigmented.  They’re creamy and have that soft, gel formula reminiscent of my beloved Avon Mega Impact/Supershock Gel Eyeliner (whatever they’re bleedin’ being called at the moment).

The Bobbi Brown Long-Wear Eye Pencils* are available in six shades: Jet, Mahogany, Black Navy, Black Plum, Hunter and Smoke, providing a colour option whatever your personal taste.  I really like an off-black range that carries the density of an inky black but without the harshness on maturing features.  Not that my features are maturing, shutup.

These pencils haven’t given me any trouble sharpening, the uber-softness of the Avon ones means that I do need to chill them in the fridge for half an hour prior to sharpening, total pain when you need a pencil stat.  I didn’t have to do this with the Bobbi Brown pencils.

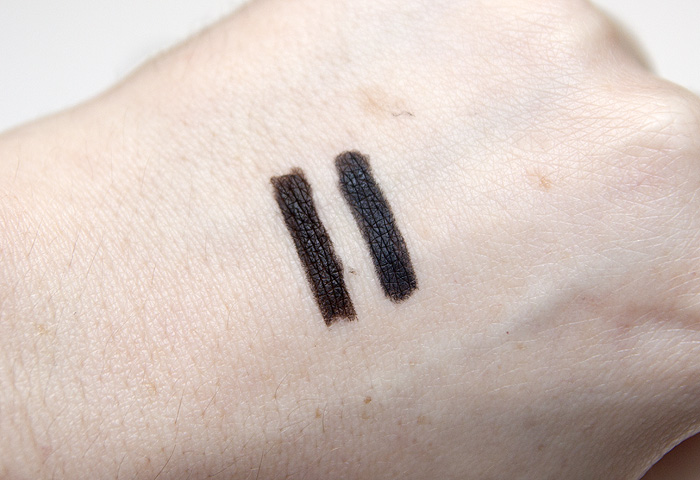
Mahogany is swatched on the left, Smoke on the Right.  You can see the density of pigment is really quite impressive.  It’s a teeny bit less pigmented than the Avon offerings (which are insanely pigmented) but as I said earlier, they do provide a little more precision during application thanks to a firmer texture.

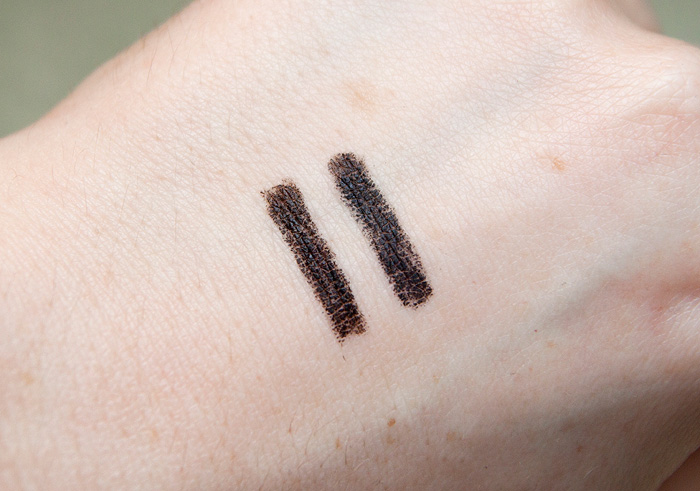
Here are the same swatches after scrubbing the back of my hand with soap and water for a good 30/40 seconds.  I was impressed that they didn’t smear or transfer as I swiped and rubbed.  You can see that the pigment has eroded in places but if you imagine that swatch as drawn across your lash-line, I think you’d be fairly happy to emerge from the swimming pool 3-hours later with that much still intact no?

Unfortunately, whilst I think these pencils are brilliant.  This is where the praise ends.

I’ve been comparing these all along to the Avon SuperShock Gel Eyeliner pencils (which don’t come in as many shades admittedly) simply because the Avon ones are my benchmark and indeed, my daily staples.  As I swatched both alongside one another, I expected the Bobbi Brown ones to outlast the Avon.  They don’t.  They wear identically both on the back of my hand and on my waterline, around 5 hours.

The Bobbi Brown Long-Wear Eye Pencils are priced at £17 each.  The Avon SuperShock Gel Eyeliner pencils are currently priced at £4 each.  And there’s the rub, I’m not going to recommend that you spend extra money needlessly… both are fabulous long-wearing, densely pigmented pencil liners.  The Avon ones are substantially cheaper.

The Bobbi Brown Long-Wear Eye Pencils are available to buy on counter and online from BobbiBrown.co.uk

* press samples

Clinique High Impact Curling Mascara

Posted by Lipglossiping On April - 22 - 2012

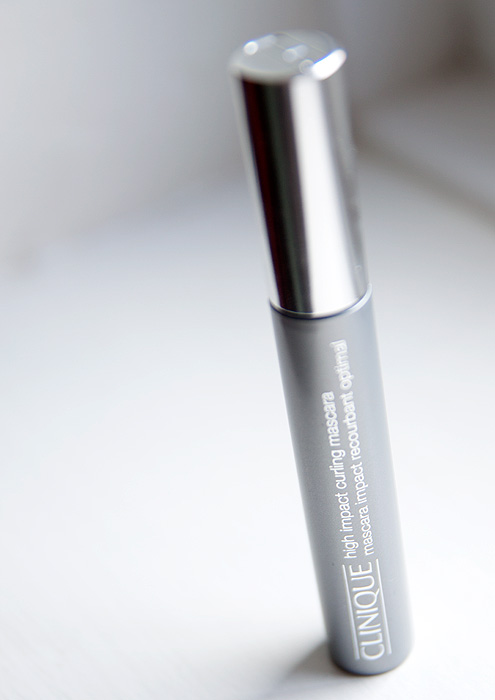
Finding the perfect mascara is much like finding the perfect killer heels.  You want something that makes your legs (lashes) look incredible without crippling the wearer.  Some mascaras sting, flake, smear, or generally flop halfway through the day.  The Clinique High Impact Curling Mascara* is a good choice for anyone who wants impressive lash scaffolding without too many side effects.

My lashes are naturally fairly curly and crave definition and impressive darkening to make the most of them.  Curling isn’t high on my list of priorities but even I could see how once this mascara sets, it holds a rock-solid shape throughout the day.

The brush is a curved affair, with a tapered tip to allow you to reach the tiniest of corner lashes.  It does offer good coverage with a single pass, which is just as well because the formula has a tendency to go a little spidery if you go back for too many coats.  I’d stick with two as a maximum.  The formula is a little wetter than some, so be aware of this when applying… I’m always a little heavy-handed which usually results in a couple of splodges of product on my eyelid when using wetter formulas.  Avoid this by removing any excess from the wand with a tissue, or wiping it against the edge of the tube opening.

The black is a true, inky black which coats my lashes evenly and offers great definition, curling and lengthening.  It also does well to volumise at the roots, but again… with the wetter formula, you do need to be precise here.  It’s a little bit ‘bitty’ as it builds, and these ‘bits’ will flake off throughout the day but it’s purely the excess which drops, so again, just take a little more care that you haven’t loaded your brush with too much product and you’ll avoid this.  Another issue is removal… you’ll need warm water to remove, so simply hold a wet flannel to your lashes momentarily and the formula will slide right off.  If you don’t?  This stuff is holding steady – making it a great choice for Summer holidays!  Basically, there’s a learning curve with this mascara that’s worth getting to grips with.

All in all, I think the Clinique High Impact Curling Mascara is a strong offering from the line.  It does what it says on the tube, and if you’re looking for supreme hold and curl with a long-lasting formula (albeit with a little work on your part to get the absolute best from it), you won’t go far wrong with this one.

Clinique High Impact Curling Mascara is available to buy on counter and online, priced at £16.00

* press sample

ADesign Skincare Brush Set (and my new favourite brush)

Posted by Lipglossiping On April - 19 - 2012

I’ve been trying out the ADesign Skincare Brush Set for just over a month now, and I wanted to see if this one set could ever possibly replace the various skin brushes that I’ve grown to love over the years.  I have to say, the set did fare better than I thought it would… but the ultimate answer is that nothing can replace many years of replacing rubbish brushes with marginally better ones until you reach brush nirvana!

But let me talk you through the brushes contained in the ADesign Skincare Brush Set*, with particular reference to my. new. favourite. brush.

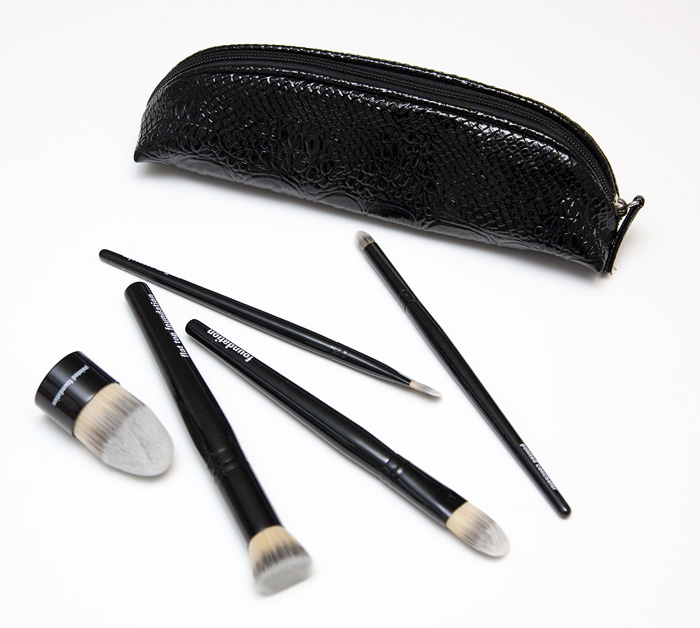
I’ll begin by giving you a quick overview of the set, which is available to buy online from Cocktail Cosmetics, priced at £44.95.  Broken down, that works out at around £8.99 per brush – which for face brushes, makes it a very good value set.  You’d easily pay that on the high street for brushes that don’t come close to even 10% of the quality that these represent.

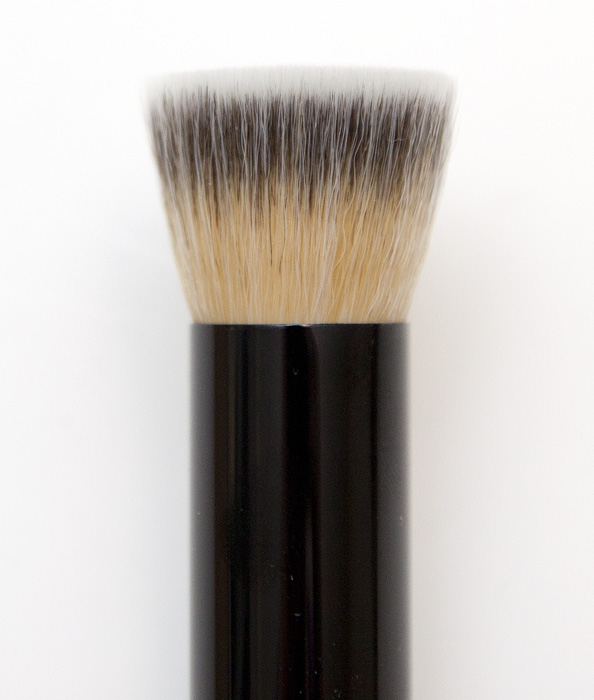
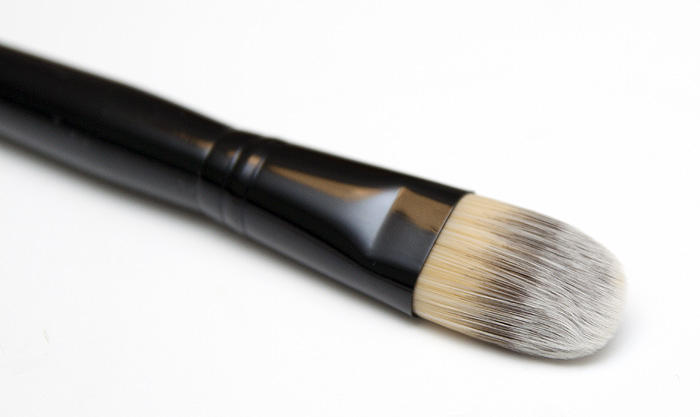
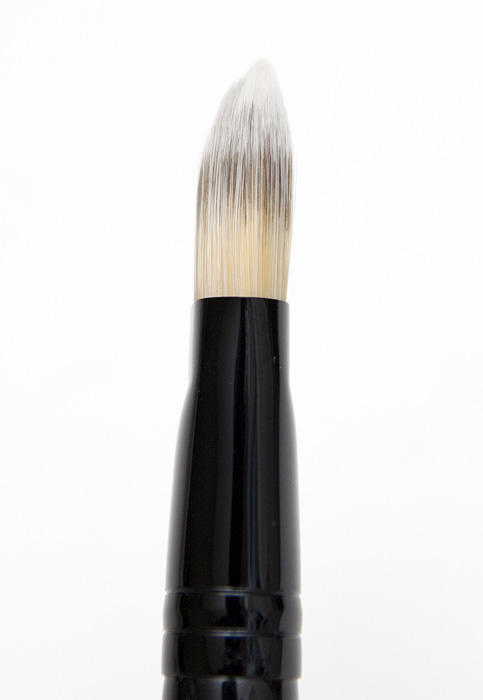
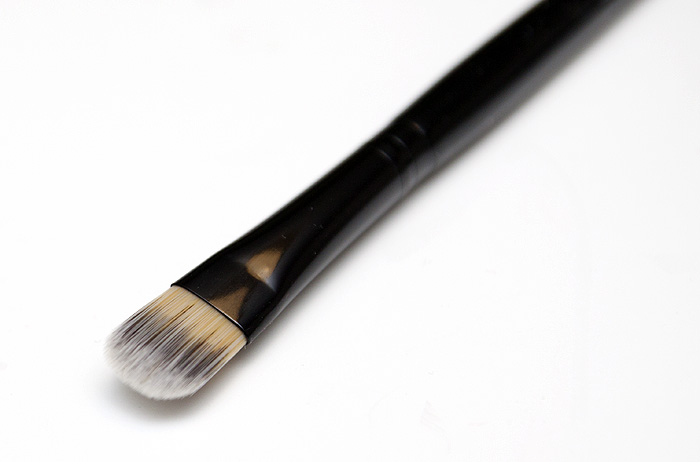
For your money, you get five brushes housed in a patent mock-croc bag that is fully-lined to prevent damage from spills.  The brushes (from left to right) are: Pointed Foundation Kabuki Brush, Flat Top Foundation Brush, Foundation Brush, Medium Concealer Brush, and Pointed Concealer Brush.

You may be asking yourself, why on Earth would you need three different foundation brushes?  If you are, get off my blog.

Moving on…

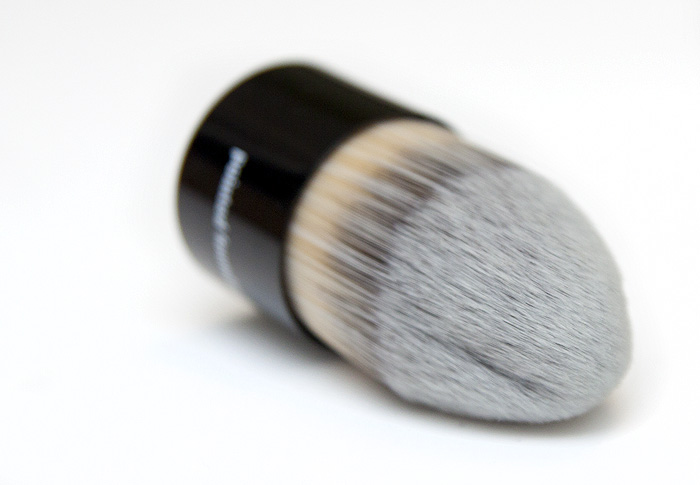
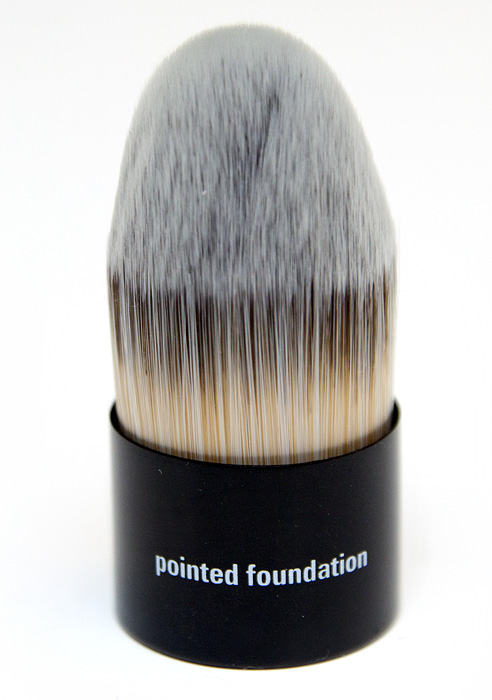
Yes.  It’s magnificent isn’t it?  Like a silver bullet sent to banish bad makeup application werewolves (or something *shrugs*).  I haven’t quite got the hang of how best to use the Adesign Pointed Foundation Kabuki Brush and I’m not keen on the stubby kabuki-handle – the pointed tip is obviously engineered to provide precision and having a longer-handle would complement this more effectively.  Of course, if you love the design, you could always opt for something like the Bdellium Tools Bambu Pointed Foundation Brush as an alternative.

The heavily tapered bristles on this brush allows for dual-motion blending… you can swipe both back and forward like a traditional painting motion or apply circular buffing strokes.  For me, I’ve found its forte when it comes to applying concealer over a larger area, particularly around the nose as the point gets right into the creases whilst the taper blends the edges seamlessly.  I’m not completely sold on it, but I do think I’ve not quite mastered the best technique for it yet.  If you have any suggestions, I’m all ears!

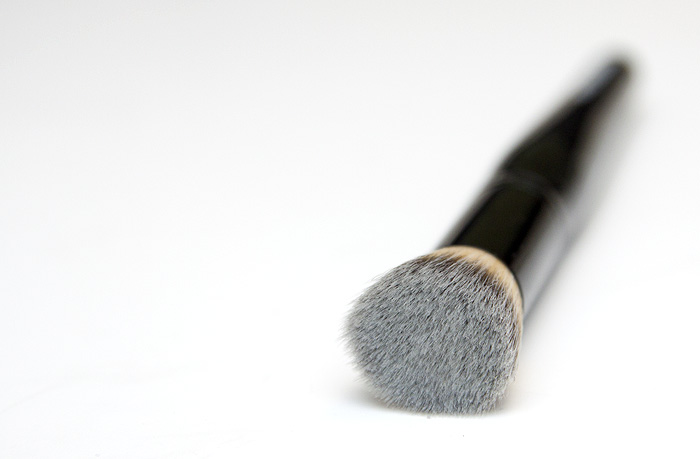
The Adesign Flat Top Foundation Brush, a.k.a. my new favourite brush.  It’s a masterpiece, so beautifully dense with tickle-me soft fibres.  It is not very pliable which allows for a really good buffing motion (rather than flopping about ineffectively on the face) and comes with a small head which I much prefer when compared to a larger size flat-top such as the ELF Powder Brush.  I’m going to photograph comparable brushes shortly and reiterate why I prefer this brush to the others.  For quick reference, comparable brushes would be: MAC 130 and Shiseido Perfect Foundation Brush (though this one isn’t cut at an angle).

I’ve been using this for applying foundation (all textures), applying cream blush and blending out any edges.  When my skin has been particularly dry and all my products have been cream or liquid-based, I haven’t even bothered to use a different brush.  This is the stand-out offering from the set.  The smaller head also means that it complements my stick products really well (things like NARS Multiples and my Shu Uemura Stick Foundation).  Perhaps the ultimate compliment I can pay it though is that it has enabled me to wear my MUFE HD Cream Blushes… those things played me up something chronic, I just couldn’t find the right tool to get the just-flushed blush from them.  Until now.

I wish that I could point to a single technical aspect of this brush that suits my needs so well, but all I can tell you is that I’m in brush love.  For reals.

After the gushing over the previous brush, the Adesign Foundation Brush doesn’t get me nearly as excited.  Again, this is small-headed… comparable in size to the Giorgio Armani Designer Foundation Expert Shaping Brush but mega-bucks cheaper.  While the GA brush tapers away quickly, the ADesign brush provides greater density from the base up, which allows this brush to both paint and buff.  The fibres have a good amount of spring to them and are densely packed from root to tip.

The Adesign Medium Concealer Brush is another that didn’t give me an awful lot to flap about.  Again, it’s a good-looking brush without any flaws and applies under-eye concealer very gently but one the whole, I prefer my No7 Concealer brush when it comes to painting on the product with a flat edge like this offers.  But talking of flat edges…

…the Adesign Pointed Concealer Brush is without them!  This is a really good brush for concealing over blemishes.  It delivers the product with pin-point precision and blends without dislodging or removing any of the product you’ve just placed!  How many times have you applied concealer to a spot, blended and then realised that you’ve blended at least 50% of the product off?!  This has worked wonders for my concealer application skillz… now I has some!  Again, this is so densely packed, you would think you’d need something with a ‘lighter’ touch, but no… despite my initial scepticism, this really does the job magnificently well.  It’s a little too stiff-feeling to use in the delicate eye area, where something like a MAC 224 works well to both apply and blend concealer.


Without exception, each of these synthetic-fibre brushes are high-quality.  The ferrules are solid, the fibres are well-cut and dense.  Each is perfectly soft, washes well and keeps its shape as it dries.  Talking of drying, these do dry more slowly than natural hair fibres…. such is the downside to synthetic brushes but I haven’t experienced any shedding during washing or application at all.  Which is more than can be said for most brushes.  Whilst I haven’t fallen head-over-heels for every brush in the set, the two that have made an impression on me (Flat Top Foundation & Pointed Concealer) … have made an impression that I want to shout about.

As an aside, you may be wondering why this is called the ‘skincare’ set… well, if you watch the video below, you’ll see that this set was designed for both makeup application AND skincare application.  Call me old-school but I’m all about the fingers when it comes to skincare!

The ADesign Skincare Brush Set is available to buy online from Cocktail Cosmetics, priced at £44.95

* press sample
Face Atelier Ultra Foundation Review

Posted by Lipglossiping On April - 16 - 2012

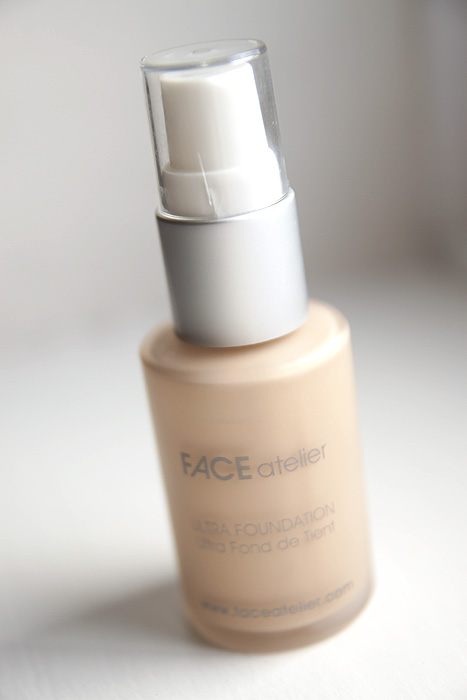
I promised you a full review of the Face Atelier foundation after last week’s FOTD and my recent re-discovering of it.  Face Atelier Liquid Foundation offers medium/high coverage without looking like a traditional, high-coverage foundation.  On my dry/combination skin, it takes about 20 minutes to warm up, at which point it begins to look less like a foundation and more like naturally good skin.  It’s one of those foundations where you look in the mirror part-way through the day and say “Woah, good skin day!”  Followed by a fist-pump.

However, I do have a caveat with this foundation.  To get the best from it, you need to apply it on well-moisturised, not-too-dry, not-too-oily skin.  If you’ve got good skin texture but with a little discolouration or redness, you should be chomping at the bit to purchase.  If you’re prone to dryness or oiliness, you’ll probably be in love with this 65% of the time.  Does that make sense?
The bottle comes with a great pump that dispenses the perfect amount for a full-face application with a single squeeze.  The brand state that you do not need to wear a primer underneath this and indeed you can feel the silicone in the fomula.  If you like your foundation to feel completely weightless, you may not enjoy the feel of this one (though in no way does this feel like a heavy foundation).

It also sets fast, so work quickly!

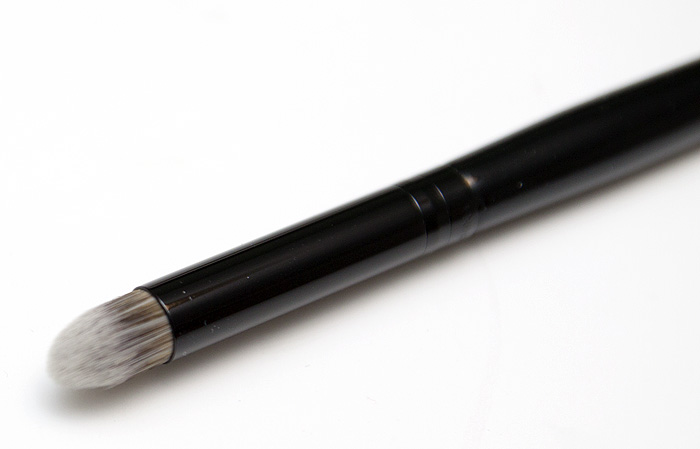
Personally, I ignore the brand’s recommendations on primer and mix it up with a blob of moisturising primer (non-silicone) or Maqpro Make Up Mixer to give me a sheer(er) finish that doesn’t set as quickly.  To combat the additional dewiness this pairing provides, I set the foundation on my t-zone with a touch of powder.  I don’t find that it wears any less well and have been surprised by how well it performs mixing it into all different kinds of bases!  I like to buff it in with a flat-top kabuki… working it in to the skin in light circular motions, both back and forward.

* my hair looks two different colours in the above photo – the sun had come out from behind the clouds in time for the 2nd shot!

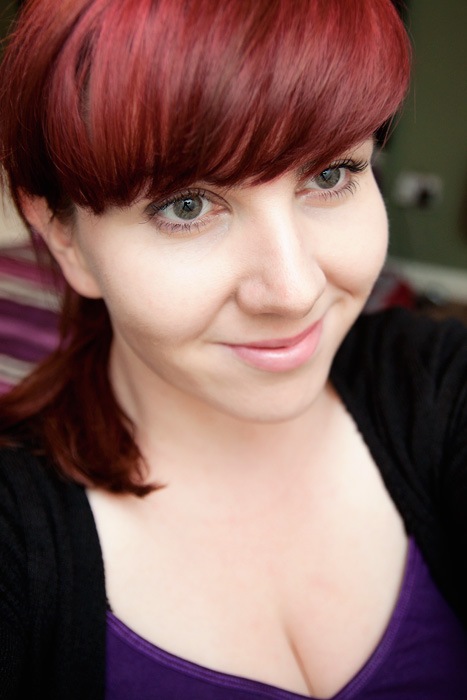
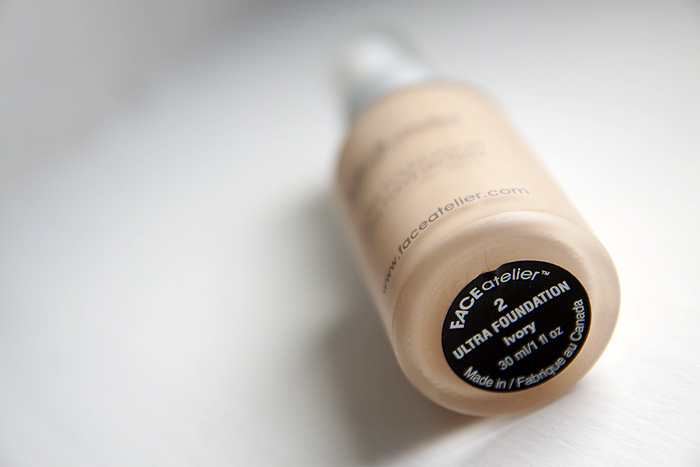
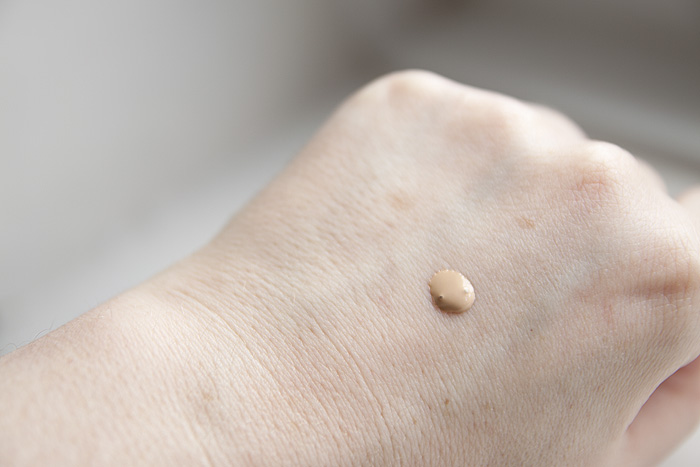
The shade #2 Ivory is spot on for me, a little too yellow technically, but I like this because it tones down my redness more effectively.  If you’re just slightly darker or lighter than the official range, you can also purchase their 0-/0+ to lighten and darken any of their shades.

Overall, on good skin days (or if you’ve got skin prep down to a fine art), this is show-stealing foundation.  It’s pricey, but what price beautiful skin fakery?

Face Atelier Ultra Foundation is priced at £32 and available to buy online from Cult Beauty

RANDOM

Swatch Sunday: Kure Bazaar launch their eco-natural polish range in Selfridges

I promised you a full review of the Face Atelier foundation after last week’s FOTD and my recent re-discovering of it.  Face Atelier Liquid Foundation …

A little TKMaxx splurge on random goodies!

I promised you a full review of the Face Atelier foundation after last week’s FOTD and my recent re-discovering of it.  Face Atelier Liquid Foundation …

Clarins Colour Accents Face and Blush Powder

I promised you a full review of the Face Atelier foundation after last week’s FOTD and my recent re-discovering of it.  Face Atelier Liquid Foundation …

DIY: Recycle your old candle holders!

I promised you a full review of the Face Atelier foundation after last week’s FOTD and my recent re-discovering of it.  Face Atelier Liquid Foundation …

A pyjama day of snots, coughs, fun and sniffles!

I promised you a full review of the Face Atelier foundation after last week’s FOTD and my recent re-discovering of it.  Face Atelier Liquid Foundation …

Courgette Chocolate Brownies anyone?

I promised you a full review of the Face Atelier foundation after last week’s FOTD and my recent re-discovering of it.  Face Atelier Liquid Foundation …

Jemma Kidd Make Up School Launching on QVC Today!

I promised you a full review of the Face Atelier foundation after last week’s FOTD and my recent re-discovering of it.  Face Atelier Liquid Foundation …

Rachel Weisz - L'Oreal's new global ambassador

I promised you a full review of the Face Atelier foundation after last week’s FOTD and my recent re-discovering of it.  Face Atelier Liquid Foundation …

Dior Smoky Crystal Palette Holiday 2009

I promised you a full review of the Face Atelier foundation after last week’s FOTD and my recent re-discovering of it.  Face Atelier Liquid Foundation …

Benefit Bad Gal Mascara - Review

I promised you a full review of the Face Atelier foundation after last week’s FOTD and my recent re-discovering of it.  Face Atelier Liquid Foundation …

POPULAR

CLOSED: Competition Time: Givenchy Very Irresistible L'eau en Rose Perfume!

I promised you a full review of the Face Atelier foundation after last week’s FOTD and my recent re-discovering of it.  Face Atelier Liquid Foundation …

CLOSED - Win it! The Body Shop Expert Brush Collection

I promised you a full review of the Face Atelier foundation after last week’s FOTD and my recent re-discovering of it.  Face Atelier Liquid Foundation …

Win a gorgeous "glow" trio with prizes from Urban Decay, New CID, & Arbonne!

I promised you a full review of the Face Atelier foundation after last week’s FOTD and my recent re-discovering of it.  Face Atelier Liquid Foundation …

Hello? Is this thing on?

I promised you a full review of the Face Atelier foundation after last week’s FOTD and my recent re-discovering of it.  Face Atelier Liquid Foundation …

Avoid the brush off with Oral-B Pro-Expert

I promised you a full review of the Face Atelier foundation after last week’s FOTD and my recent re-discovering of it.  Face Atelier Liquid Foundation …

Big savings on French Pharmacy brands, win my Escentual.com top picks!

I promised you a full review of the Face Atelier foundation after last week’s FOTD and my recent re-discovering of it.  Face Atelier Liquid Foundation …

Win it! 3 EcoTools Bamboo Bronzer Brushes to win!

I promised you a full review of the Face Atelier foundation after last week’s FOTD and my recent re-discovering of it.  Face Atelier Liquid Foundation …

FOTD Busting out of the comfort zone!

I promised you a full review of the Face Atelier foundation after last week’s FOTD and my recent re-discovering of it.  Face Atelier Liquid Foundation …

Dear Obesity...

I promised you a full review of the Face Atelier foundation after last week’s FOTD and my recent re-discovering of it.  Face Atelier Liquid Foundation …

Urban Decay The Black Palette - Photos & Swatches

I promised you a full review of the Face Atelier foundation after last week’s FOTD and my recent re-discovering of it.  Face Atelier Liquid Foundation …

COMMENTS

  • Categories

  • Archives

  • Admin

  • Ads